

<head> tags. Then add a hidden form field to your checkout page so each order carries the visitor’s Cometly fingerprint (the value Cometly uses to recognize that visitor).
This matters because Cometly can only connect an order to an ad when it has seen the visit that led to it. With the pixel on every page and the fingerprint on every order, you can see which ad or channel produced each sale in your funnel.
Before you start
Copy your pixel from Cometly: click Setup in the left sidebar, open step 2, Install the Cometly pixel, and under Install the pixel click Copy Code.Add the pixel to your funnel
1
Open the funnel settings
Log in to your Funnelish account, open your funnel and click the settings (gear) icon.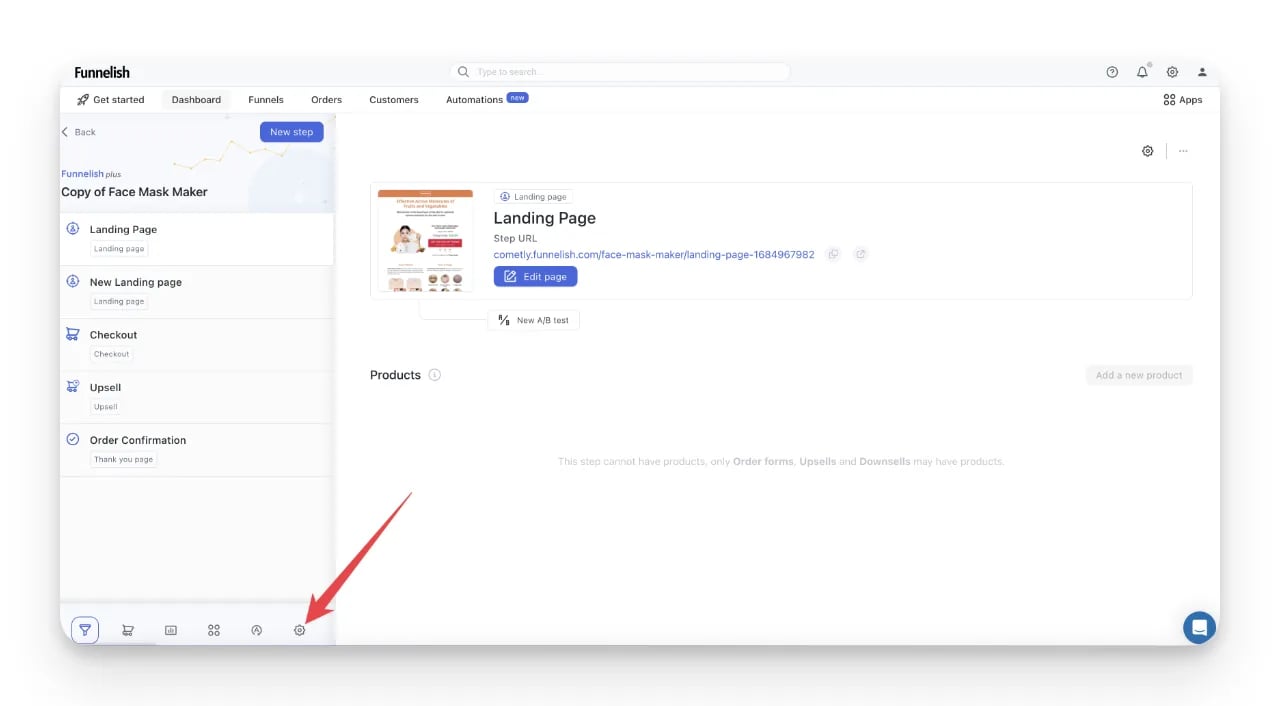
2
Open Custom codes
Click Custom codes.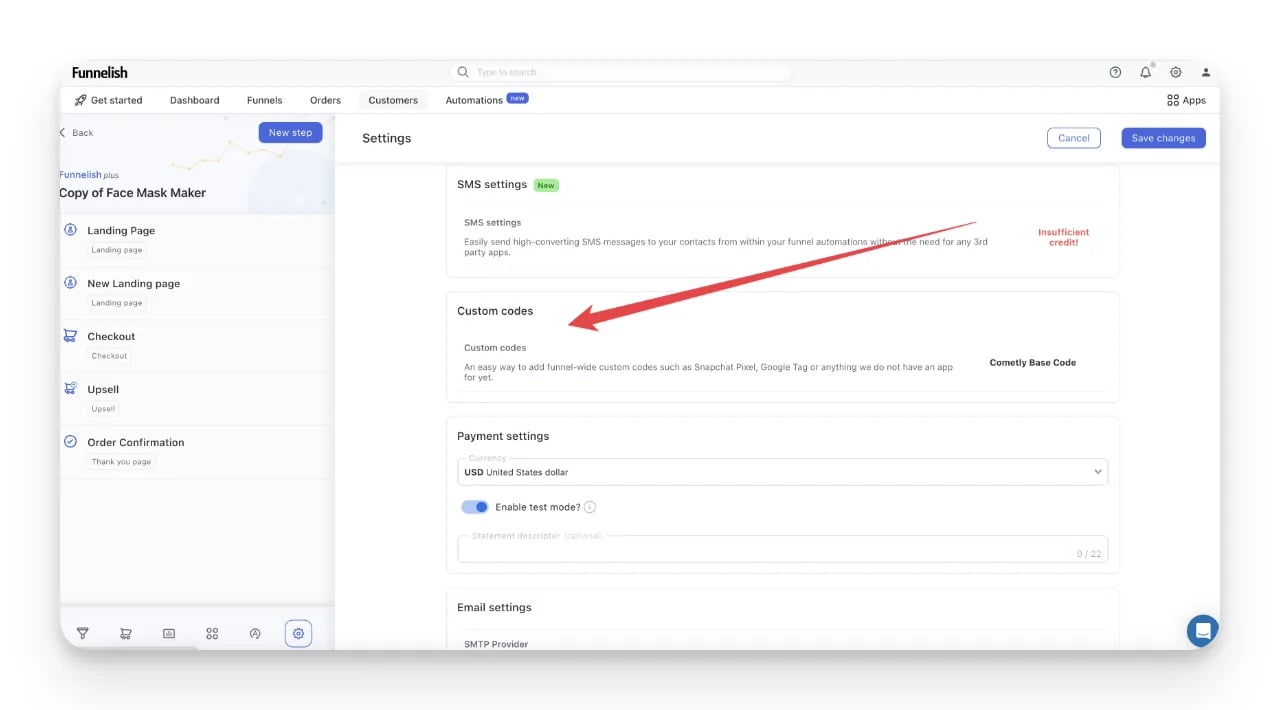
3
Create a new code
Click Create a new code.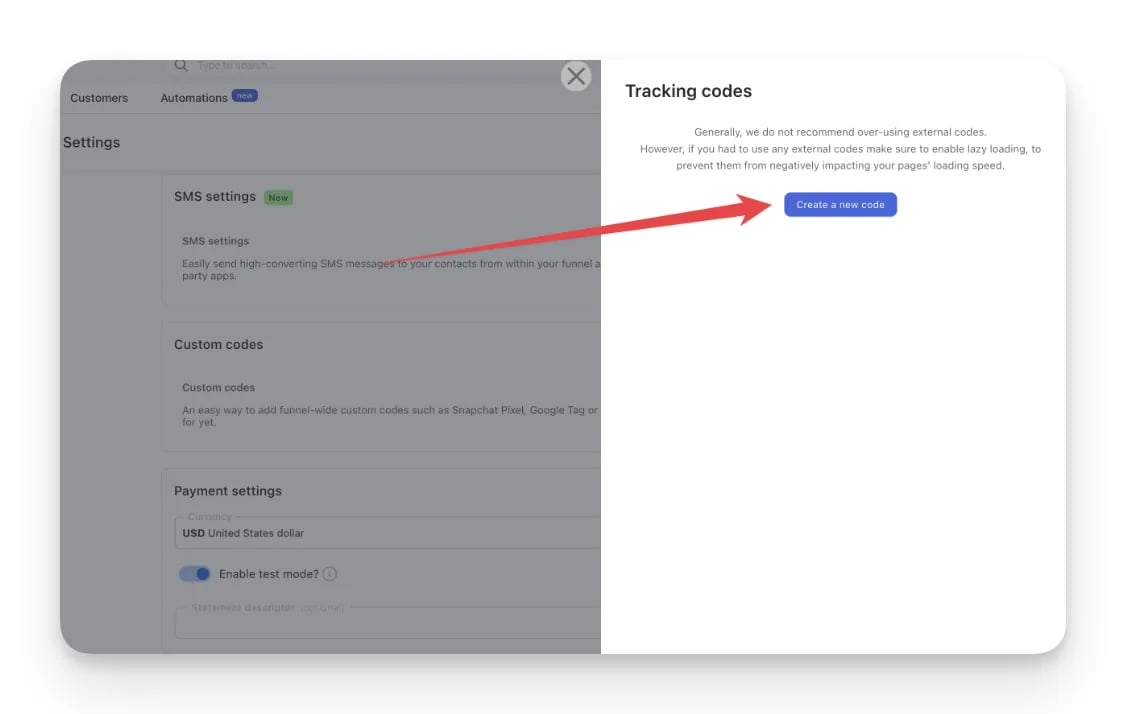
4
Paste the pixel and save
Paste your Cometly pixel in the code section. Turn Lazy load off and select Append to page head for the code placement. Then click Create code.
Add the fingerprint field to your checkout page
1
Add a form element
Go to the checkout page in your funnel and click Edit page. Add a Form element as the last form field. You customize it in the next step.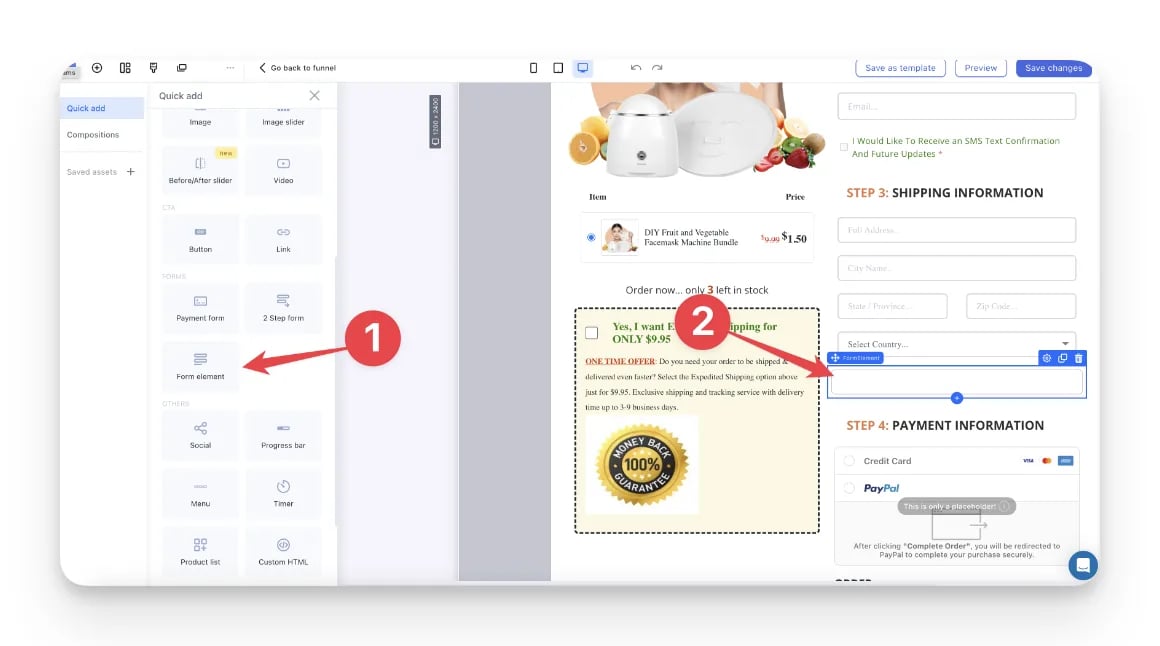
2
Configure the form element
Click the new form element. Remove any margin, turn Is required? off, turn Show label? off and choose Custom as the Data type. Set the Data name to exactly 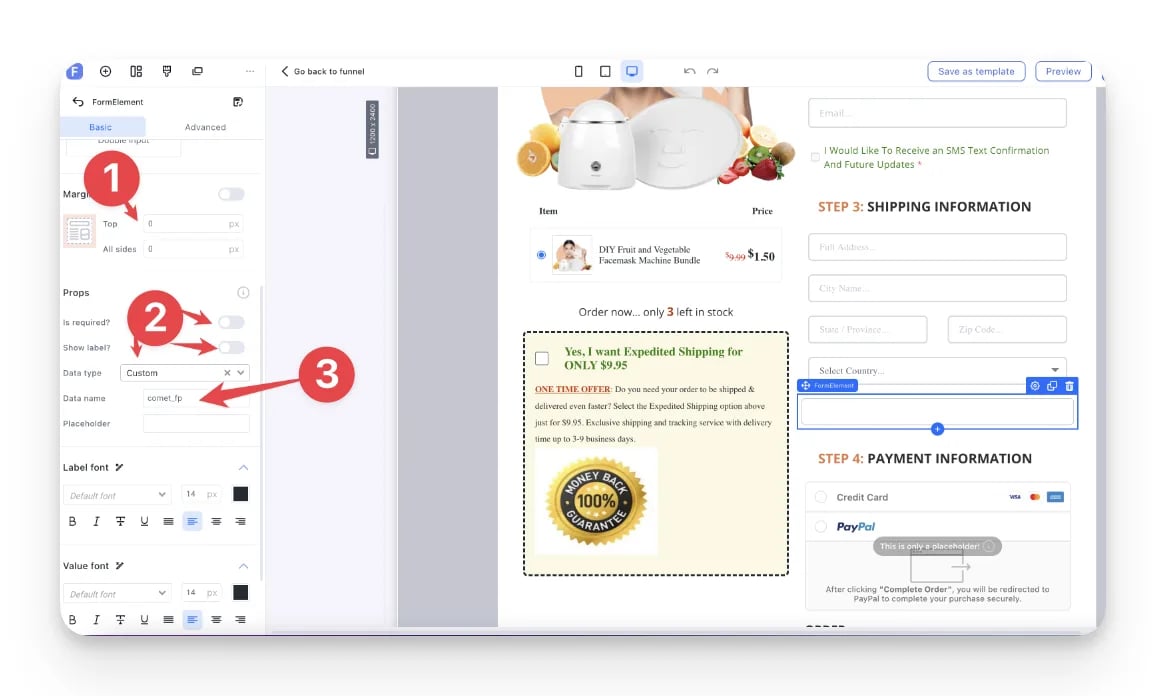
comet_fp.comet_fp form element in place, the field is not visible on the published page. It passes the fingerprint to Cometly with every order, which makes tracking more accurate.
To send your Funnelish orders to Cometly, also set up the Funnelish integration.
Check it worked
In Cometly, click Setup in the left sidebar and open step 2, Install the Cometly pixel. Make sure your funnel’s domain is listed under Add domains, then under Verify your pixel click Verify next to it. The domain shows Pixel detected when the pixel is installed correctly. See Install and verify the Cometly pixel for the full verification steps.Frequently asked questions
Does the Cometly pixel track Funnelish purchases on its own?
No. The pixel records the visits to your funnel pages, and the purchases are sent by the Funnelish integration, which you set up separately. You need both for a sale to be tied to the ad that produced it.What is the comet_fp field for on my Funnelish checkout page?
Thecomet_fp field sends the visitor’s Cometly fingerprint with each order. Cometly uses it to connect the purchase to the visitor’s earlier ad clicks. The field is not visible on the published page, so your customers do not see it.
How do I test the Cometly pixel on a Funnelish page?
Use the Cometly Pixel Helper, a Chrome browser extension. It checks for errors in your pixel installation and shows the Cometly events that load on the page. See Cometly Pixel Helper for how to install it.Next steps
- Set up the Funnelish integration to send purchases to Cometly
- Verify the Cometly pixel on your domains
- Test your pixel with the Cometly Pixel Helper
- Set up cross-domain tracking
- Check your tracking in Tracking Health