

This solution works for ClickFunnels only, not ClickFunnels Classic.
Before you start
- The Cometly pixel is installed on your funnel. See the ClickFunnels pixel installation guide.
- ClickFunnels already sends a Purchase event to Cometly, through the ClickFunnels integration or a webhook.
Step 1: Add a custom input field
-
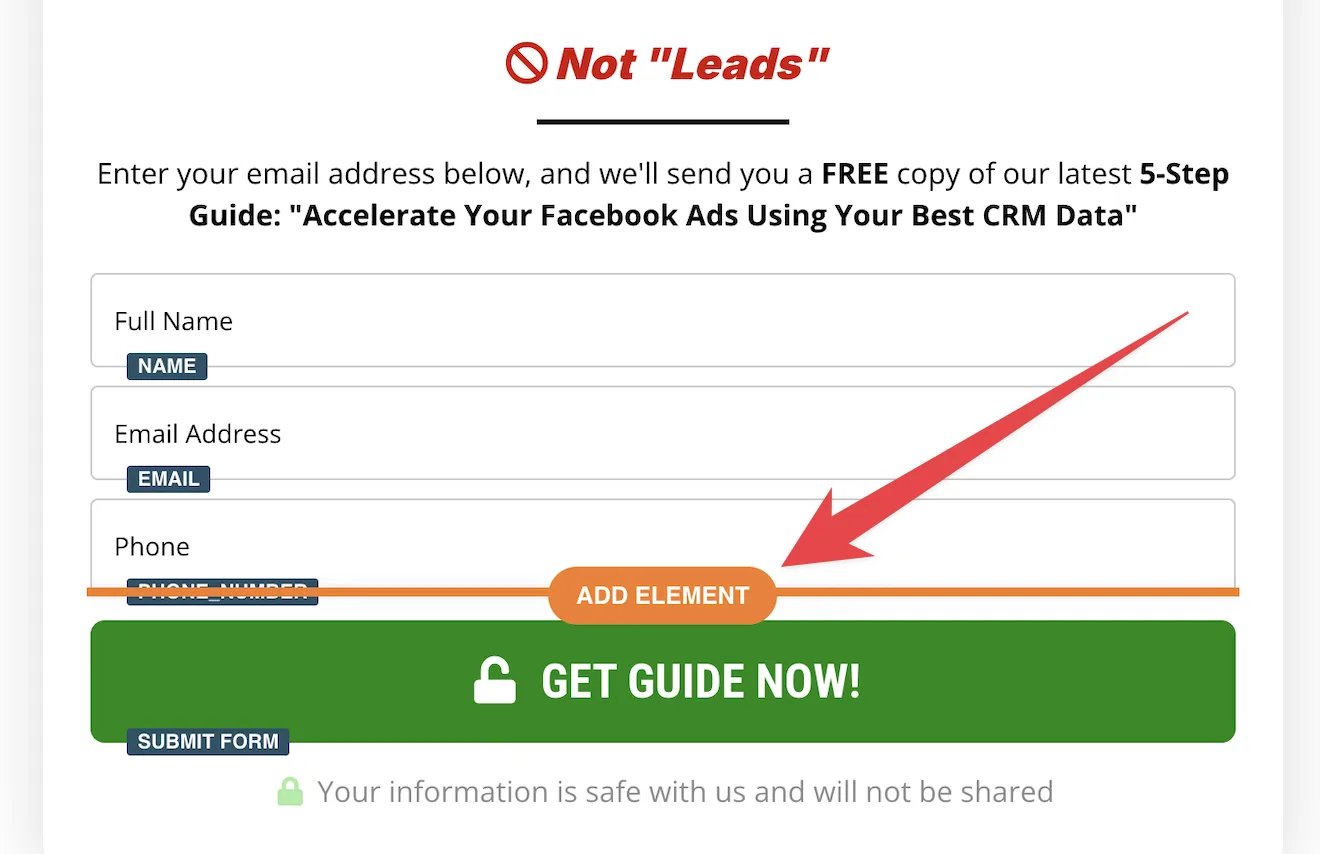
In the ClickFunnels editor, hover your mouse under the last form field and click Add Element.
-
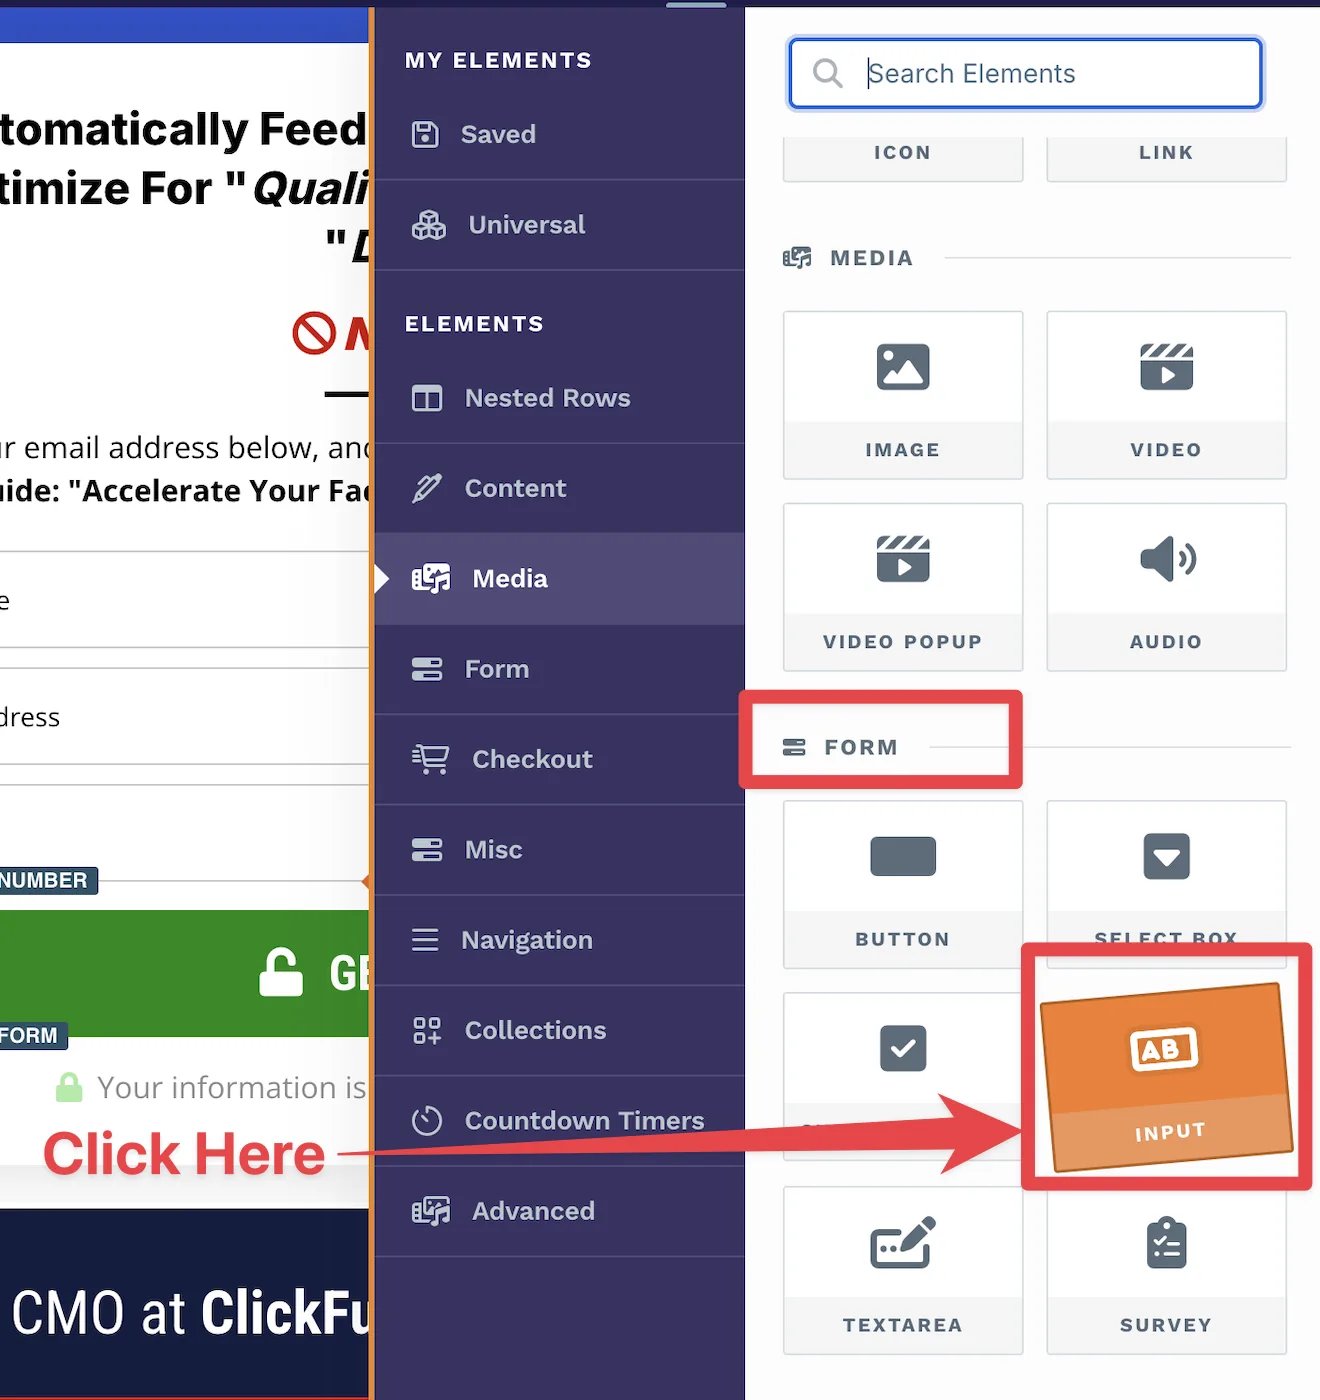
In the Form section, click Input.
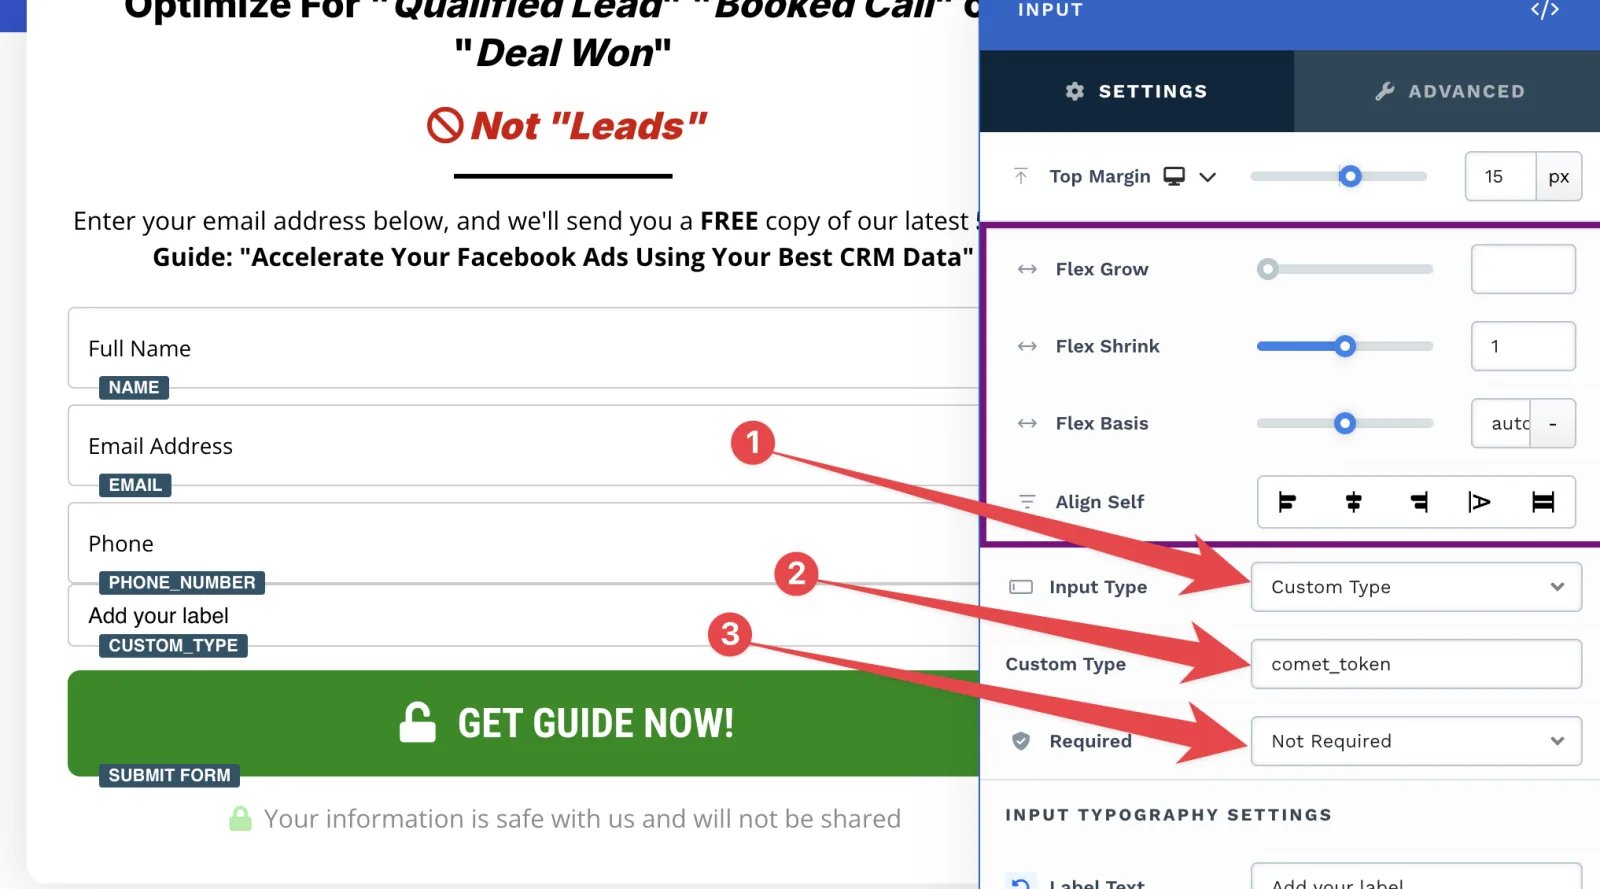
- Set Input Type to Custom Type.
-
Enter
comet_tokeninto the Custom Type field. Spell it exactly like this: all lowercase, with an underscore. -
Set Required to Not Required. This prevents submission issues if the pixel is blocked.
Step 2: Add a custom attribute
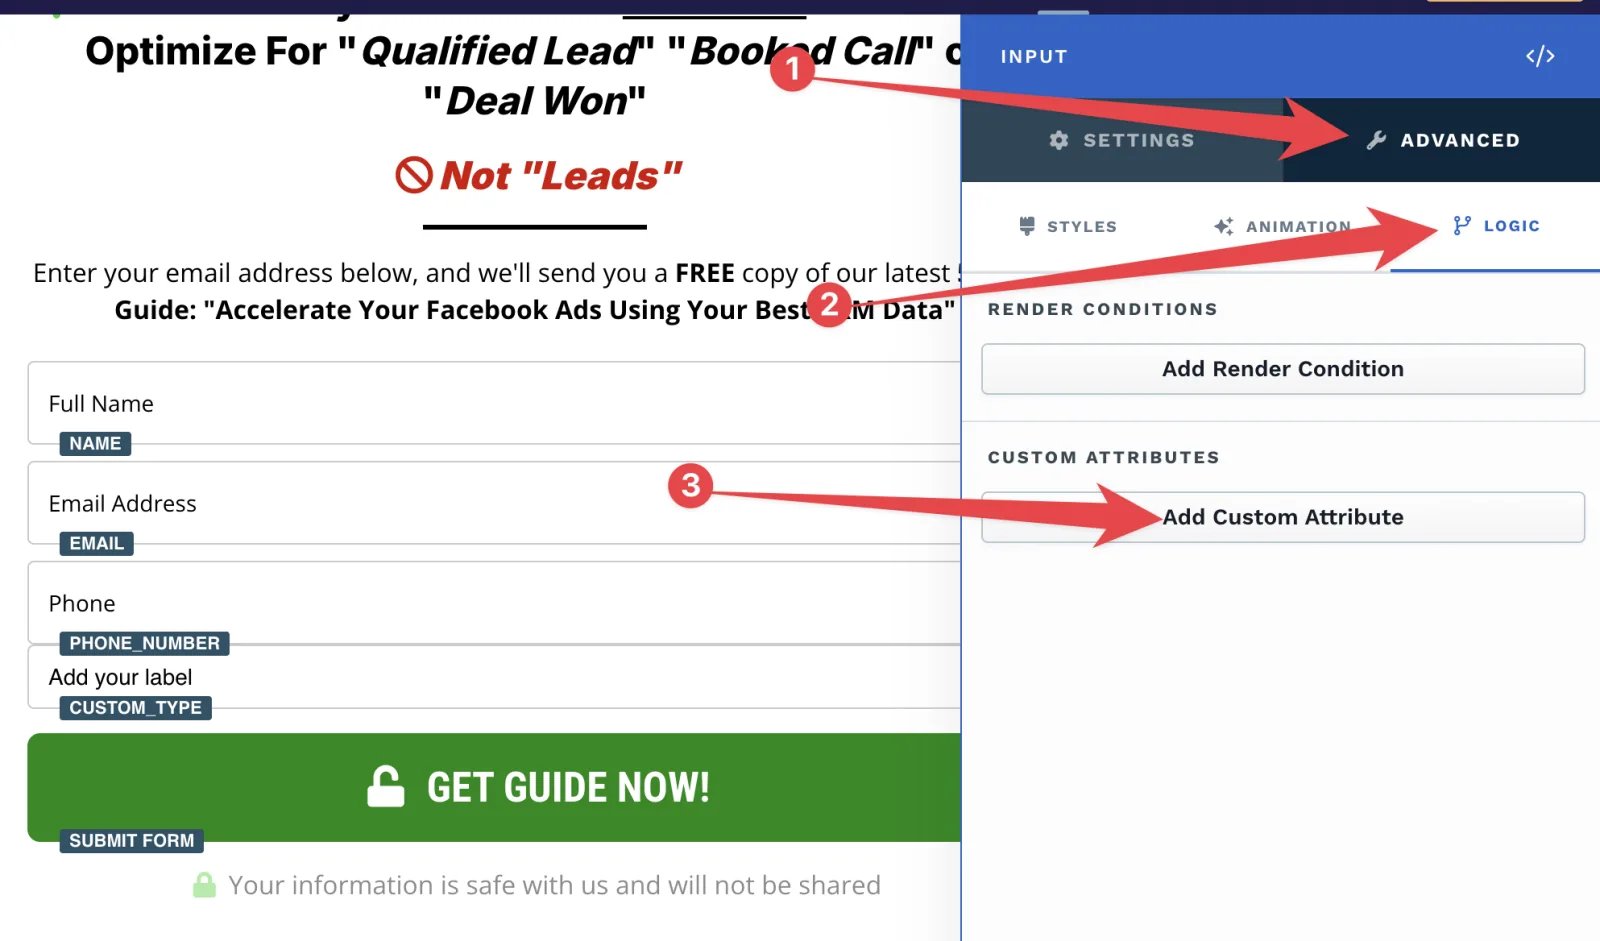
- Select the comet_token input field.
-
Go to Advanced → Logic → Custom Attributes.
-
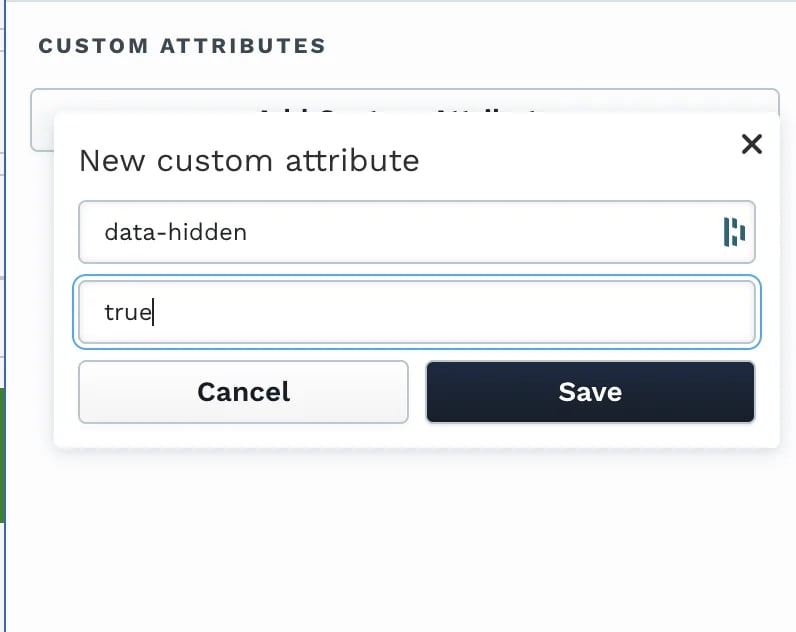
Click Add Custom Attribute, enter the following and click Save:
- Name:
data-hidden - Value:
true
- Name:
Step 3: Add the custom script
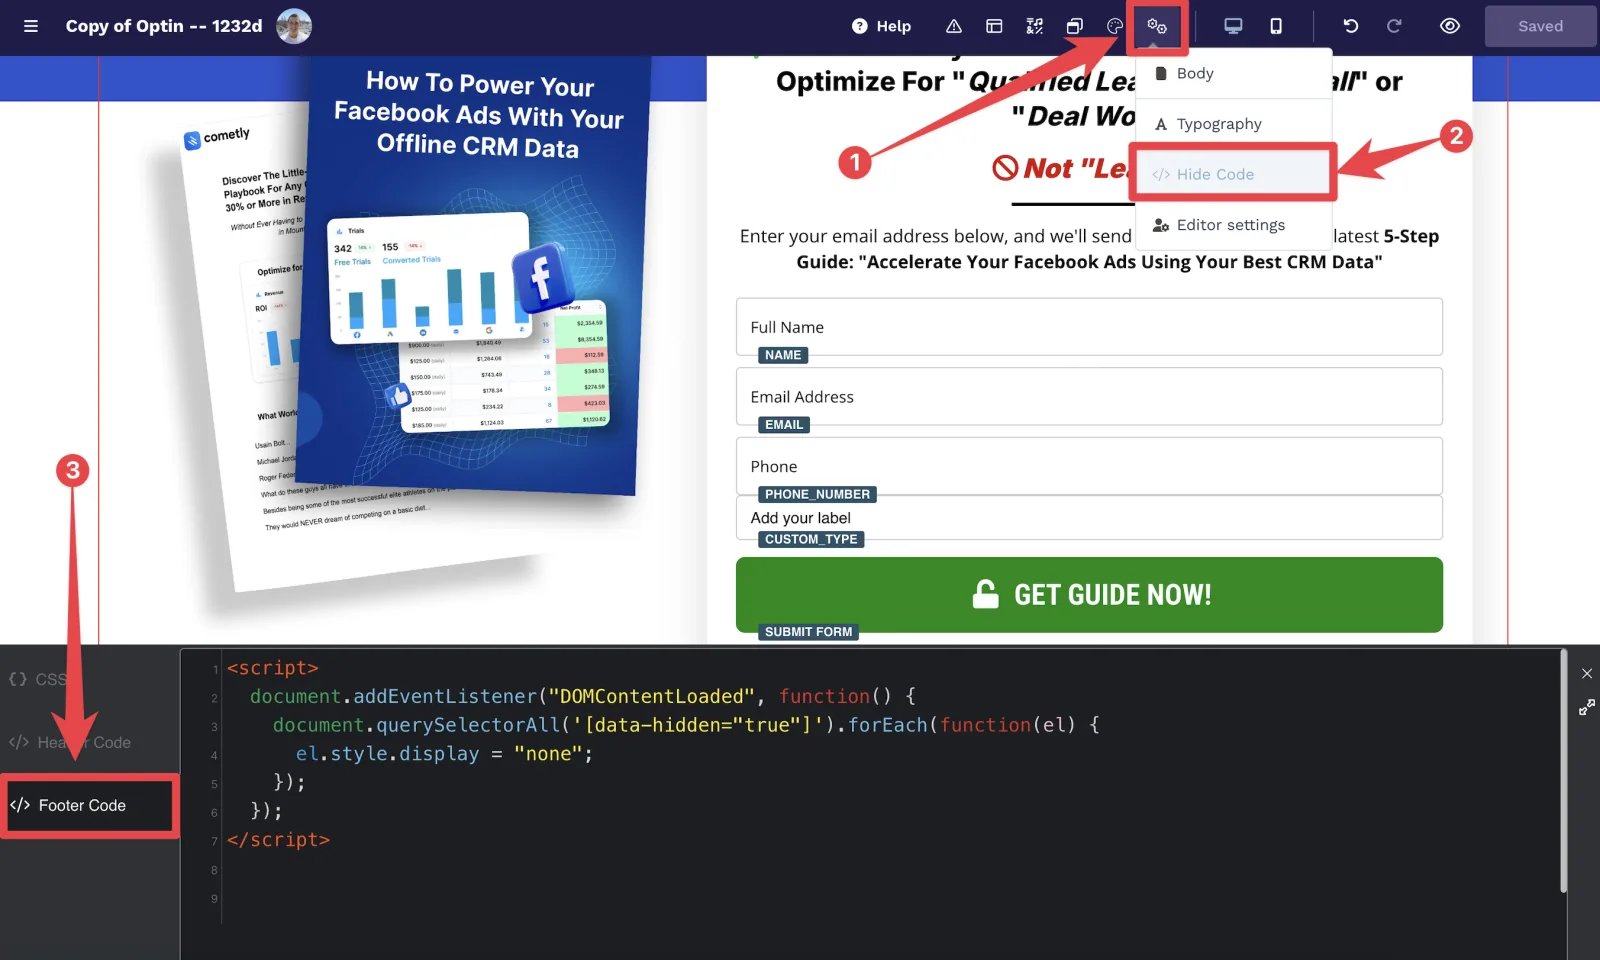
Next, add a script to your funnel page that hides the comet_token field:- Open the page editor.
-
Go to Settings → Custom Code → Footer Code.
-
Paste in this script:
The script hides any field with the
data-hidden="true"attribute, which turns the comet_token field into a hidden field. - Save the page.
Step 4: Map the comet_token to your Purchase event in Cometly
Once this setup is complete, the comet_token is included in the payload when ClickFunnels sends the purchase event. Map it in Cometly:- In Cometly, go to Events Manager.
- Find your ClickFunnels Purchase event and click Edit (or Configure if the event is still a draft).
- Open the Configure Mapping step and click Add Field.
- Under Cometly Fields, choose Comet Token. Under Data Fields, select the comet_token field from the ClickFunnels payload.
- Click Save & Continue and finish the remaining step.
Check it worked
Complete a test purchase on your funnel. In Cometly, the data ClickFunnels sends for your Purchase event now includes the comet_token field with a value, and it is mapped to Comet Token.Why this works
- The comet_token is captured even though Stripe blocks email capture.
- The custom attribute and the script hide the field from the visitor but keep it working.
- Mapping the comet_token in Cometly links every Stripe purchase event back to the visitor’s funnel activity.
- Setting the field to Not Required prevents form errors if the comet_token can’t be generated.
Frequently asked questions
What is the comet_token in Cometly?
The comet_token is a unique identifier created by the Cometly pixel. It links a visitor’s browser session to their attribution data, so an event that arrives with it can be matched to that visitor even without an email address. The Cometly pixel must be installed on the page for it to exist.Why can’t I find the comet_token field when I map my ClickFunnels Purchase event?
Cometly lists the fields from the data ClickFunnels has already sent. Purchases made before you added the field to your form do not contain it. Complete a new purchase on the funnel after you save the page, then map the field from that record.Next steps
- Connect ClickFunnels to Cometly with the direct integration
- Send ClickFunnels events with webhooks
- Install the Cometly pixel on ClickFunnels
- Learn how mapping and filters work in Cometly webhooks
- Understand how events work in Cometly