

Before you start
- The pixel goes in the
<head>section of your site, so you need to be able to edit your theme’s header file or use a header script manager plugin.
Install the Cometly pixel on WordPress
Add the pixel script
- In Cometly, click Setup in the left sidebar and open step 2, Install the Cometly pixel. Under Install the pixel, click Copy Code.
- Paste the pixel in the
<head>section of your WordPress site. You can typically do this with a header script manager plugin or by editing your theme’s header file.
Make sure the pixel works
After adding the pixel:- Clear your cache so the change takes effect.
- Adjust JavaScript settings in plugins. If a plugin defers or lazy-loads JavaScript, turn those options off so they do not interfere with the Cometly pixel.
- Test the pixel installation. Follow Install and verify the Cometly pixel for step-by-step instructions to confirm the pixel is loading properly.
If you pinned your site to a script version (Setup step 2 > Pixel options > Script version > Pinned to a version), paste the tag exactly as Cometly shows it and exclude it from optimization. If an optimizer plugin rewrites the tag, browsers refuse to run it.
Check site performance and caching plugins
WordPress has a wide range of plugins for managing headers, performance and caching. Plugins such as WP Rocket, Autoptimize or similar tools may need adjusting for the Cometly pixel to work correctly.Configure WP Rocket
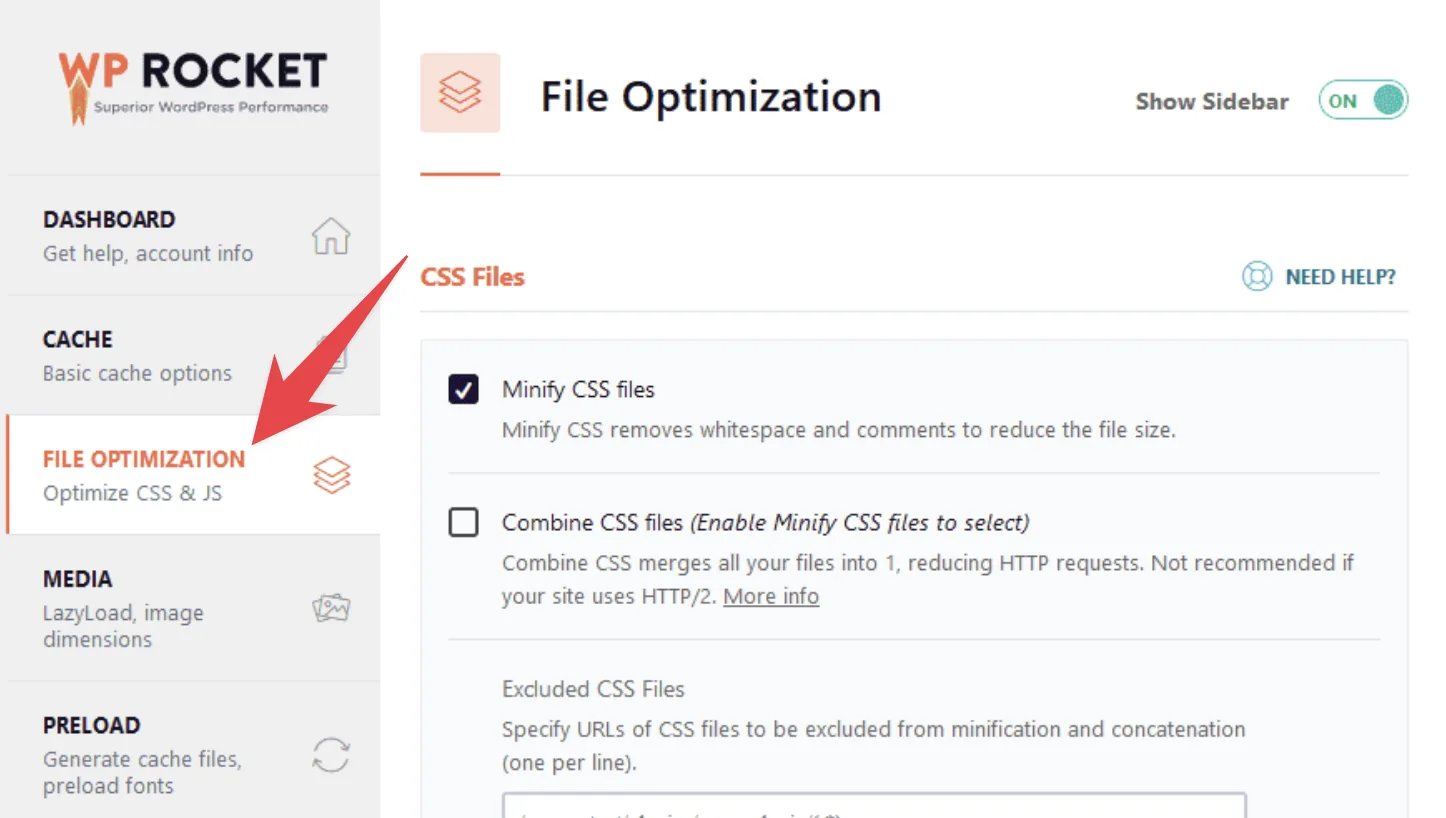
If you use WP Rocket, make sure specific settings are unchecked.- In your WordPress dashboard, go to Settings > WP Rocket.
-
Open the File Optimization tab.
-
Scroll down to the JavaScript Files section and make sure these options are unchecked:
- Combine JavaScript files
- Load JavaScript deferred
- Delay JavaScript execution
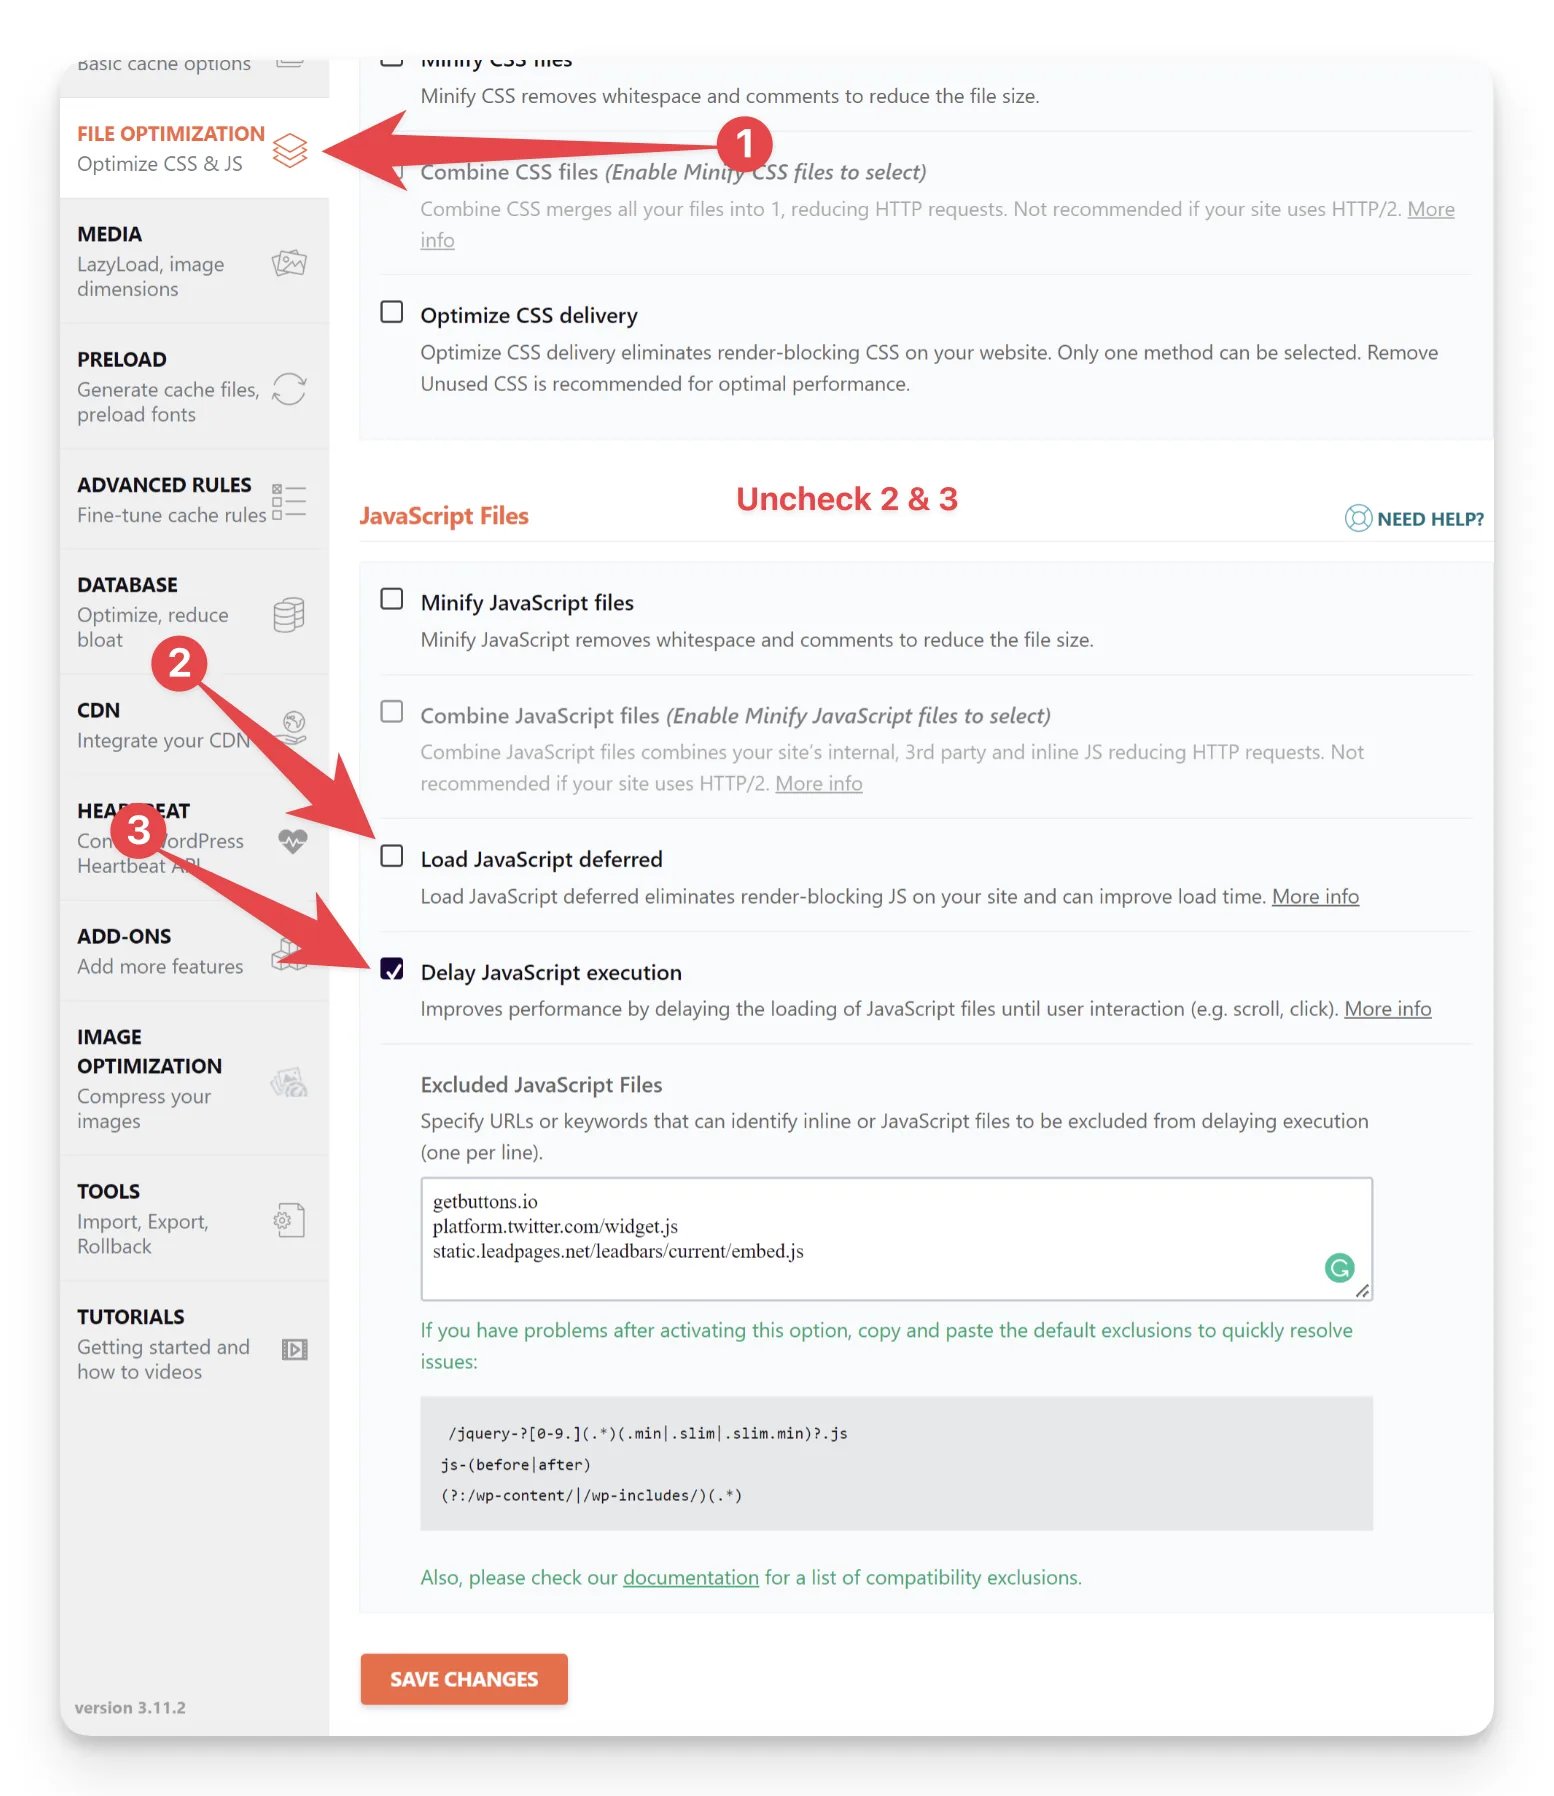
- Click Save Changes, then clear your cache.
Check it worked
In Cometly, open Setup step 2, Install the Cometly pixel. Under Verify your pixel, click Verify next to your WordPress domain: it should show Pixel detected. If it shows Pixel not detected, clear your cache, check the plugin settings above, then click Retry.Frequently asked questions
Why is the Cometly pixel not detected on my WordPress site?
The usual causes are a cached copy of the page that does not include the pixel yet, or a plugin that defers, delays or lazy-loads JavaScript. Clear your cache, turn those JavaScript options off, and make sure the script in your site’s<head> matches the one Cometly shows under Install the pixel.
Can I add the Cometly pixel to WordPress with Google Tag Manager?
Yes, the pixel works when it is installed through Google Tag Manager, but you may lose attribution data because of loading delays and privacy blockers. Installing it directly in the<head> section is recommended. Do not do both, because the pixel then loads twice and causes tracking issues.
Do I need to update the pixel on WordPress after changing settings in Cometly?
Yes, in some cases. The script changes when you add or remove domains, or change a setting under Pixel options. If Cometly tells you your tracking script has changed, copy it again and replace the old one on your site, then clear your cache.Next steps
- Install and verify the Cometly pixel
- Check your pages with the Cometly Pixel Helper
- Fix delayed JavaScript execution or lazy loading
- Set up the WooCommerce integration
- Install the pixel with Google Tag Manager