

Before you start
- Place the pixel on every website or domain you want to track: your main domain (for example
cometly.com) and any subdomains (go.cometly.com,blog.cometly.com,academy.cometly.comand so on). - The pixel must be placed in the
<head>section of every website that you want to track.
Copy your Cometly pixel
In Cometly, click Setup in the left sidebar and open step 2, Install the Cometly pixel.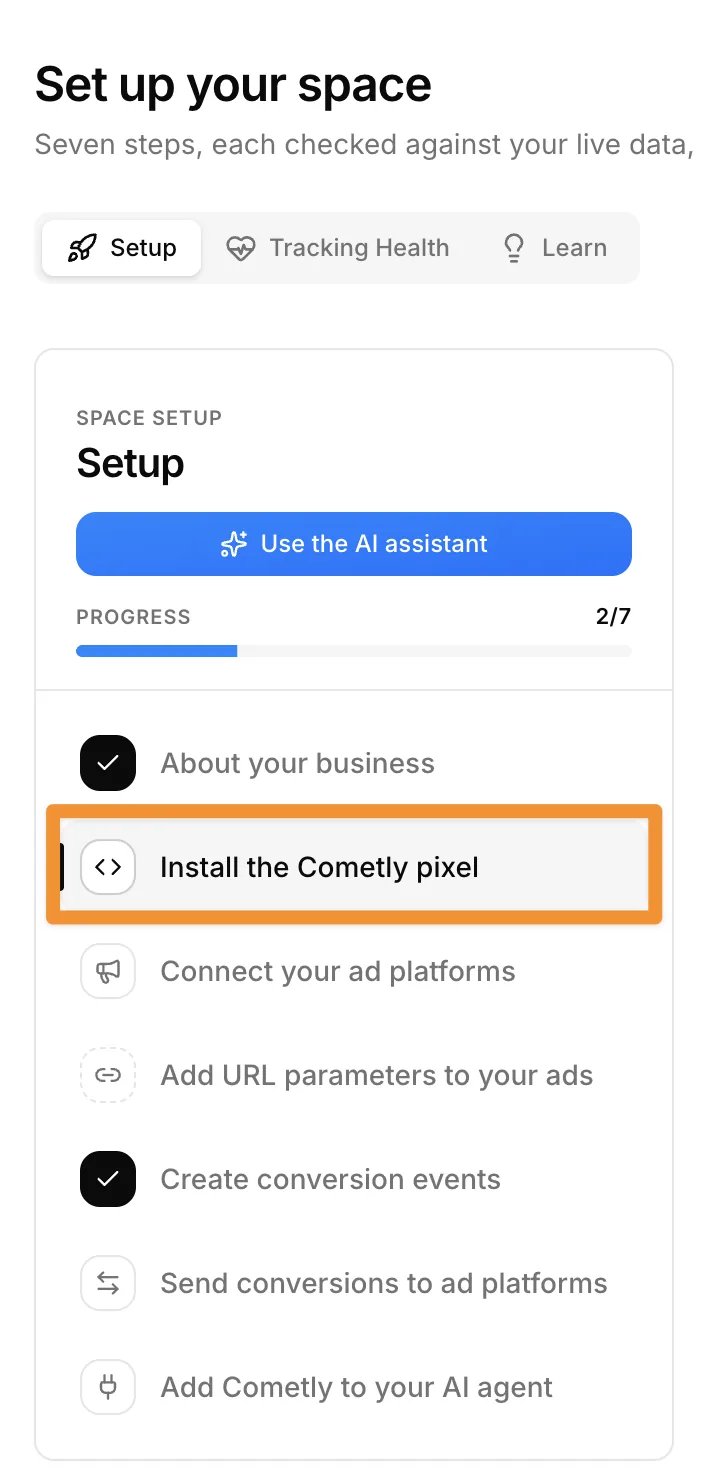
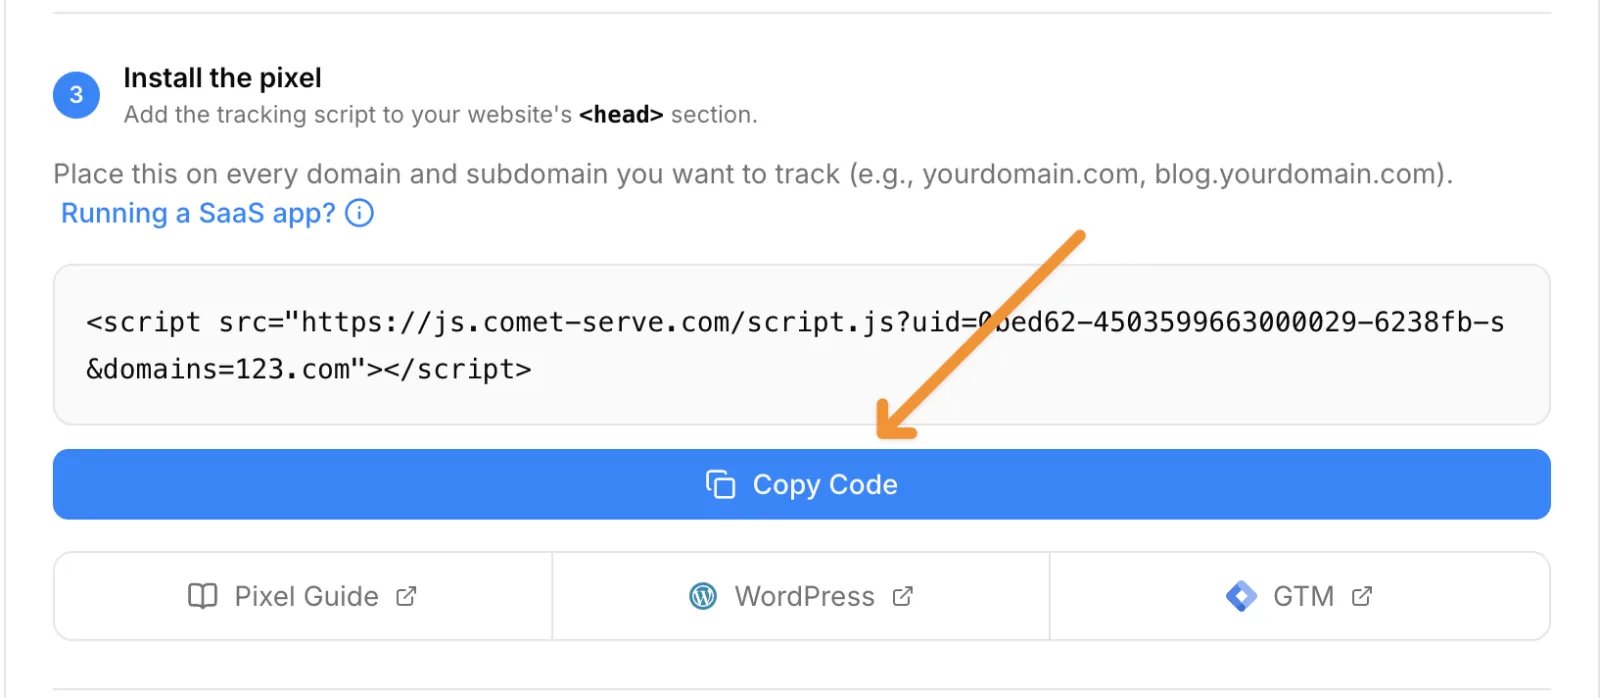
<head> section of your website.
Install the Cometly pixel in Webflow
1
Open the site settings
Log in to your Webflow account and go to the Dashboard. Click the gear icon (Site settings) on the site where you want to add the Cometly pixel.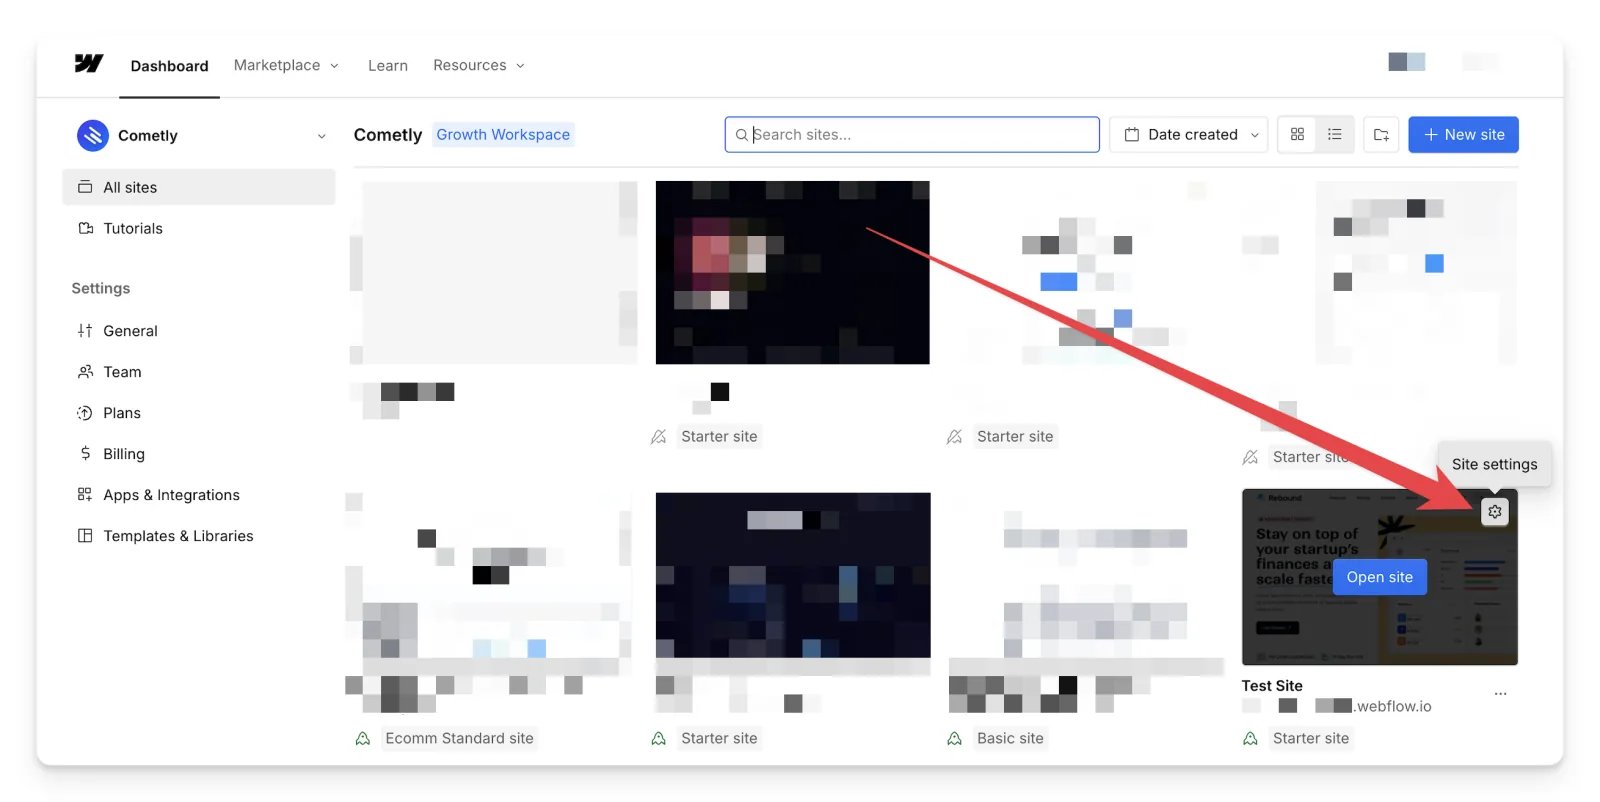
2
Add the pixel as custom code
In the site settings, select the Custom code tab.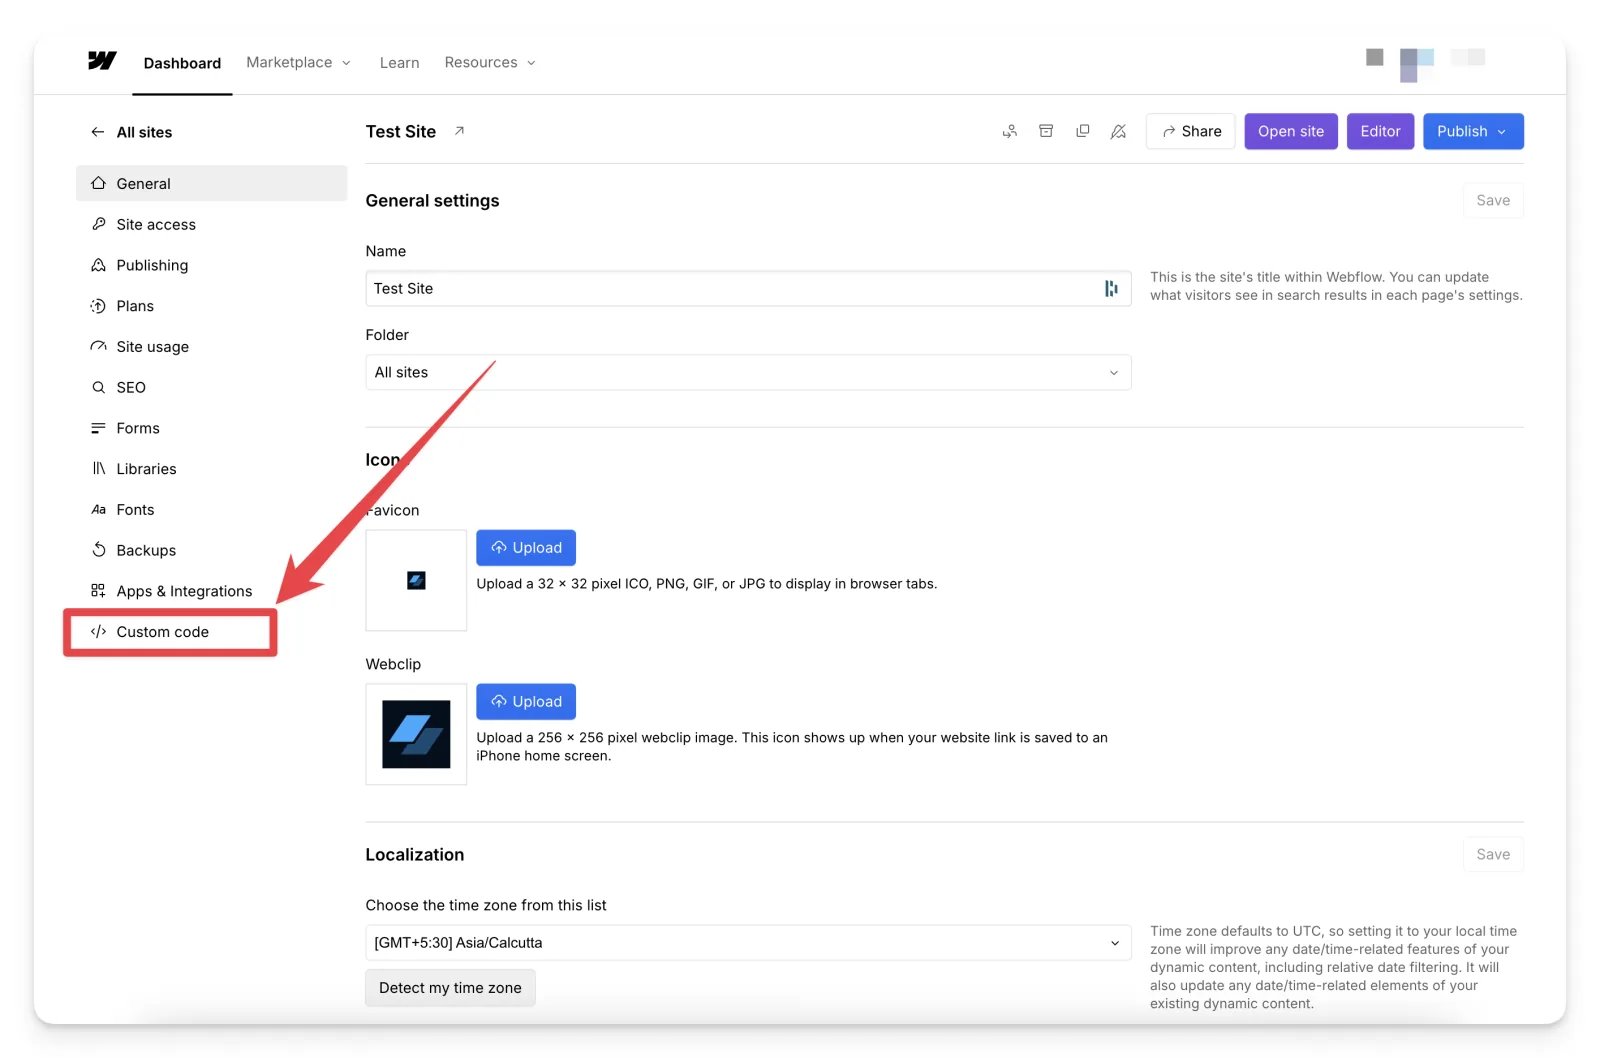
3
Save and publish
Click Save to apply the changes, then publish your site. Custom code only goes live when the site is published.
Check it worked
The Cometly pixel now tracks visitor activity on your published Webflow site. To confirm it, go back to step 2 of Setup in Cometly and click Verify next to your domain under Verify your pixel: the domain shows Pixel detected. For the full verification steps, see Install and verify the Cometly pixel. To send Webflow form submissions to Cometly as events (the actions Cometly tracks, such as a lead), see the Webflow integration.Cross-domain tracking (required for SaaS companies)
If your users move between your main domain and subdomains (for example fromcometly.com to app.cometly.com), you need to configure cross-domain tracking to keep user data accurate.
Example: If traffic flows from cometly.com to app.cometly.com, cross-domain tracking ensures users are tracked properly across both domains.
To set it up, see cross-domain tracking.
Frequently asked questions
Why is the Cometly pixel not detected on my Webflow site?
The most common cause is that the site was saved but not published: Webflow custom code only goes live when the site is published. Also check that the code in Head code matches the script Cometly shows under Install the pixel. The script changes when you add or remove domains or change a setting under Pixel options, so copy it again if Cometly tells you it has changed.Can I install the Cometly pixel on Webflow through Google Tag Manager?
Yes, the pixel works when it is installed through Google Tag Manager, but you may lose attribution data because of loading delays and privacy blockers. Pasting it into Webflow’s Head code is the recommended setup. Do not do both, because the pixel then loads twice and causes tracking issues. See Google Tag Manager pixel installation.How do I check that the Cometly pixel captures my Webflow forms?
Use Test form tracking, the last part of the same Setup step where you copied the pixel. It opens a page of your site in a pop-up window and tells you whether Cometly can see the forms on it and their email field. See Test form tracking.Next steps
- Verify the Cometly pixel on your domain
- Send Webflow form submissions to Cometly as events
- Test form tracking on your pages
- Set up cross-domain tracking
- Check your installation with the Cometly Pixel Helper