

Send event data from specific Zoho Forms
Before you start, set up form tracking for your Zoho form. Follow the Zoho Forms form tracking guide and complete its steps first. The
fingerprint and comet_token fields used below are created there.Configure sending of server events from a Zoho form to Cometly
In this step you copy the Zoho Forms webhook URL from Cometly and add it to your form settings in Zoho. Zoho then sends each form opt-in to Cometly as the event of your choice.1
Open the Zoho Forms integration in Cometly
Log in to Cometly and open the Zoho Forms integration page: app.cometly.com/space/settings/integrations/zohoforms. Zoho Forms is not listed on the Integrations page or in the Create Event dialog, so use this link.
2
Activate Zoho Forms
Click Activate Zoho Forms.
3
Copy the webhook URL
Under Copy the webhook URL, click Copy.
4
Open your form settings in Zoho Forms
Log in to your Zoho Forms account, find the form you want to track and click Settings for that form.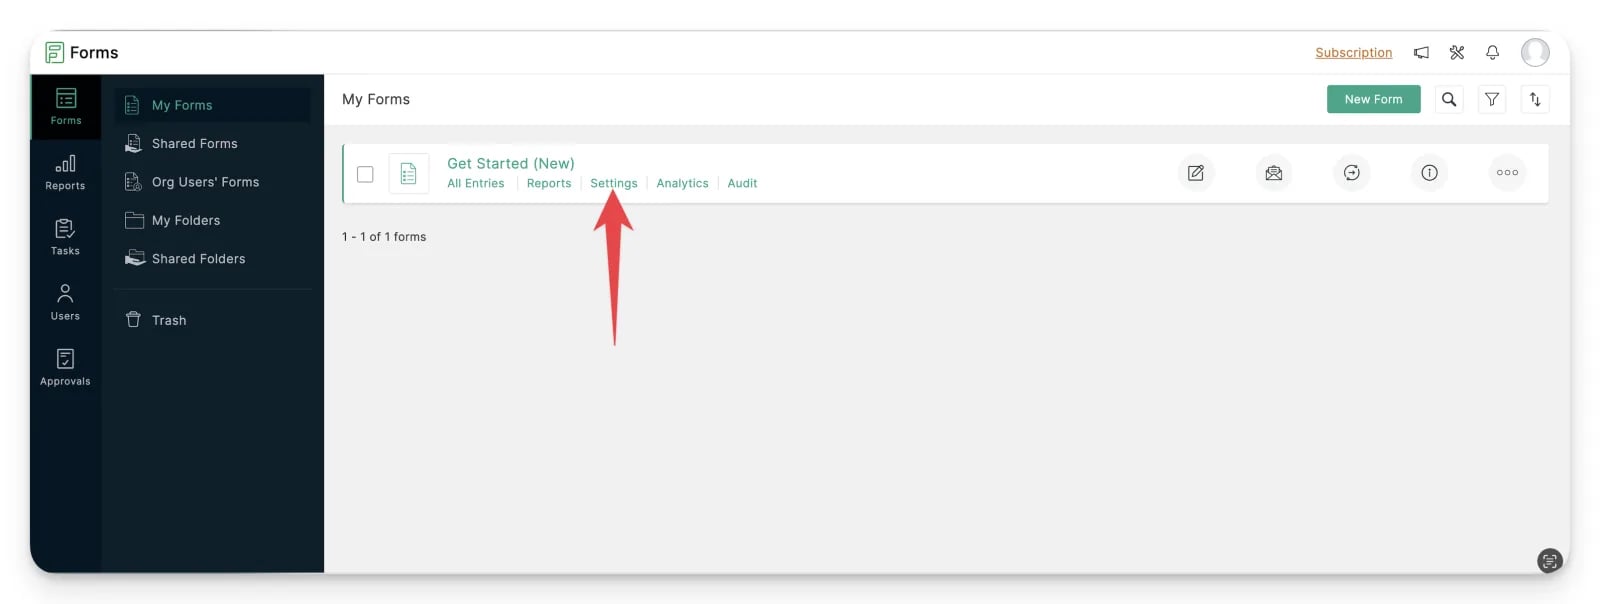
5
Open the webhook settings
Click Integrations, then click Webhooks.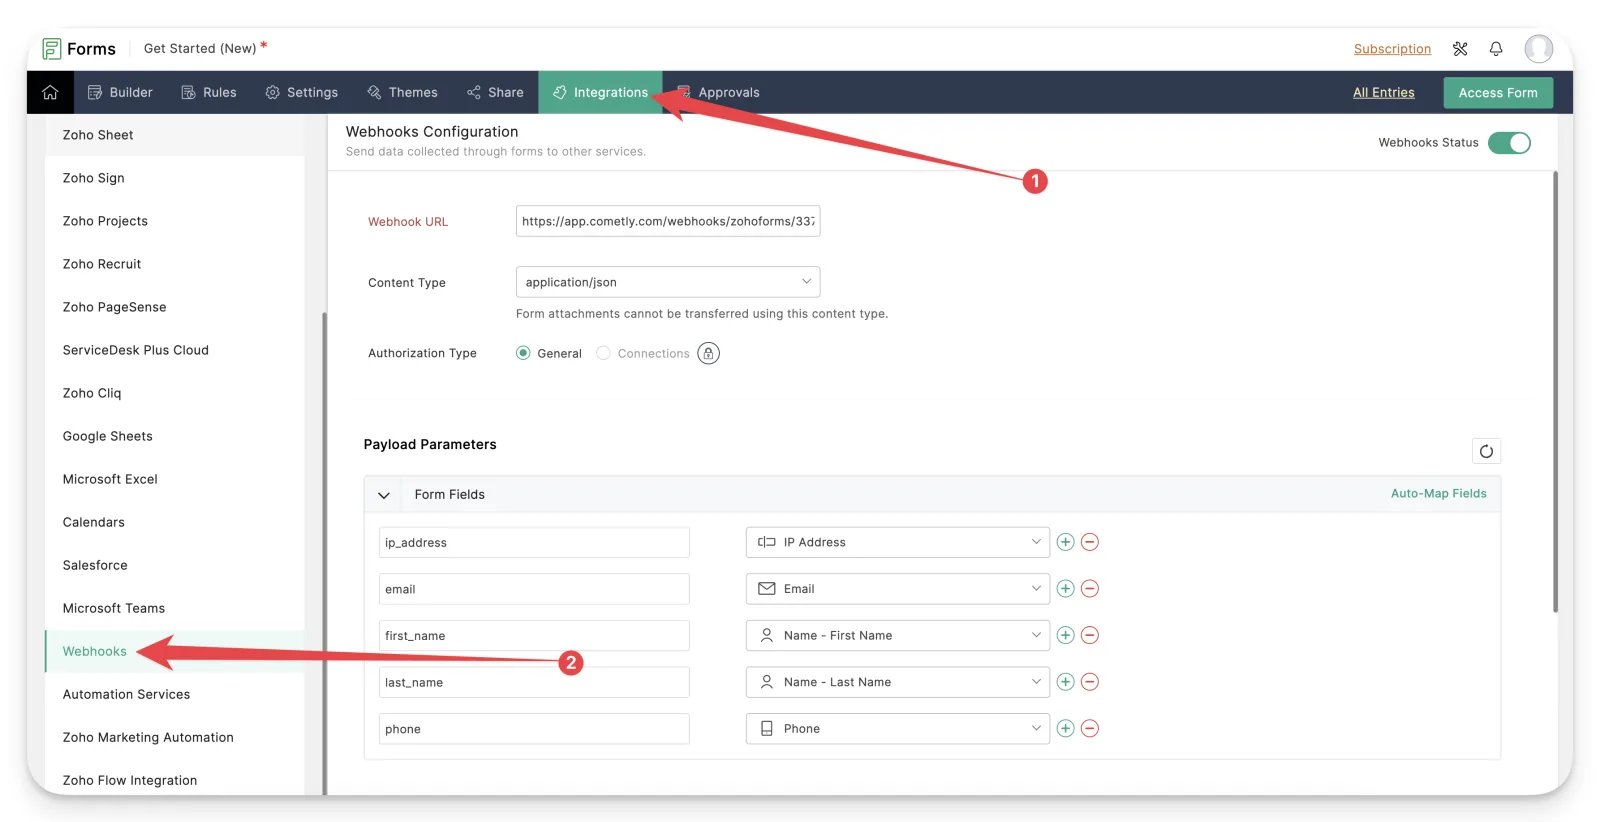
6
Configure the webhook
Set up the webhook as follows: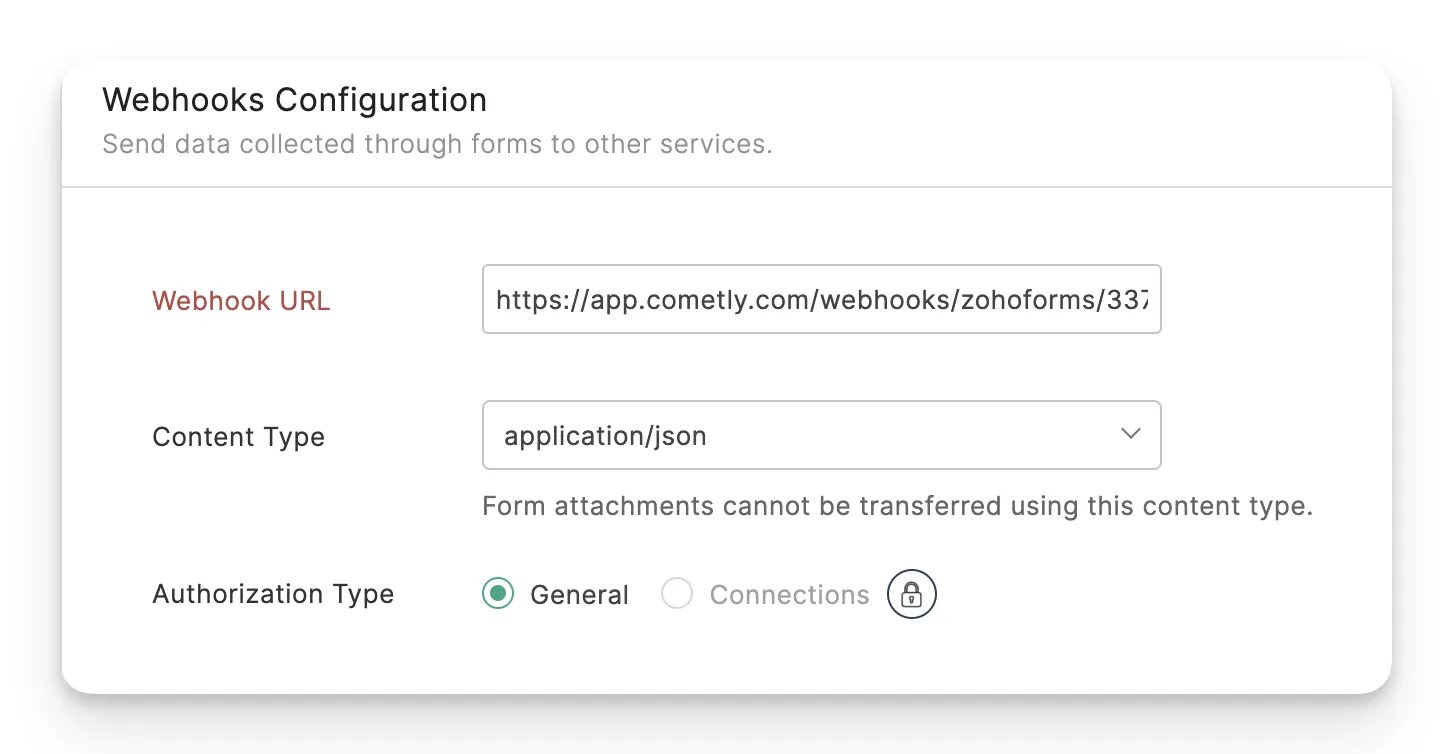
- Webhooks Status: enable it
- Webhook URL: paste the Cometly Zoho Forms webhook URL
- Content Type: select
application/json - Authorization Type: select General
7
Add the payload parameters
Under Payload Parameters, enter the names in the left column exactly as they appear in the table below. The names are case sensitive.
8
Add the URL parameter
Under URL Parameters, enter 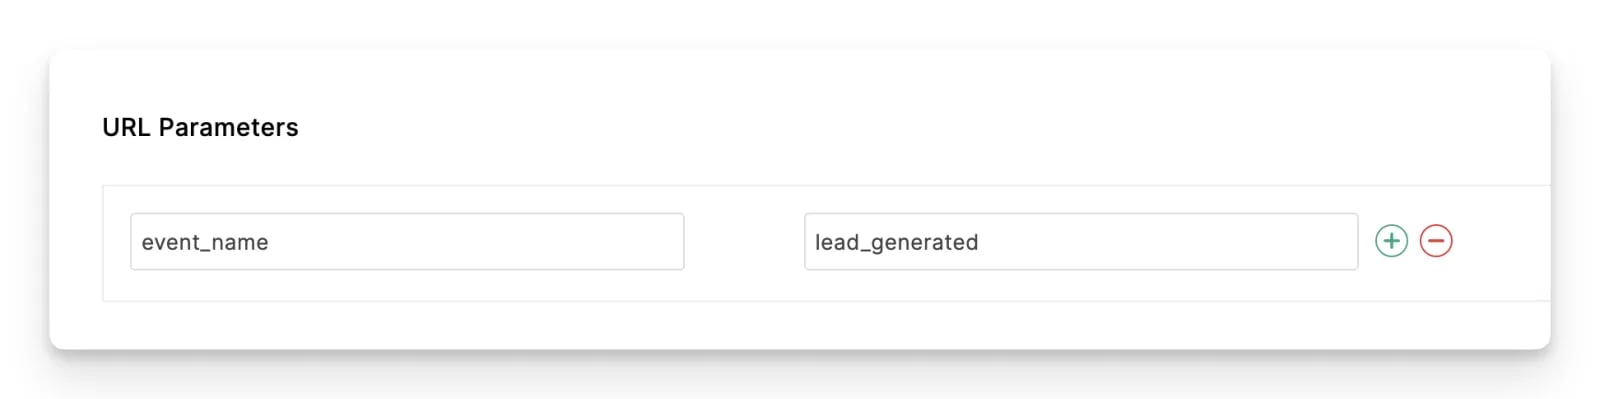
event_name on the left and the event you want to send on the right.lead_generatedview_contentschedulepurchasesubscribeadd_to_cartcontactinitiate_checkoutadd_payment_infocomplete_registrationstart_trialsign_upsubmit_applicationwebinar_registration
9
Save
Scroll to the bottom and click Save.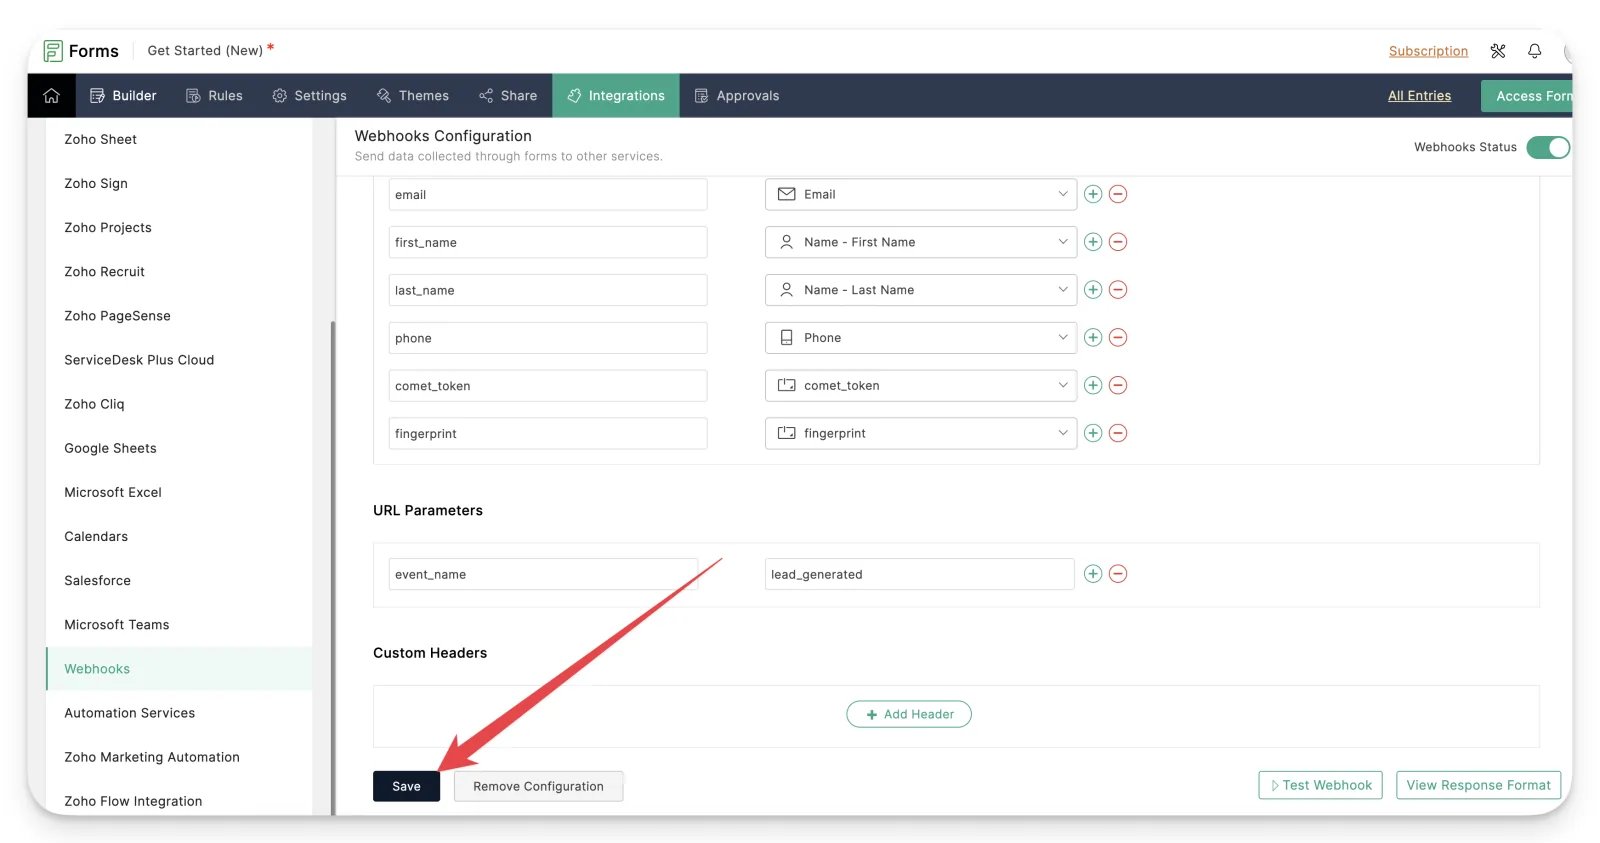
Test the integration and view the data in the Events Log
Submit a test entry on your Zoho form to check that Cometly receives the server event. Then, in Cometly, go to Events Manager and open the Events Log tab to see it. The video below shows the test from start to finish.
Your Zoho form now sends events to Cometly, so Cometly can report the source of each form submission.
Send Zoho CRM event data via webhook
Zoho CRM sends data to Cometly through a Cometly webhook event. You create the webhook in Zoho CRM, create the event in Cometly, then paste the Cometly webhook URL into Zoho CRM.1
Open Setup in Zoho CRM
In Zoho CRM, click the settings gear icon.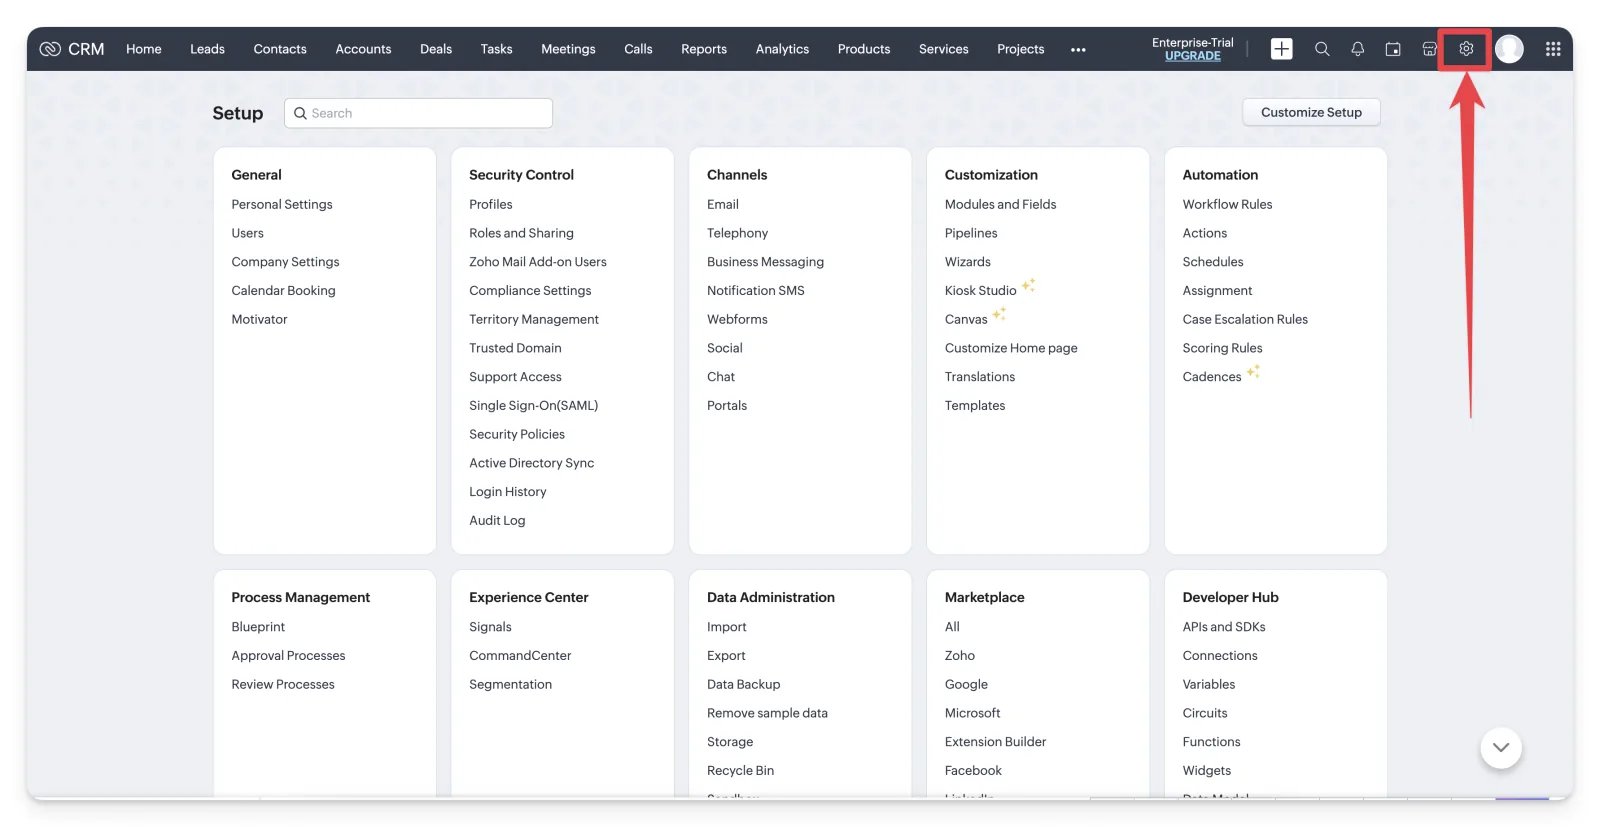
2
Start a new webhook in Zoho CRM
Search for Webhooks, then click Configure Webhook.For more on Zoho CRM webhooks, see Zoho’s help article on creating and configuring webhooks.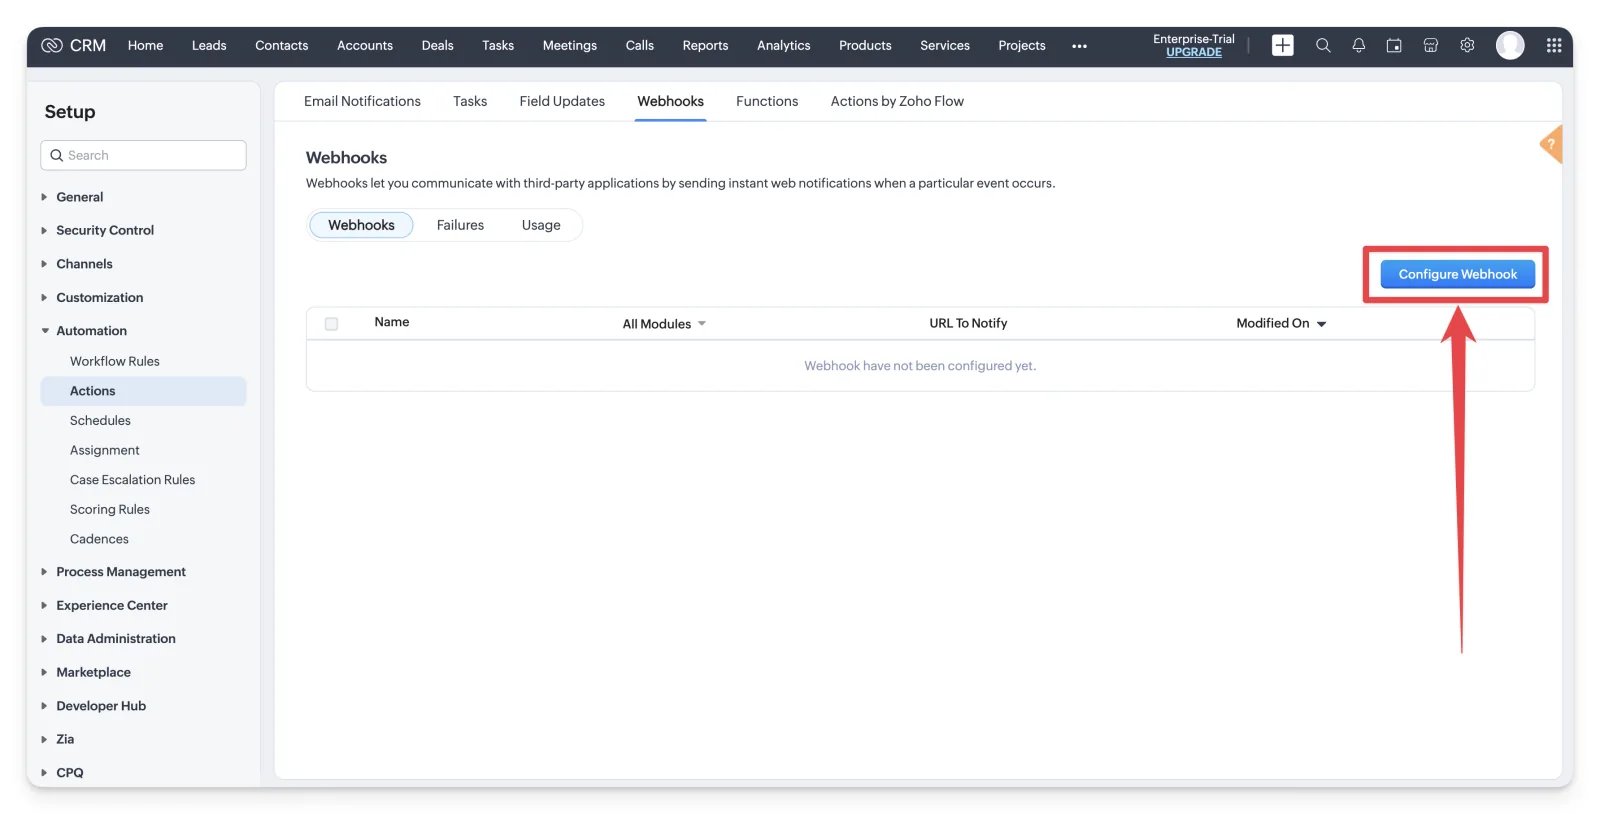
3
Create a webhook event in Cometly
In Cometly, go to Events Manager and click Create Event. Under App / Integration, choose Webhooks.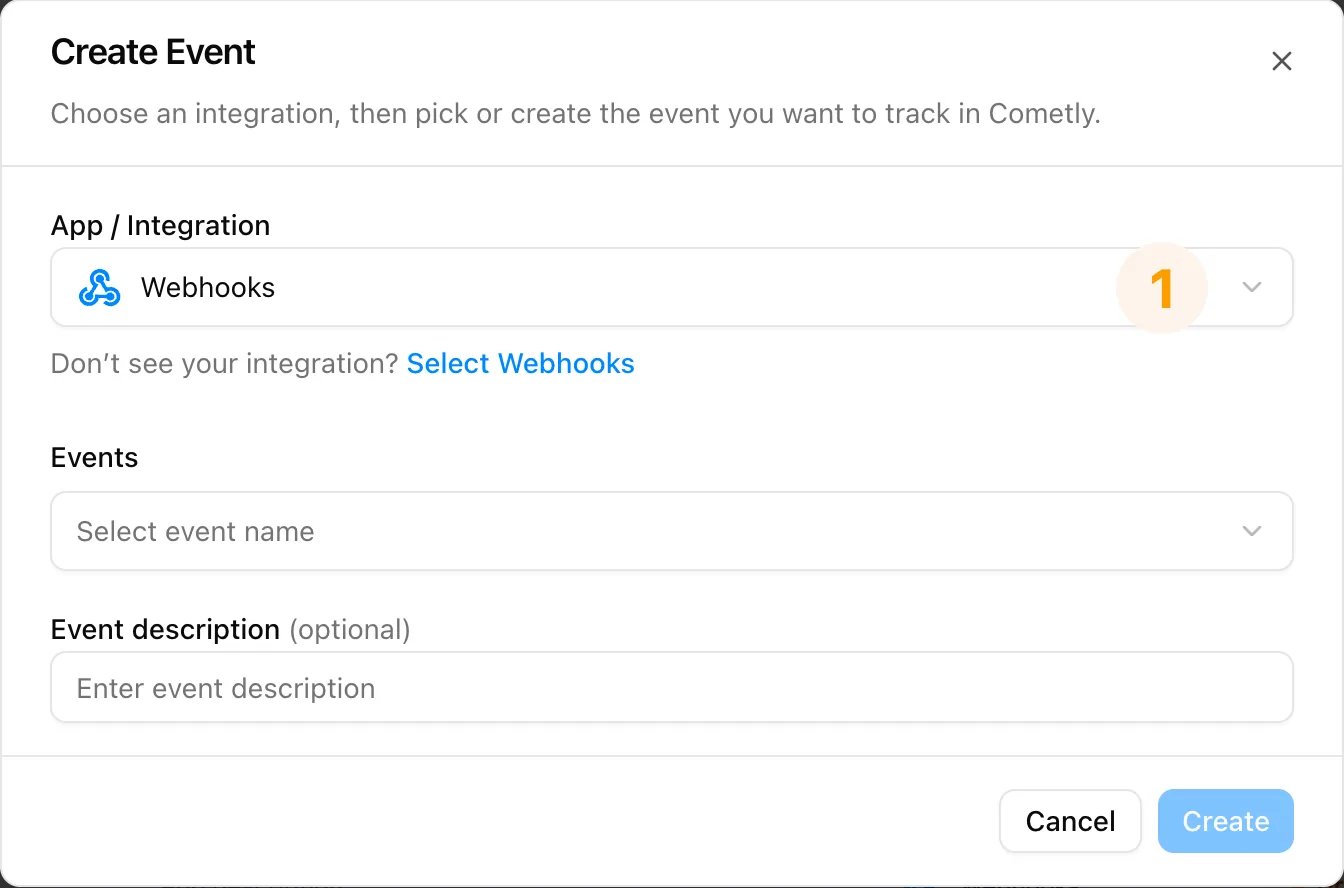
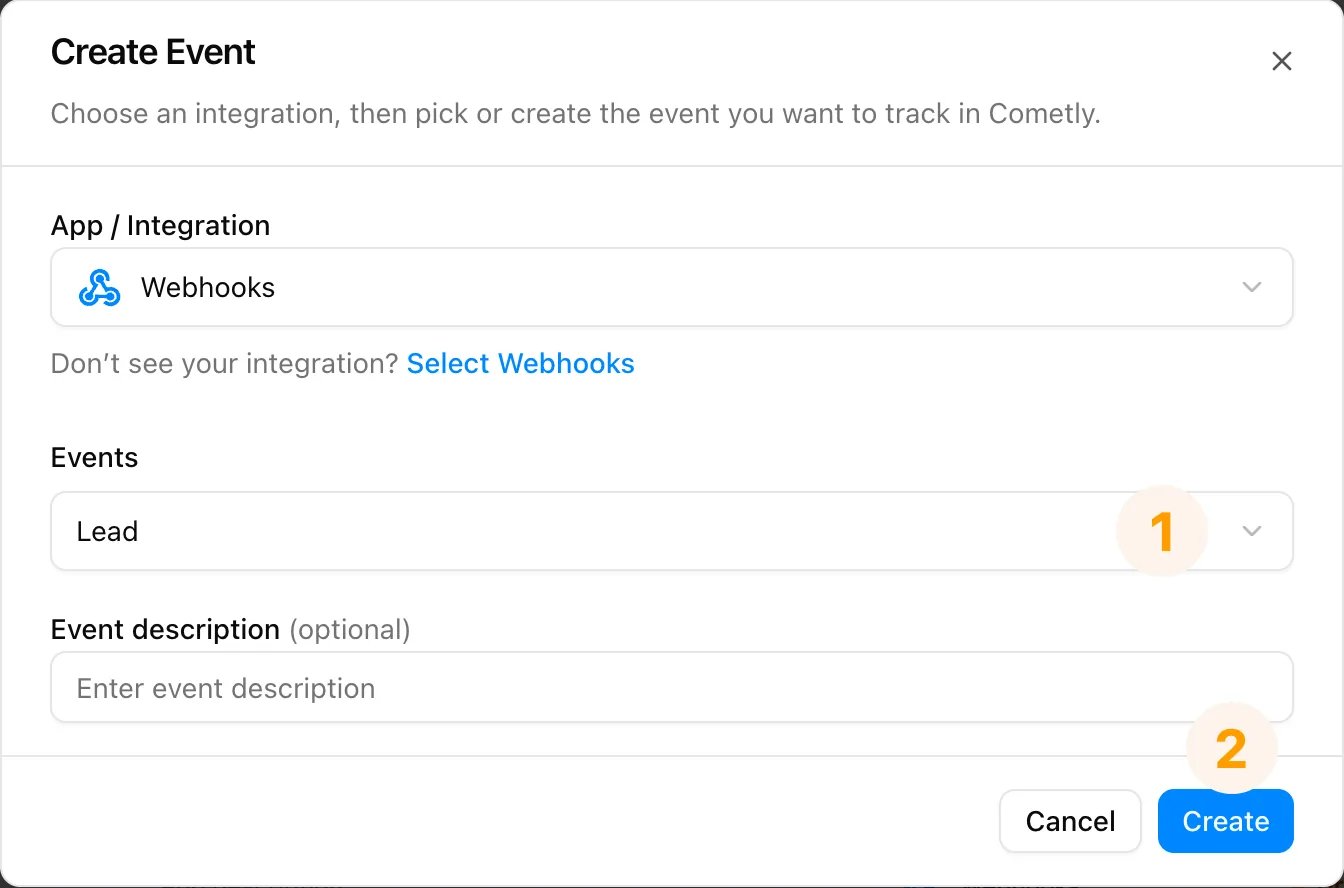
4
Copy the Cometly webhook URL into Zoho CRM
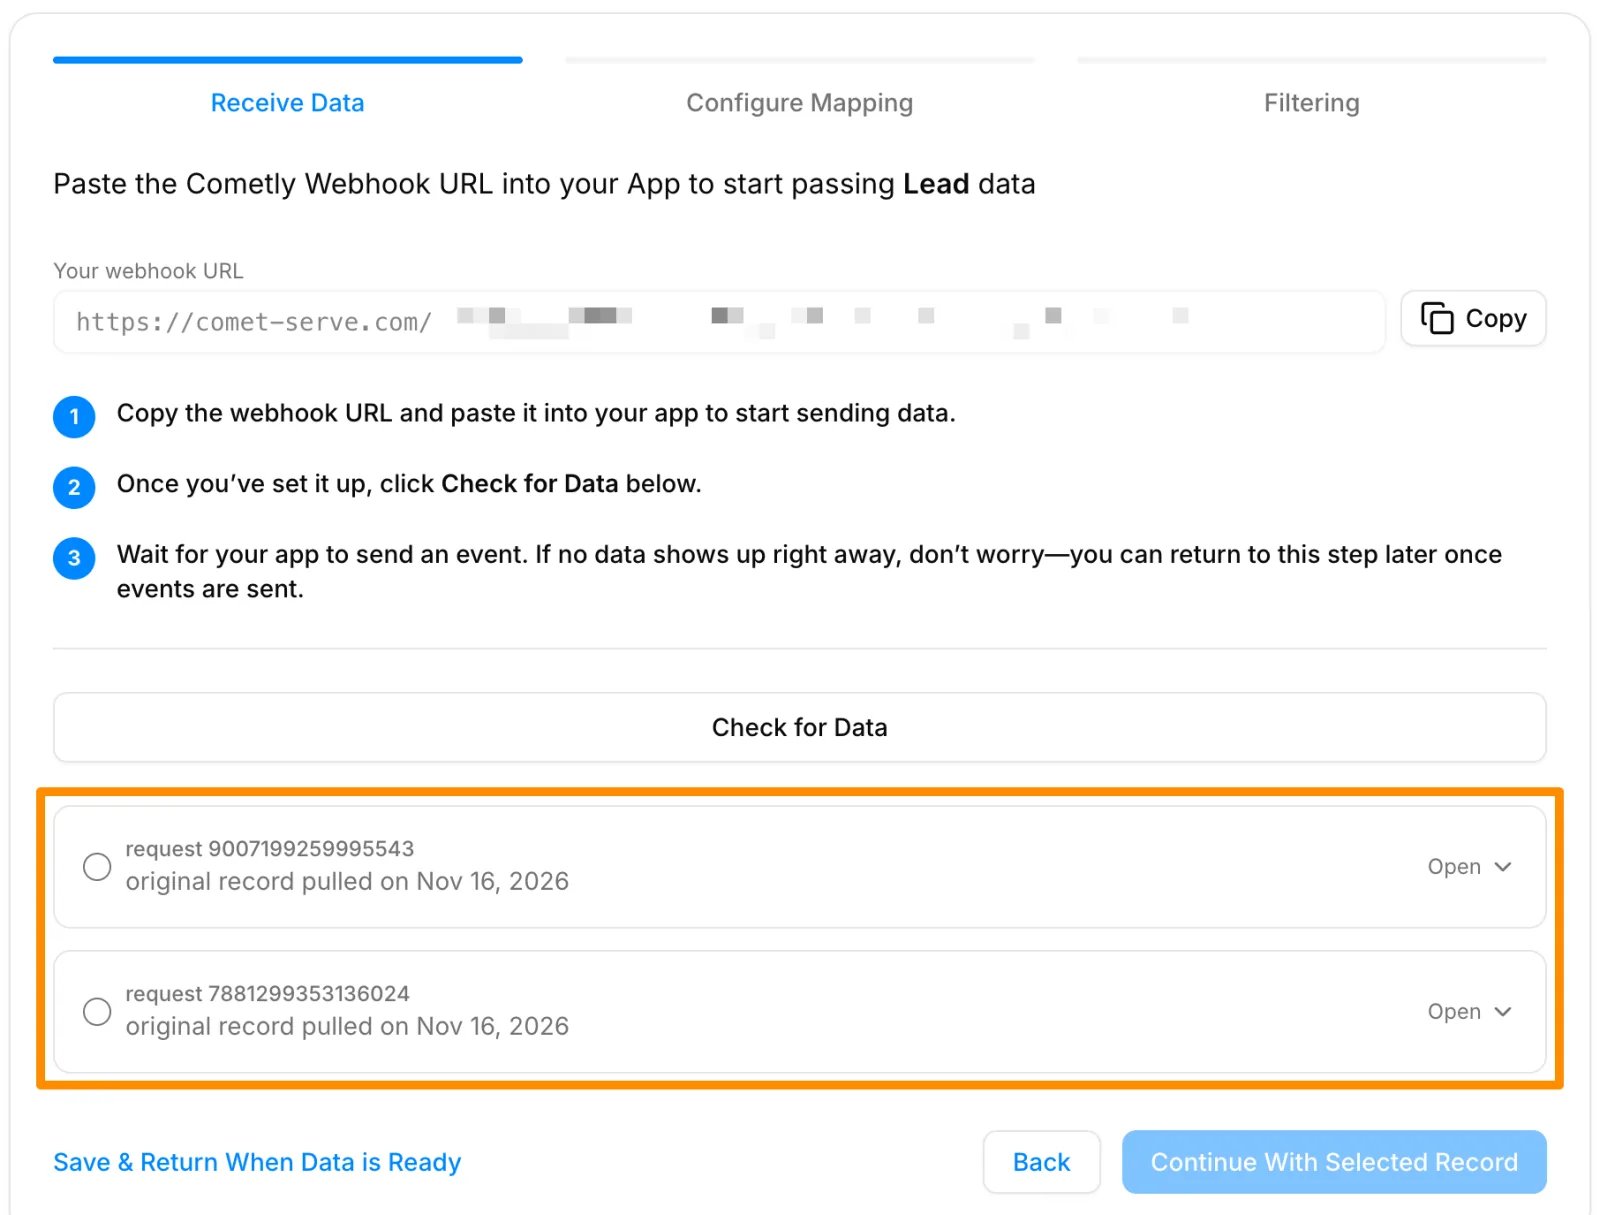
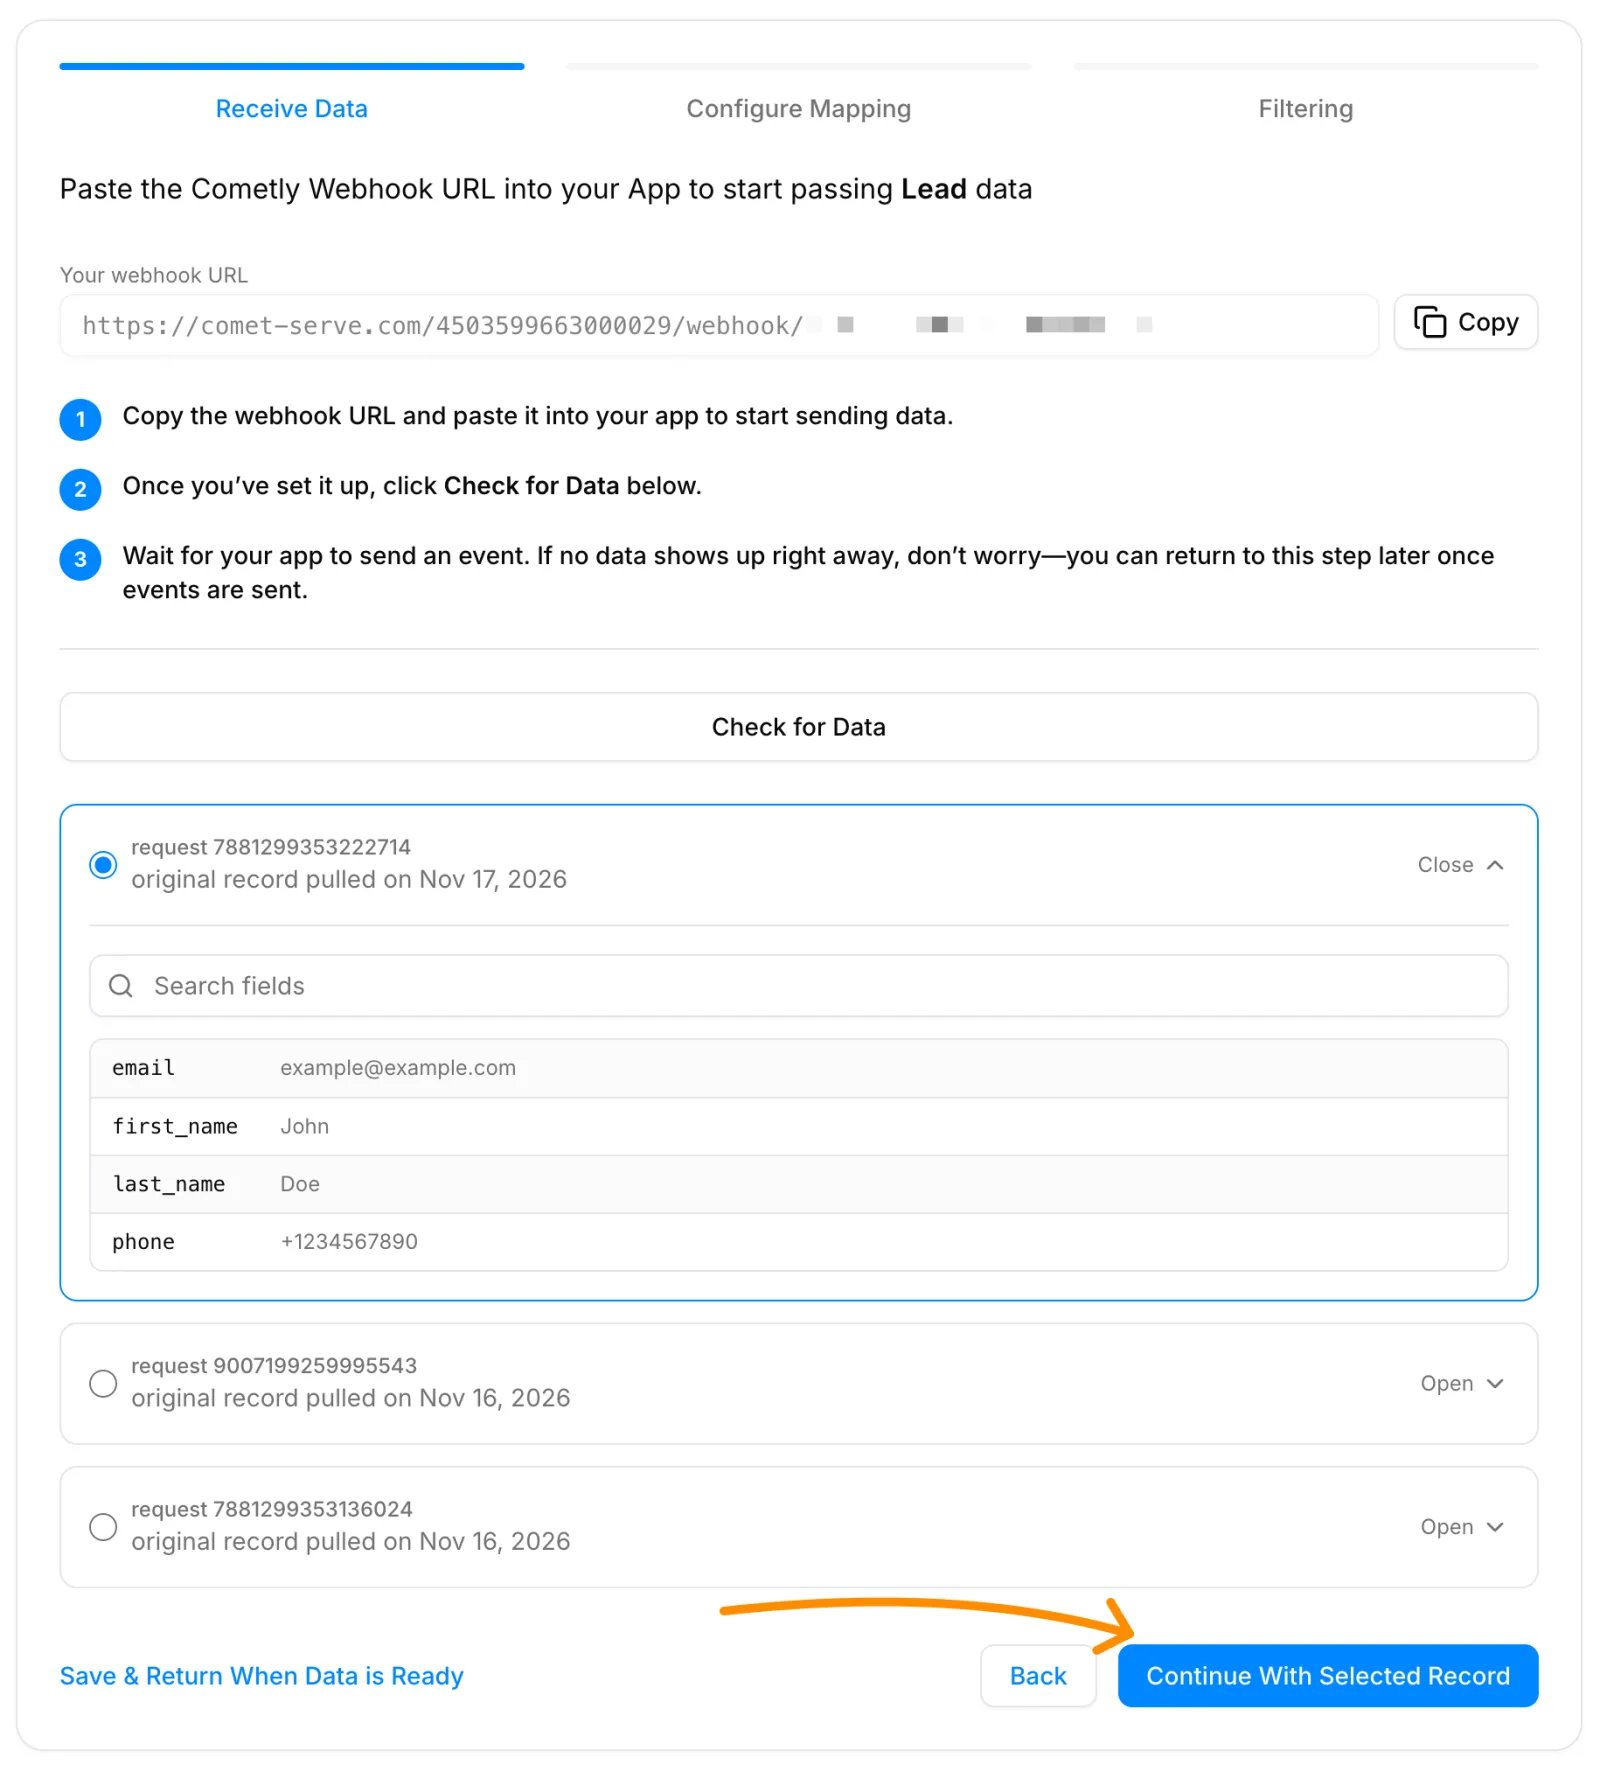
On the Receive Data step, click Copy next to Your webhook URL.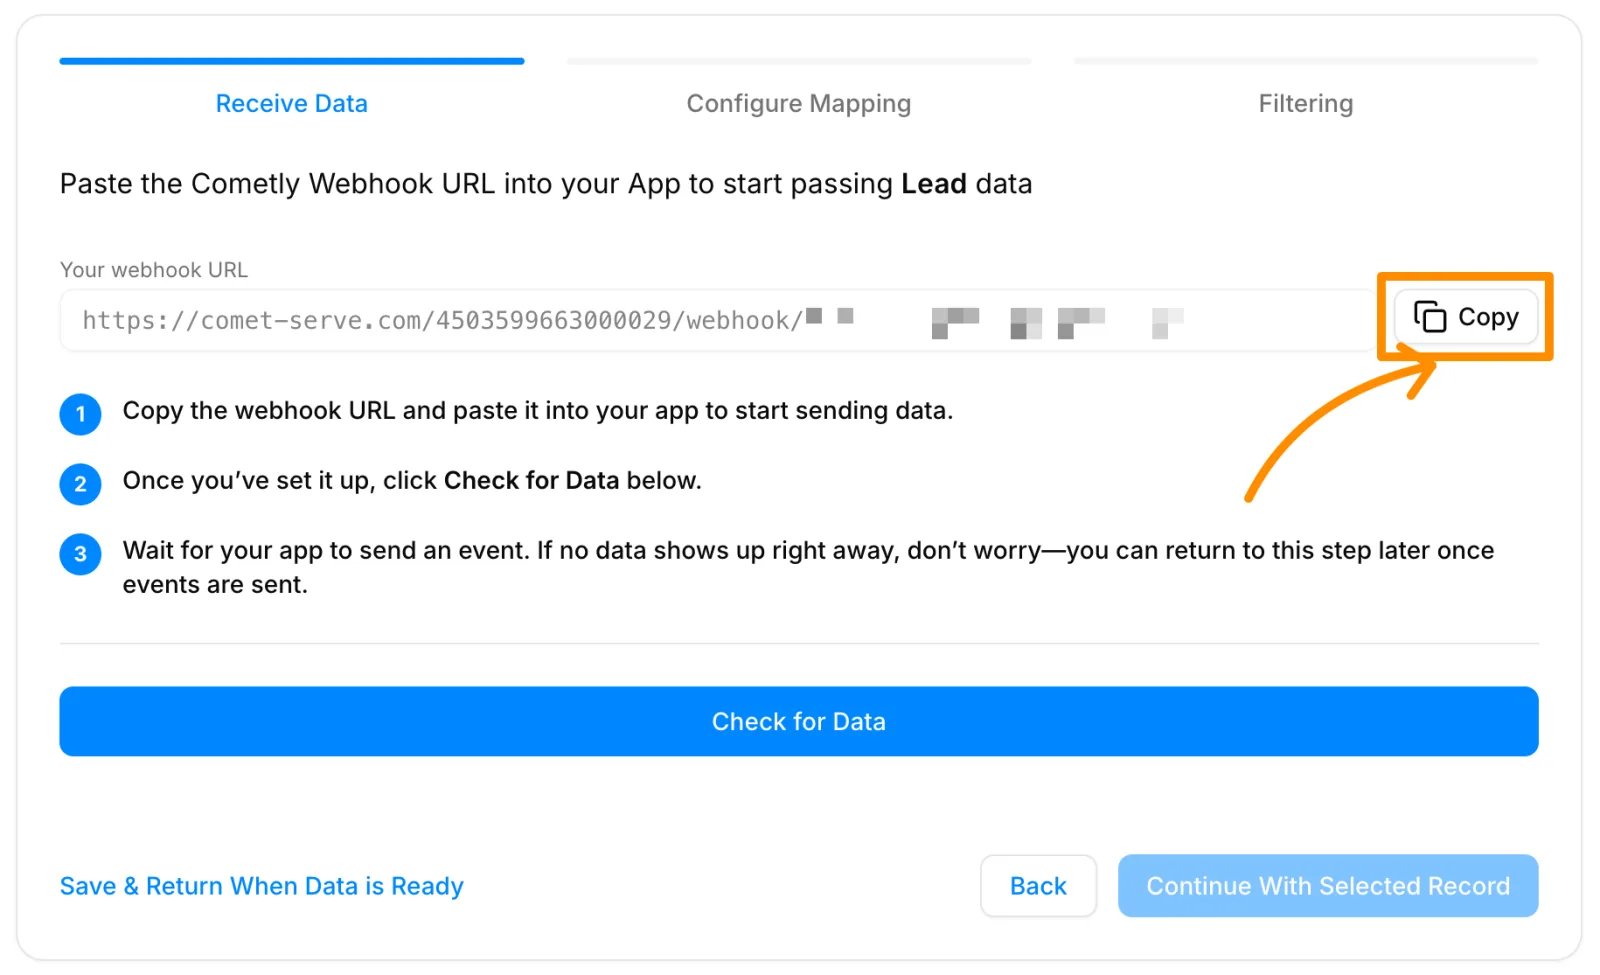
- Paste the Cometly webhook URL into URL to Notify.
- Select POST as the Method.
- Select General as the Authorization Type.
- Choose the Module (CRM object) you want to send data for. This example uses Leads, to send new leads created in Zoho CRM.
5
Choose the data to send
In the next section, choose the data you want to send. We recommend the lead’s first name, last name, email and phone number (if you have it). You can name the parameters anything you like.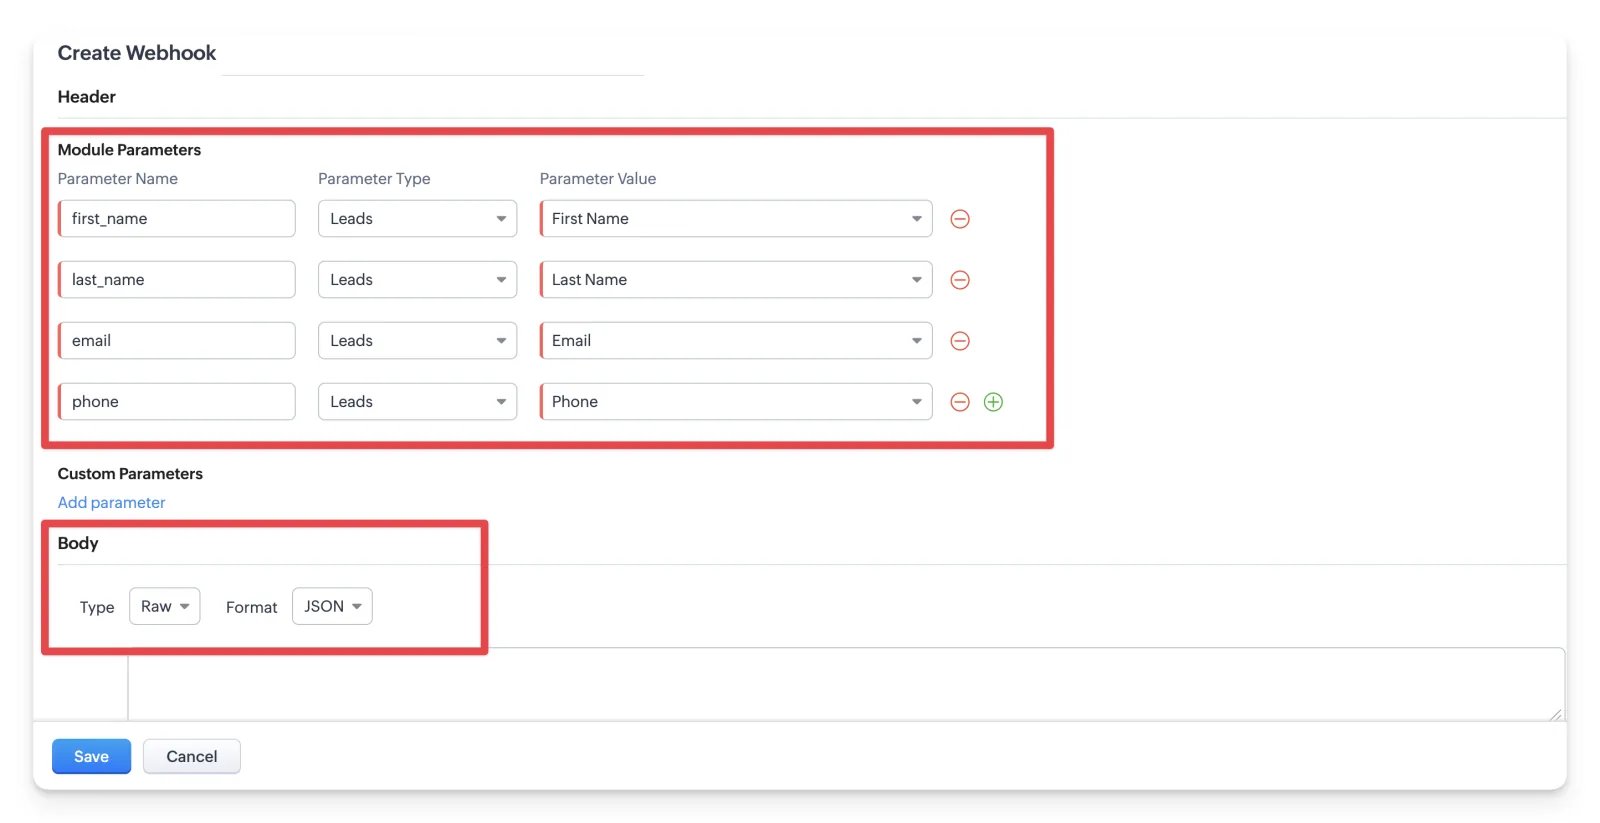
- Under Body, set Type to
Rawand Format toJSON. - Click Save.
Check the Cometly webhook for data
Once the Zoho webhook is set up, go back to Cometly and click Check for Data. Wait for Zoho CRM to send an event. If no data shows up right away, you can return to this step later, once events have been sent. If no data has been sent yet, click Save & Return When Data is Ready and come back later to check for data again. To come back to the webhook, go to Events Manager. Your event is listed with the status Draft. Click Configure in its row to return to the webhook URL and check for data.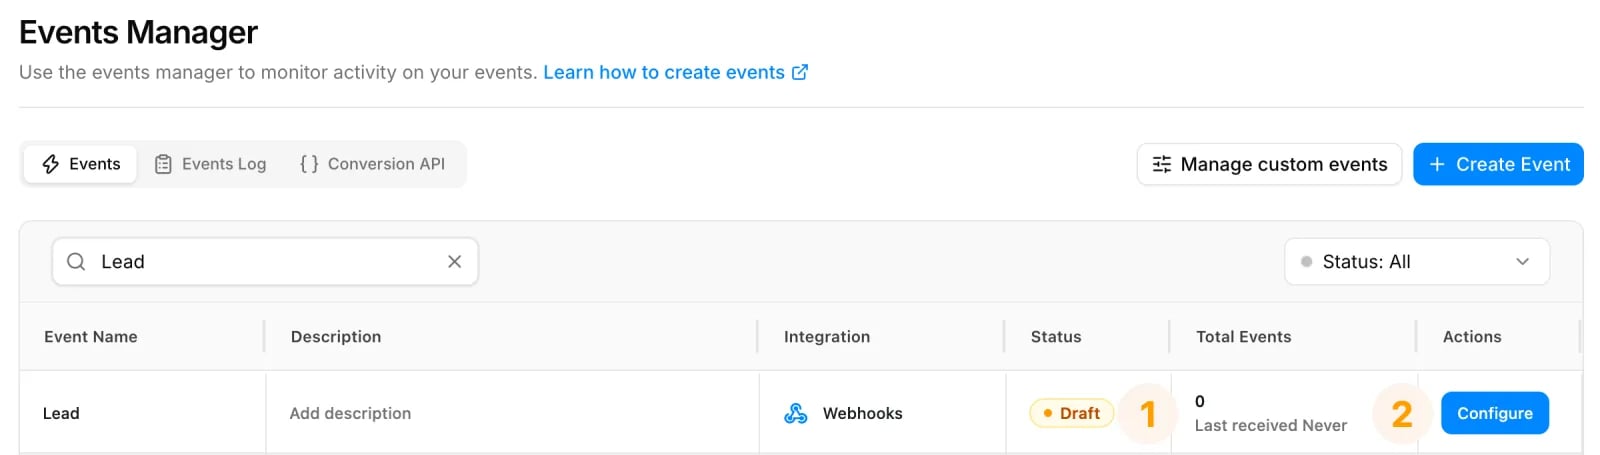
Configure mapping and set filters
Follow the Cometly webhooks guide to finish setting up your webhook: map the webhook data to Cometly fields, and add filters if you need to filter out specific leads. Finish setting up the Cometly webhook (configure mapping and set filters if needed)Check it worked
For Zoho Forms, submit a test entry on your form, then open Events Manager and the Events Log tab: the event you chose (for examplelead_generated) is listed there. For Zoho CRM, once you have activated the webhook, your event shows a switch that is turned on in the Status column of Events Manager, and each new record Zoho CRM sends appears in the Events Log tab.
Frequently asked questions
Does Cometly have a native Zoho CRM integration?
Zoho CRM connects to Cometly through a general Cometly webhook, not a dedicated Zoho CRM integration. You create a webhook event in Events Manager, paste its URL into a Zoho CRM webhook, then map the fields Zoho sends to Cometly fields.Can I send different events from different Zoho forms?
Yes. The event is set by theevent_name URL parameter in each form’s webhook settings, so each form can send its own event to the same Cometly webhook URL. Each form’s webhook sends one event.
Which fields does Cometly need from a Zoho form to record an event?
Cometly needs theevent_name and a way to identify the person: an email address, or the fingerprint together with the IP address. Add all seven payload parameters anyway. The fingerprint and comet_token values link the form entry to the visitor’s session on your site, which is how Cometly attributes it to an ad or channel.
Next steps
- Finish mapping and filters in the Cometly webhooks guide
- Set up form tracking for an embedded Zoho form
- Use the Events Log to check incoming events
- Learn how events work in Cometly