

Before you start
For the Acuity Scheduling integration to work properly, you need all three of these:- A thank you page that Acuity redirects to when a new appointment is booked
- The custom script from step 1 placed in Acuity
- A Cometly webhook URL placed in Acuity
Step 1: Pass the email to your thank you page
For Cometly to track the booking, your Acuity Scheduling form must redirect to a thank you page with the invitee’s email in the URL. This is a requirement: without it, the integration does not work properly. To learn how the Cometly pixel reads theemail= URL parameter on a thank you page, see Pass the email to a thank you page.
-
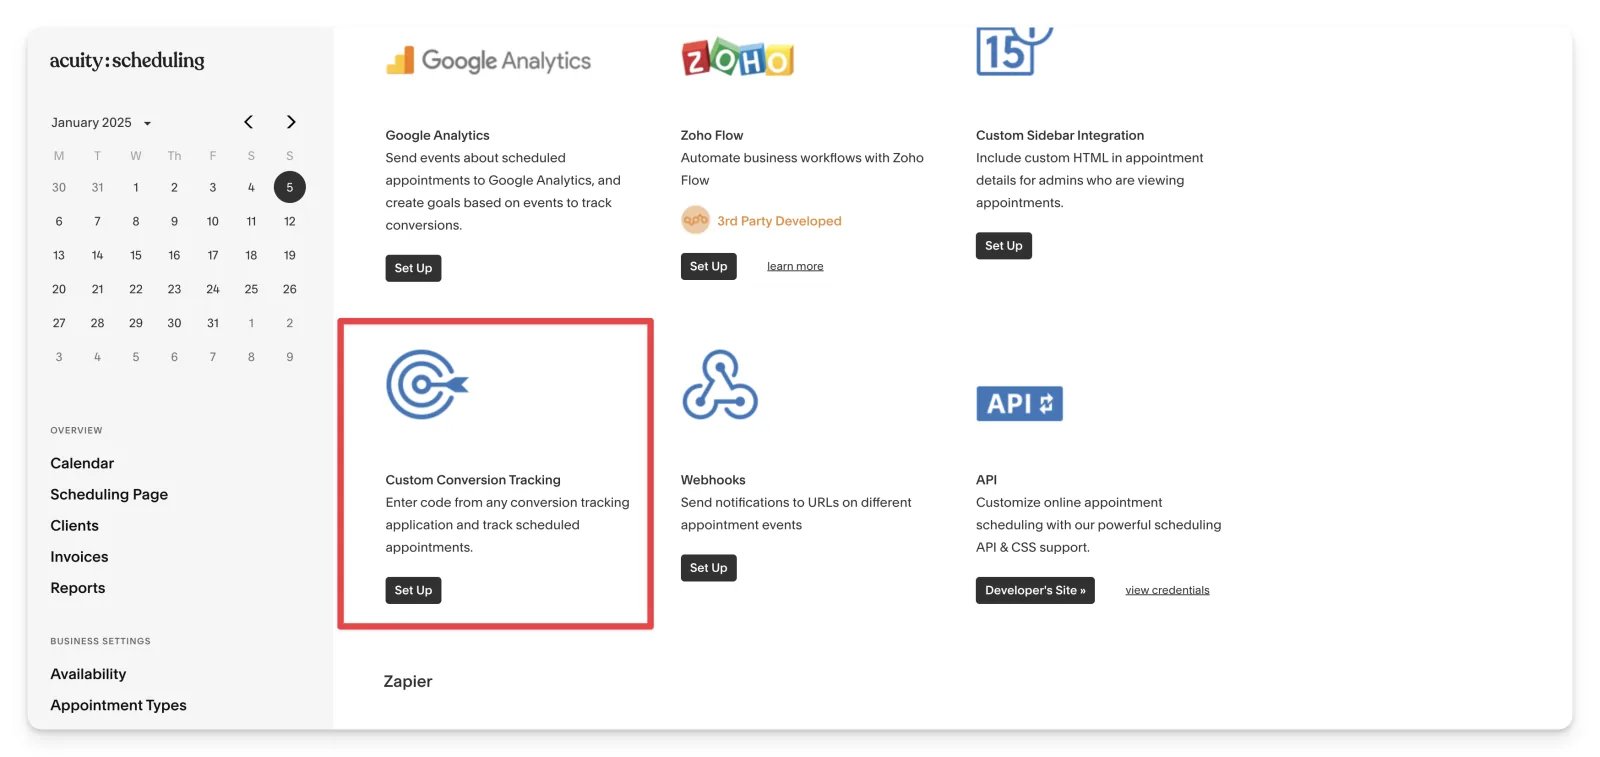
In your Acuity Scheduling account, go to Integrations and select Custom Conversion Tracking.
-
Take the code below and replace
https://www.website.com/thank-youwith the URL of your thank you page.For example, if your thank you page ishttps://www.cometly.com/thank-you, the code looks like this: - Paste the edited code into Acuity and click Save Settings.
Step 2: Create a webhook event in Cometly
- In Cometly, click Events Manager in the left sidebar, then click Create Event.
- Under App / Integration, select Webhooks.
- Pick the event you want to track (or create a new one) and click Create.
-
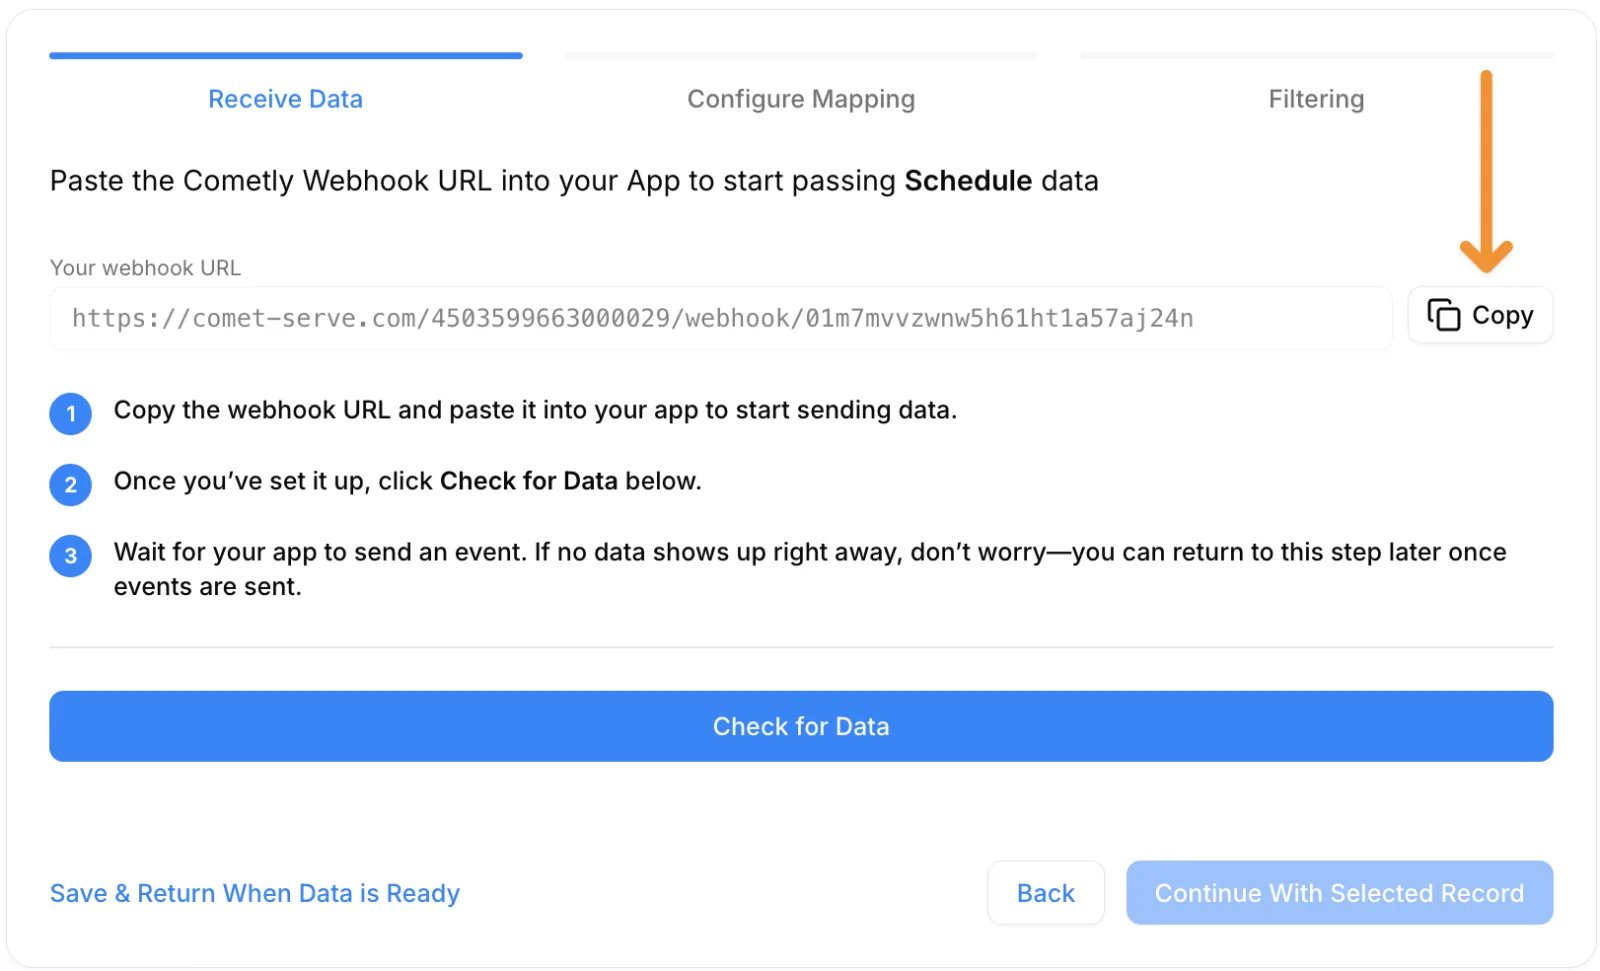
On the next page, click Copy next to Your webhook URL.
Step 3: Add the Cometly webhook to Acuity Scheduling
A webhook in Acuity Scheduling sends data to an endpoint, in this case Cometly, each time a new appointment is scheduled.- In Acuity Scheduling, go to Integrations.
-
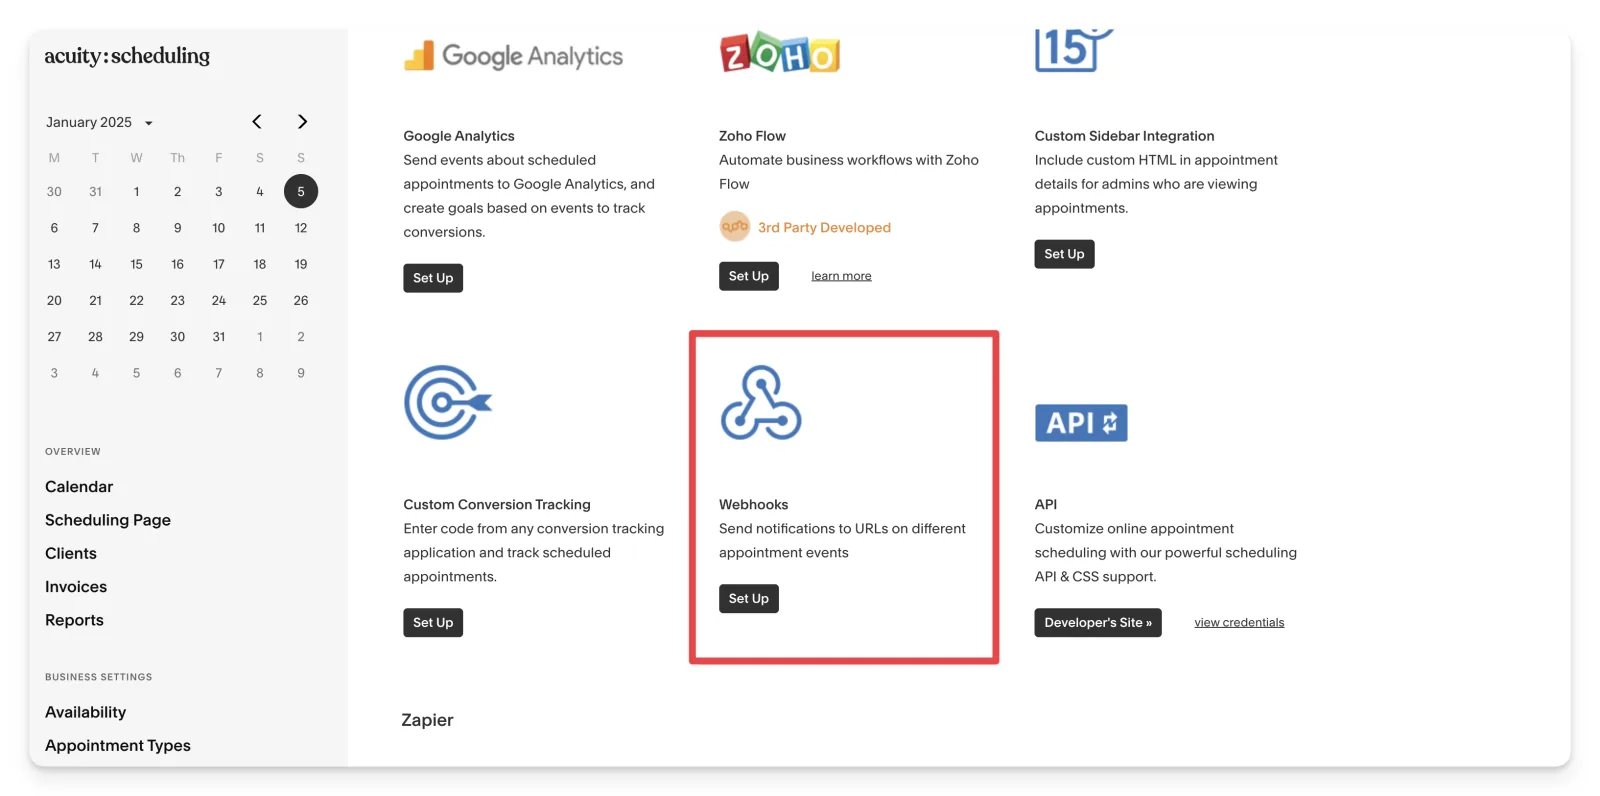
Select Webhooks.
-
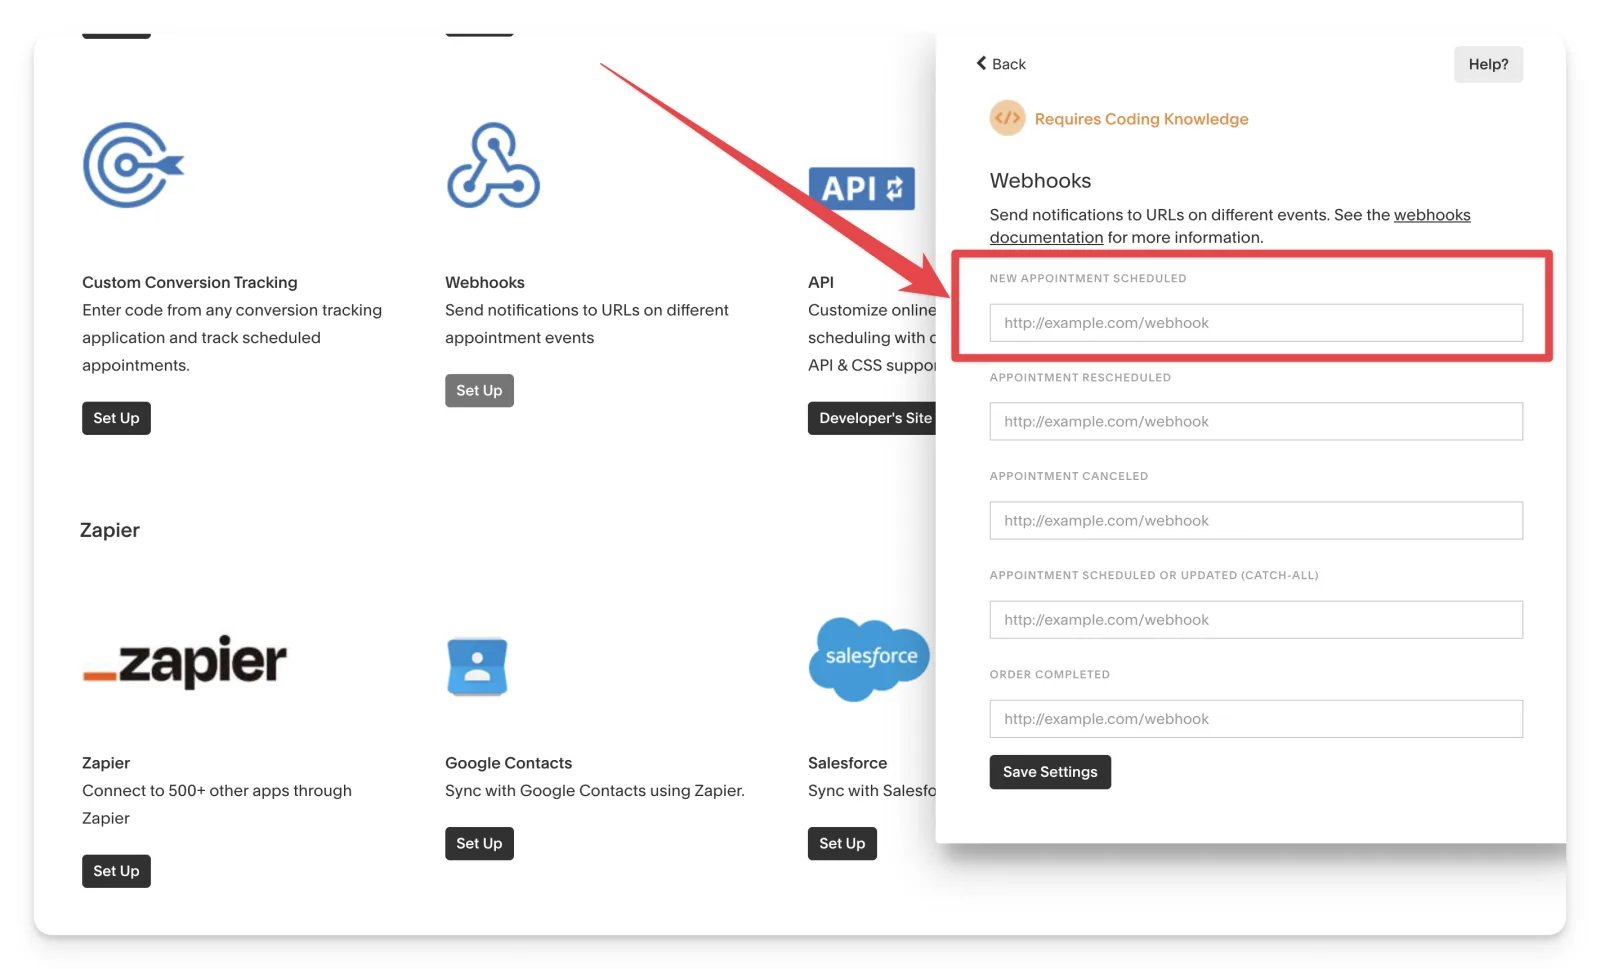
Paste your Cometly webhook URL into the New Appointment Scheduled field and click Save Settings.
Step 4: Map the webhook data in Cometly
Back in Cometly, click Check for Data, then finish the event setup. The Cometly webhooks guide explains how to:- Select a received record to map from
- Map the webhook data to the appropriate Cometly fields
- Set up filters so only the data you want is tracked
Check it worked
Open Events Manager in Cometly. Your webhook event shows a switch that is turned on in the Status column, which means it is active and new appointments are being tracked.Frequently asked questions
Does Cometly have a native Acuity Scheduling integration?
No. You connect the two with a webhook: Acuity Scheduling sends each new appointment to a Cometly webhook URL, and you map the data to Cometly fields. The script from step 1 passes the invitee’s email to your thank you page so the booking can be linked to the visitor’s journey.Which Acuity Scheduling fields do I need to map in Cometly?
Email and Event Time are required. If the data from Acuity has no event time, choose The time we receive the event for Event Time, and Cometly uses the time the event arrives. You can map more fields, such as first name, last name and phone number, to enrich the contact in Cometly.Why is my test Acuity Scheduling appointment not showing in Cometly reports?
Test data sent before the webhook was activated is not processed and does not appear in your reports. Finish the mapping, activate the event, then book a new test appointment.Next steps
- Set up mapping, filters and activation in the Cometly webhooks guide
- Learn how the pixel reads the email on a thank you page
- Understand how events work in Cometly