

Step 1: Create a webhook event in Cometly
- In Cometly, click Events Manager in the sidebar, then click Create Event.
- Under App / Integration, select Webhooks.
- Pick the event you want a completed envelope to send (or choose Create New Event), then click Create.
-
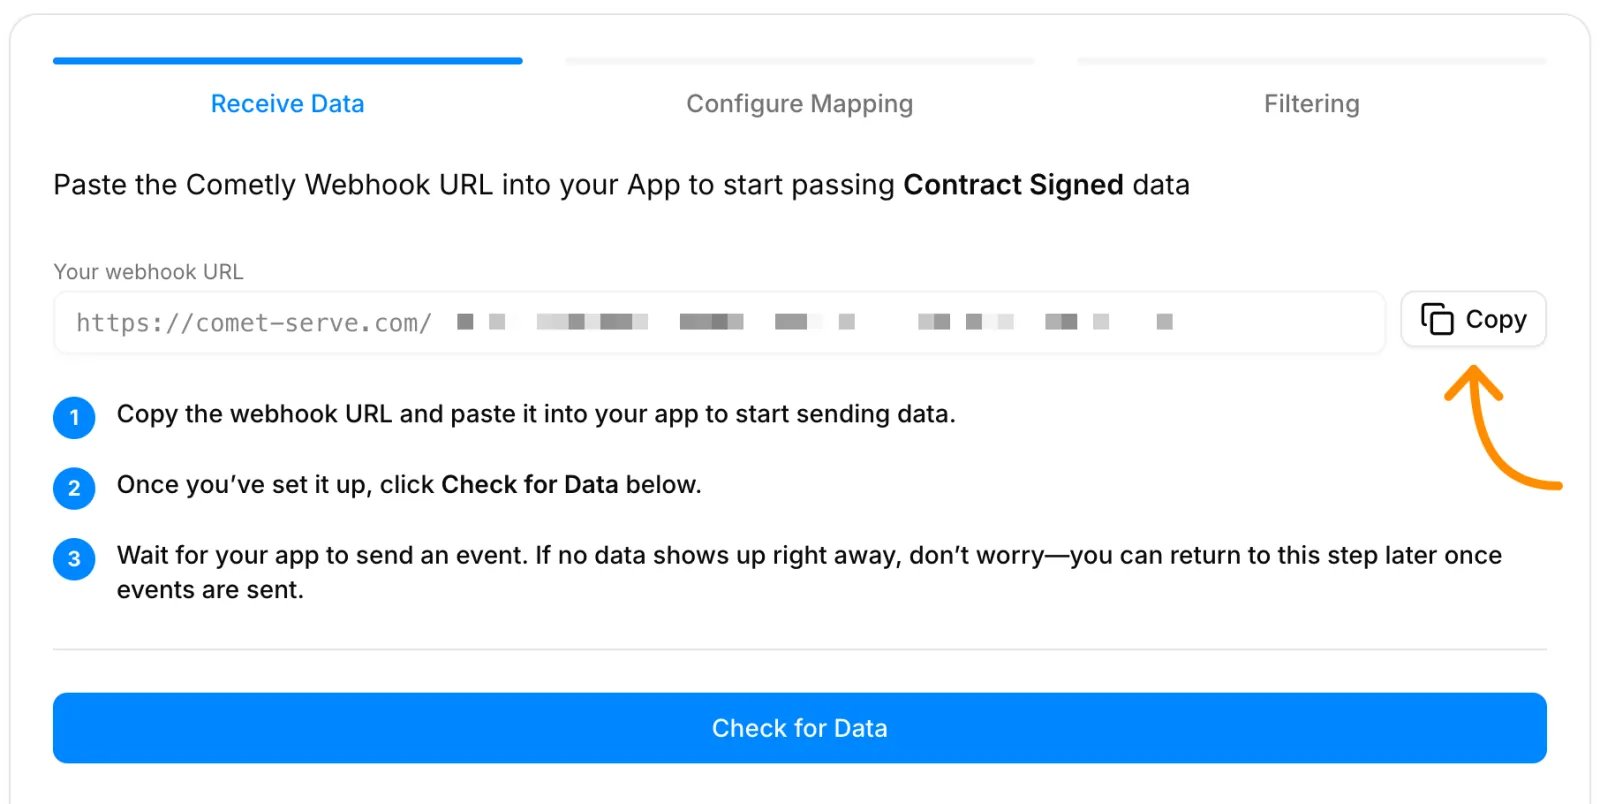
Copy the URL shown under Your webhook URL.
Step 2: Add the webhook in Docusign
-
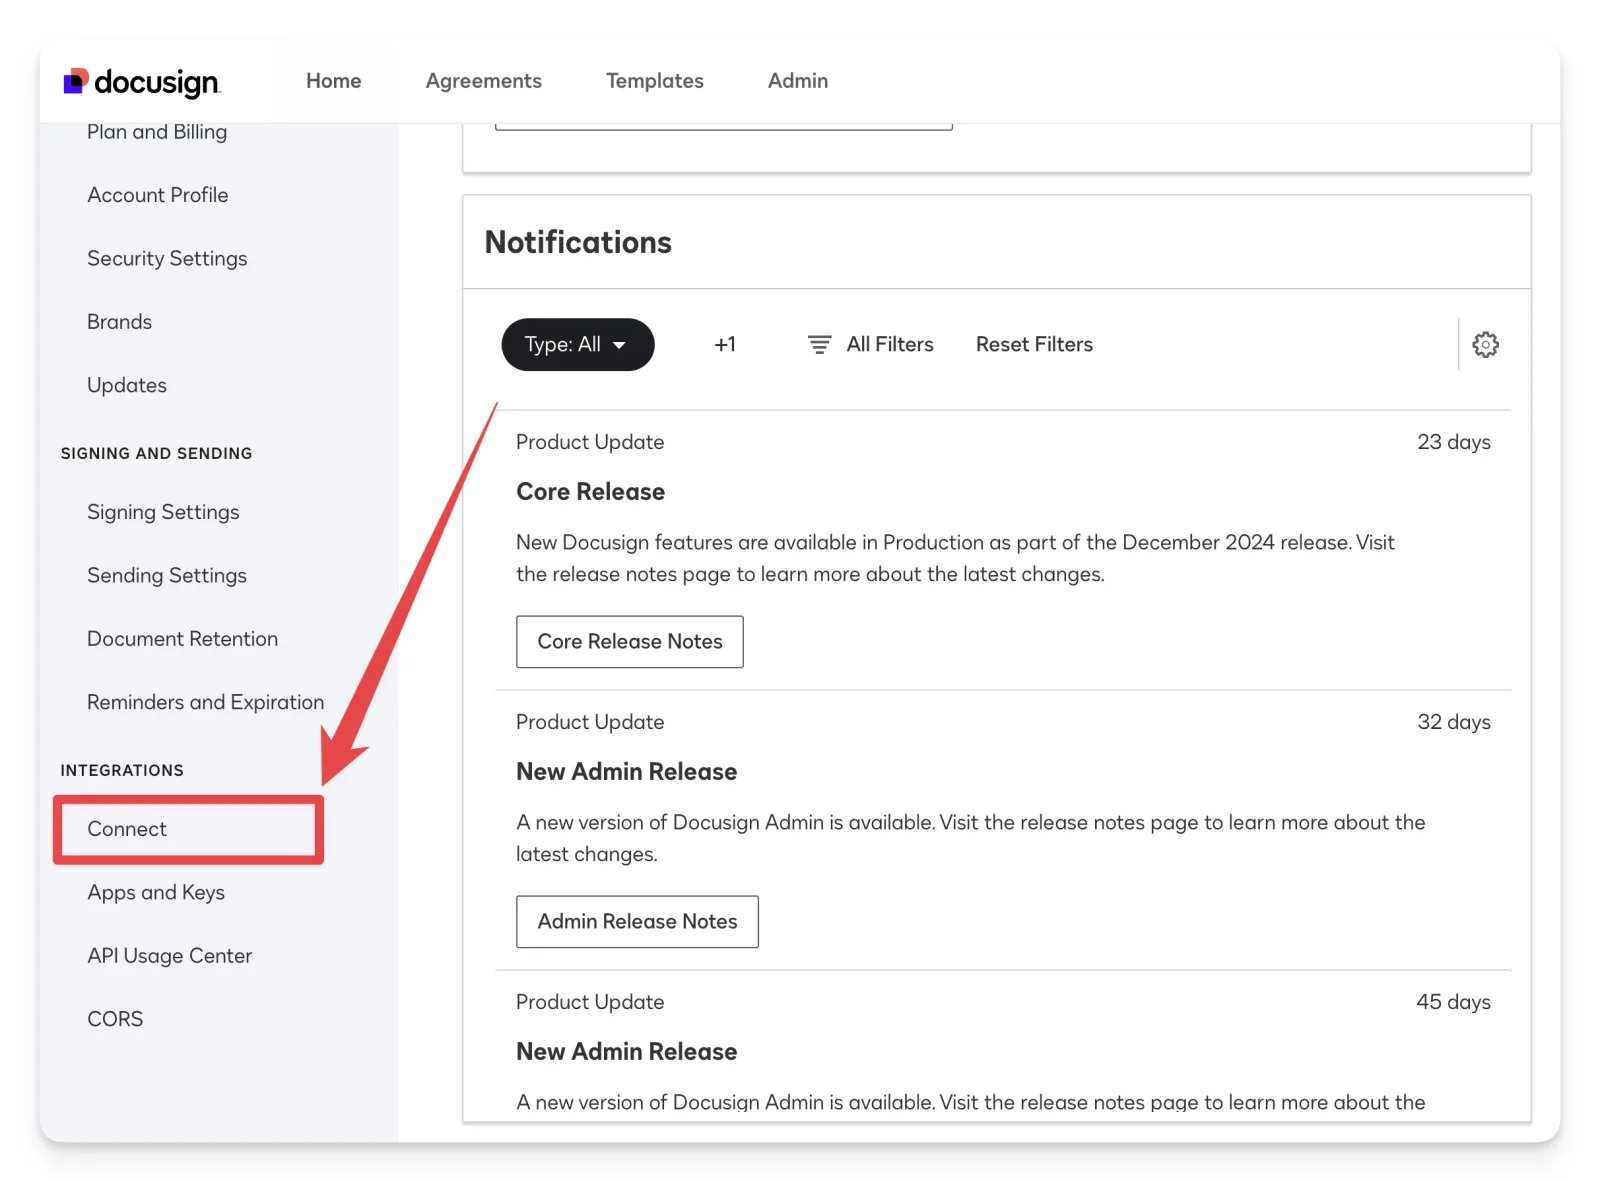
Open the Admin center in your Docusign account and click Connect in the left panel.
-
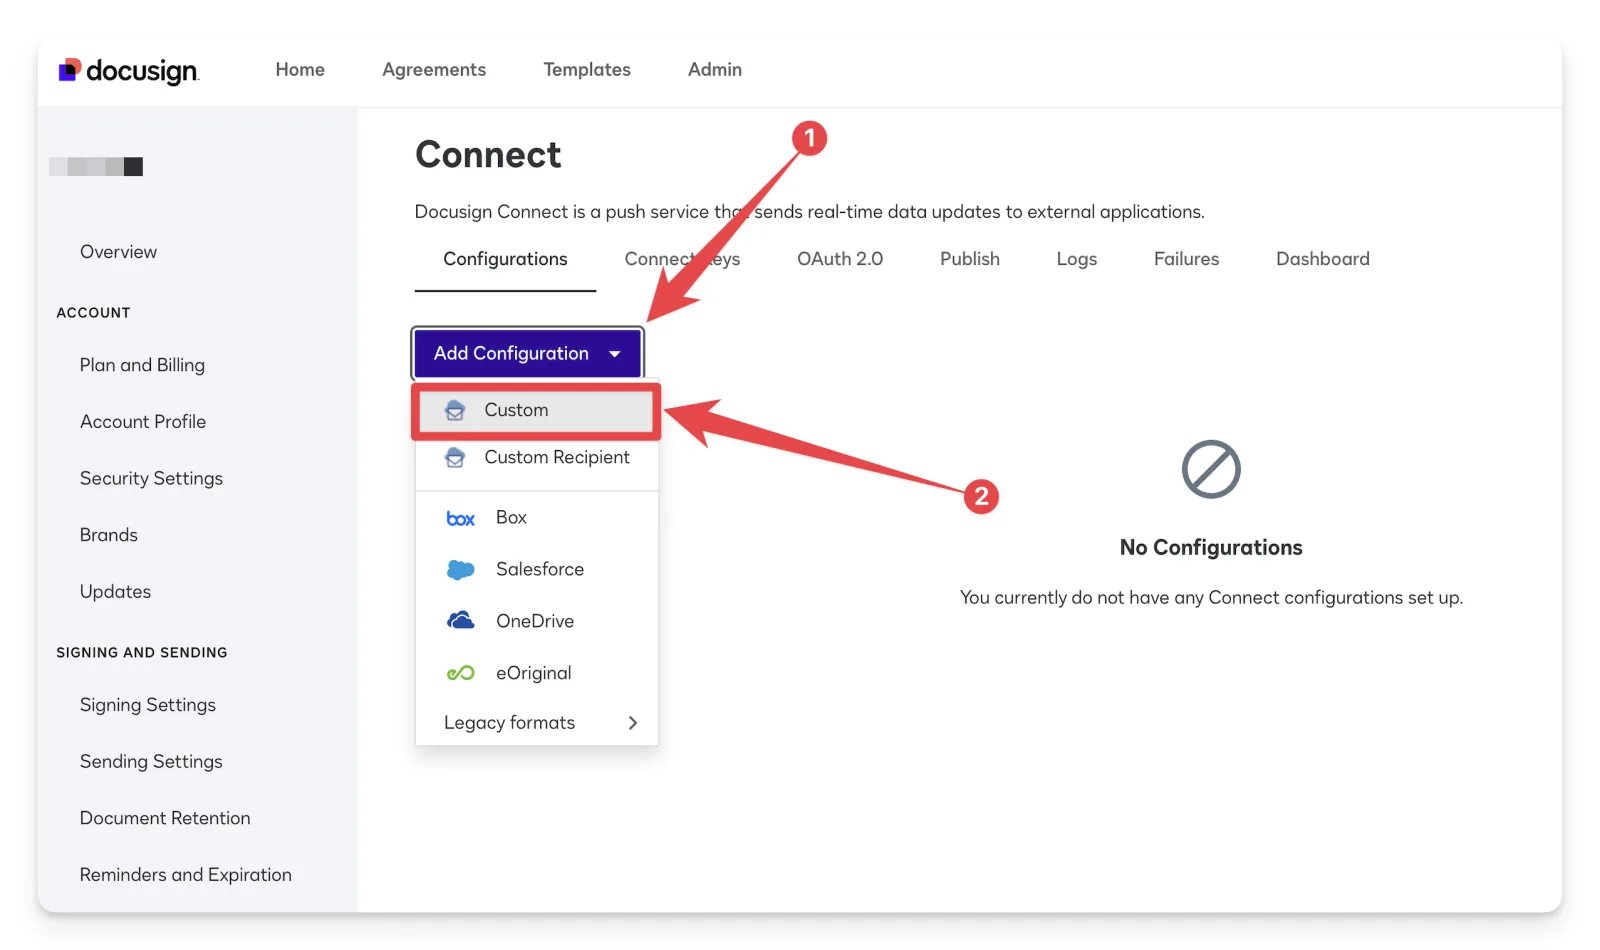
Click Add Configuration, then select Custom.
-
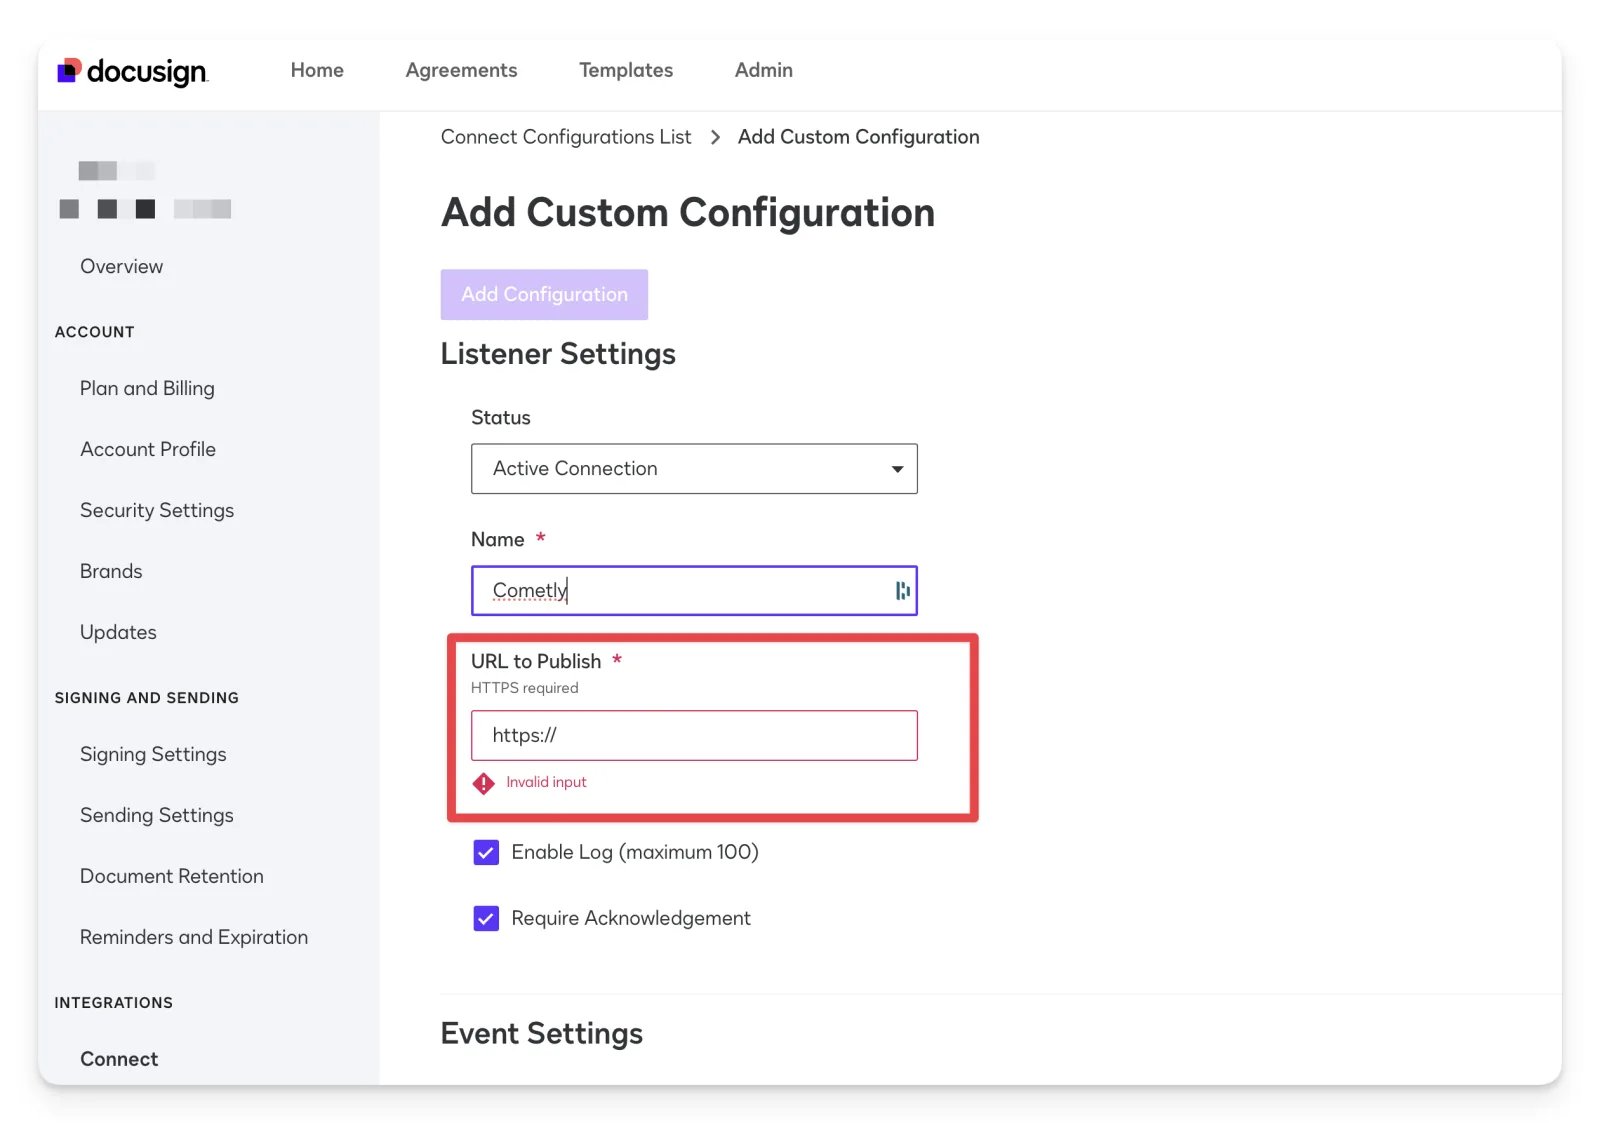
Set Status to Active Connection, enter a Name such as “Cometly Webhook”, and paste your Cometly webhook URL into URL to Publish.
-
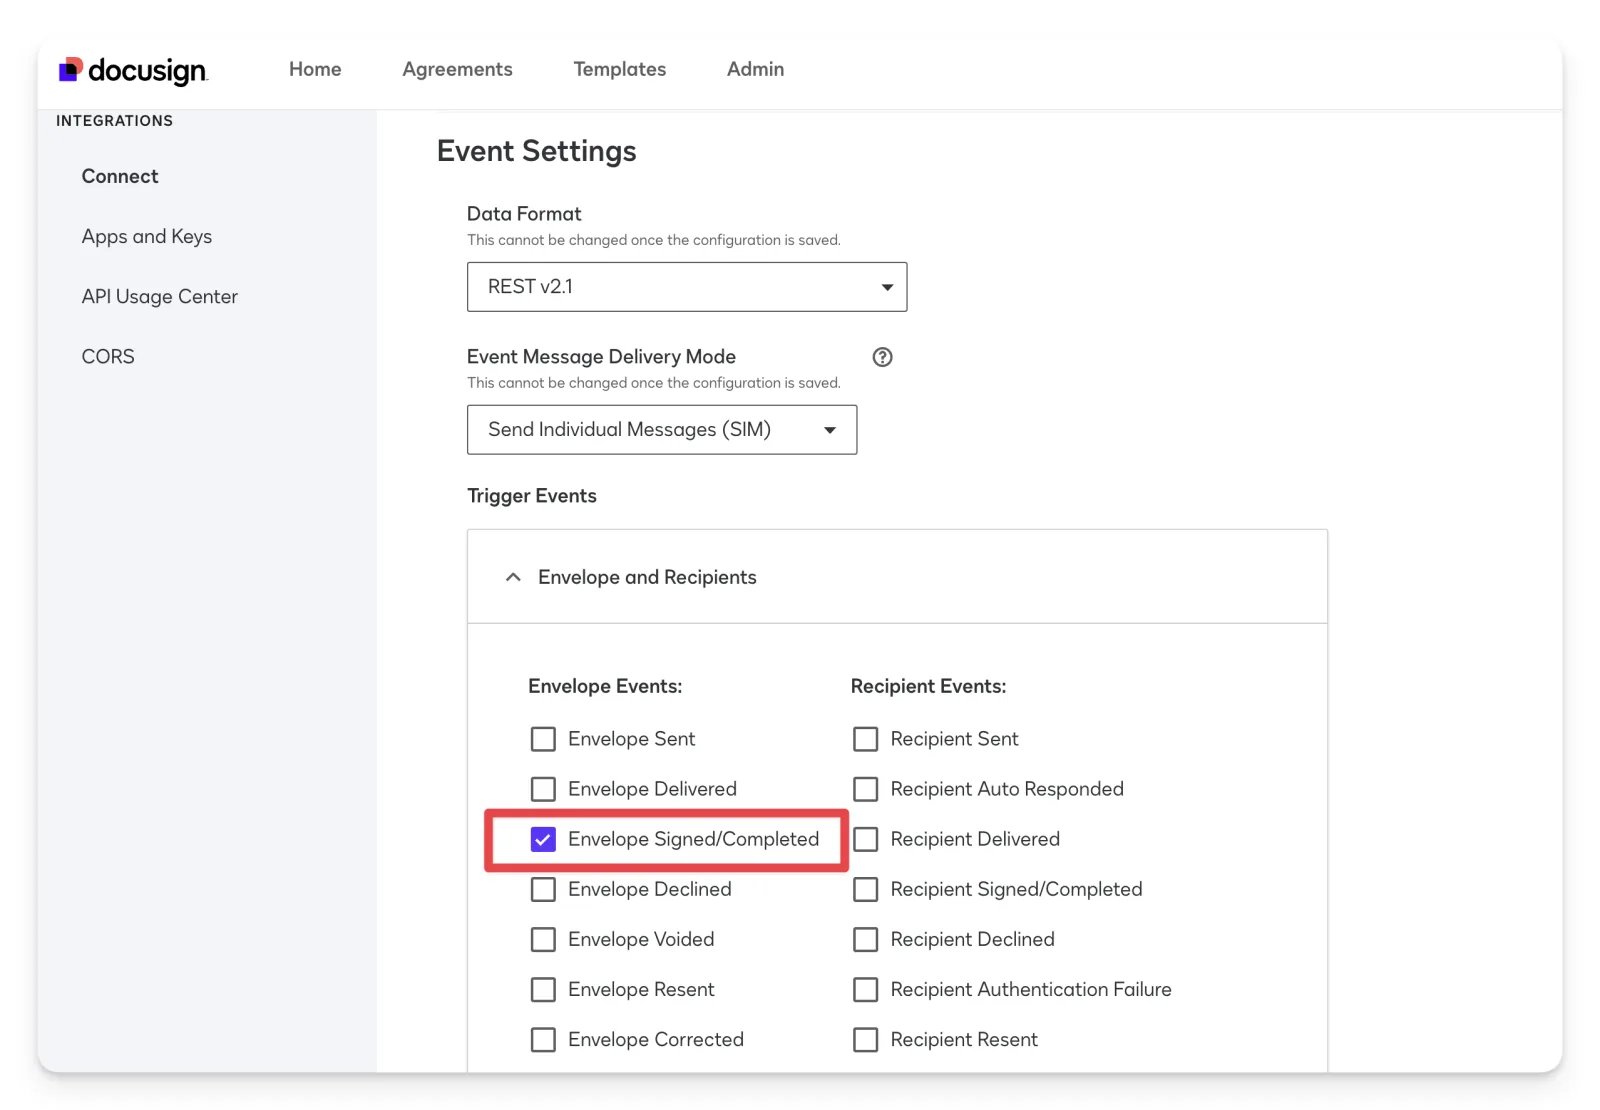
Scroll down to Event Settings, open Envelope and Recipients, and select the Envelope Signed/Completed checkbox.
-
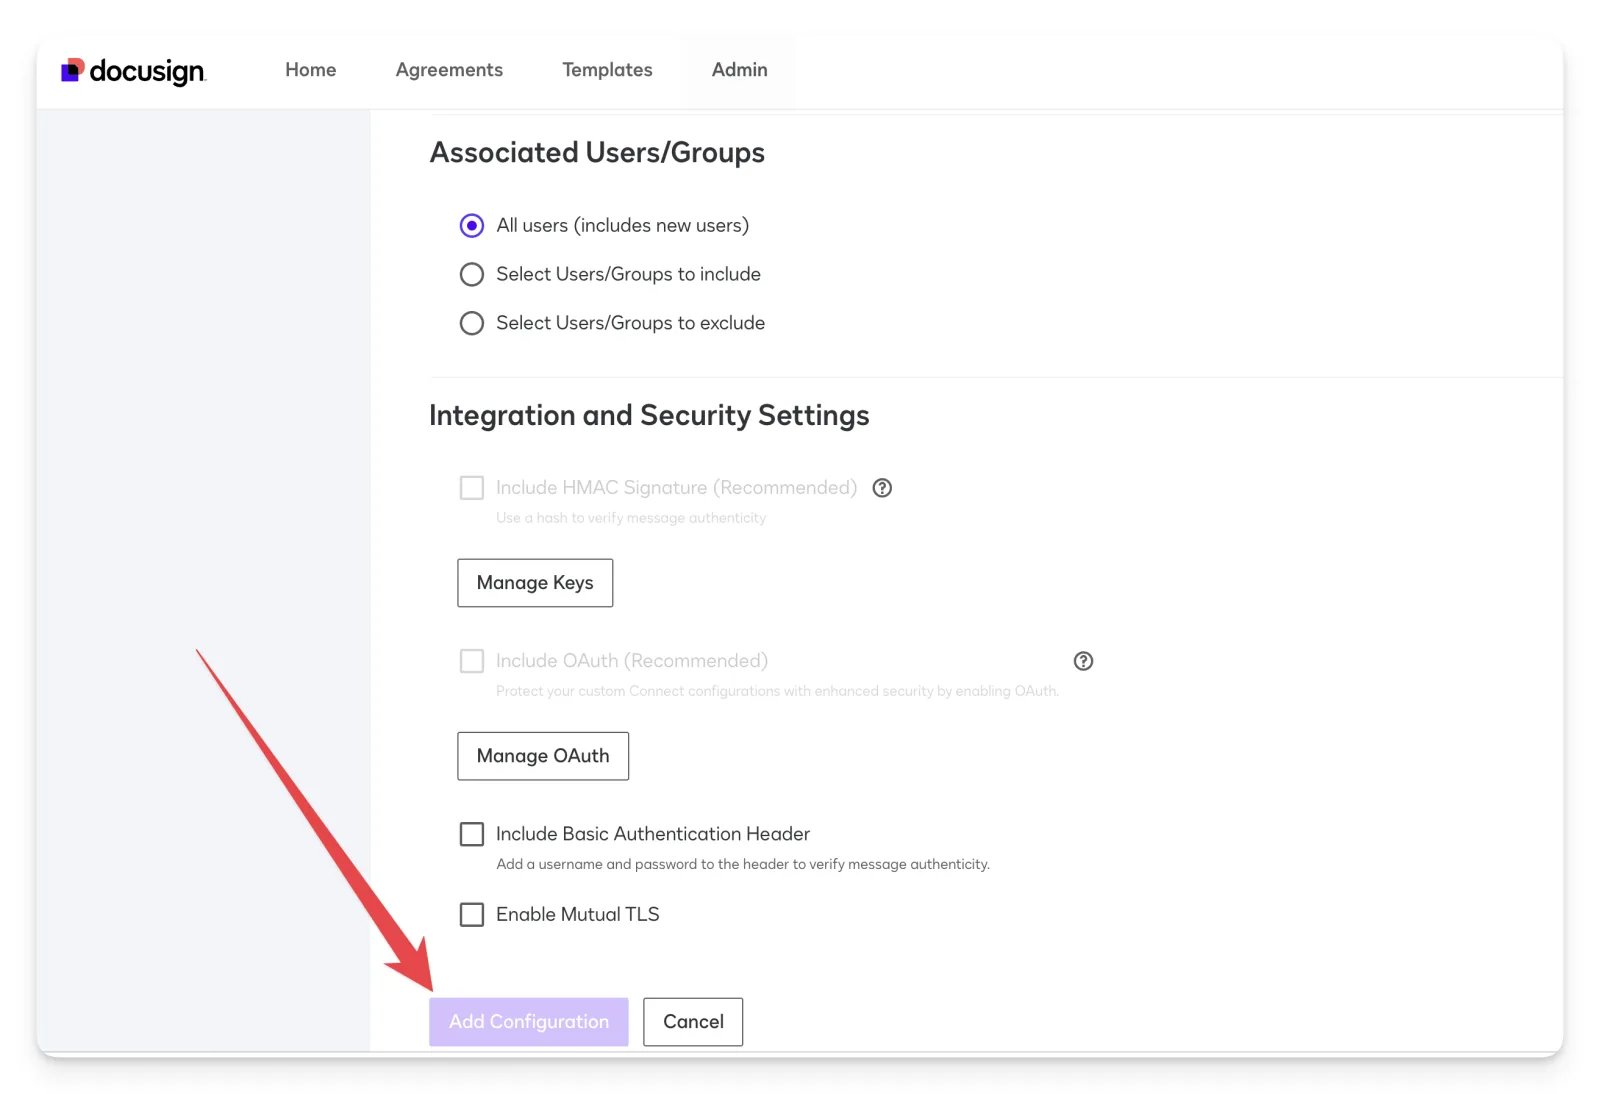
Scroll to the bottom of the page and click Add Configuration.
Step 3: Finish the webhook in Cometly
Cometly needs at least one completed envelope before you can map it, so complete a test envelope in Docusign. Then go back to the webhook event in Cometly and click Check for Data. Once the record appears, follow the Cometly Webhooks guide to:- Map the webhook data to the appropriate fields in Cometly.
- Set up filters so that only the data you want is tracked.
- Activate the webhook.
Check it worked
In Events Manager, your webhook event shows a switch that is turned on in the Status column. Test envelopes completed before you activated the webhook are not processed, so complete one more envelope in Docusign. Then open the Events Log tab: the event appears there within 60 seconds, with SUCCESS in the Details column.Frequently asked questions
Does Cometly have a native Docusign integration?
No. Docusign connects to Cometly through a webhook, as described on this page. If you would rather build the connection as a Zap, you can also send events to Cometly with Zapier.Which Docusign fields do I need to map in Cometly?
Email and Event Time are required. If the data Docusign sends has no event time you want to use, choose The time we receive the event for Event Time, and Cometly uses the time the event arrives. You can map more fields with Add Field.How long does it take for a signed Docusign envelope to show up in Cometly?
The event shows in the Events Log within 60 seconds of being sent. It can take up to 15 minutes to appear in the reporting areas, such as the Report Builder or Ads Manager.Next steps
- Map fields, add filters and activate your webhook
- Use the Events Log to check incoming events
- Learn how events work in Cometly
- Send events to Cometly with Zapier