

comet_token, the ID Cometly gives each visitor) into CallTrackingMetrics, then send call webhooks back to Cometly.
This matters when leads phone you instead of filling in a form. When CallTrackingMetrics sends the comet_token with each call, Cometly can match the call back to the ads and traffic sources that generated it, so you can see which campaigns make the phone ring.
Cometly only records a call when the webhook includes the
comet_token custom field. Calls that arrive without it are rejected, so complete every step below.Prerequisites
Before you start, make sure:- You have admin rights in CallTrackingMetrics.
- Your CallTrackingMetrics account is on a Marketing Pro plan or higher.
Step 1: Buy a tracking number
- Log in to your CallTrackingMetrics account.
-
In the left-hand menu, click Numbers, then Tracking Numbers.
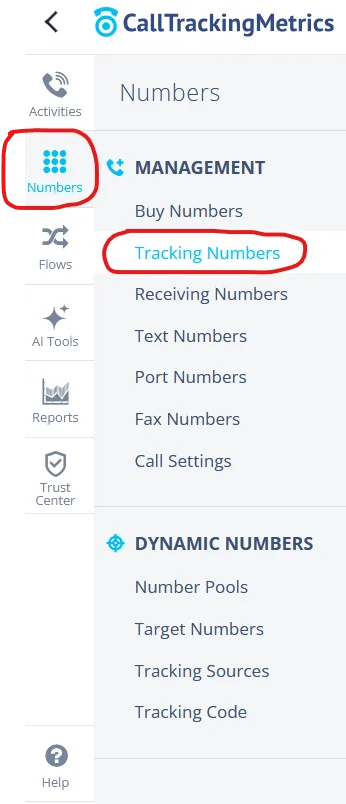
- Click the Buy Numbers button.
- Select a number and click the + icon.
- Click Confirm & Purchase to complete your purchase.
Step 2: Create a target number
-
Go to Numbers, then Target Numbers.
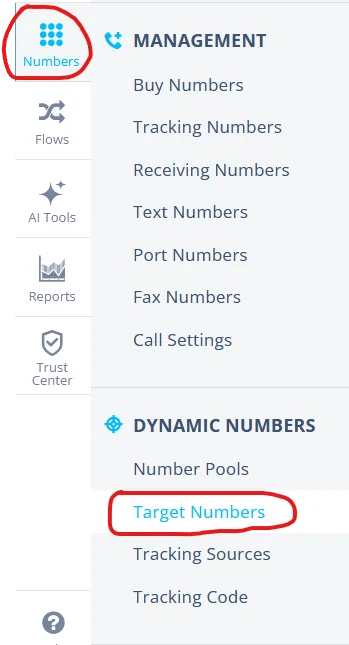
- Click New Target Number.
- In the Target Number field, enter the phone number displayed on your landing page. CallTrackingMetrics replaces this number dynamically.
- Set Match Type to Phone Match.
- Click Save Changes.
Step 3: Create a tracking source
-
Go to Numbers, then Tracking Sources.
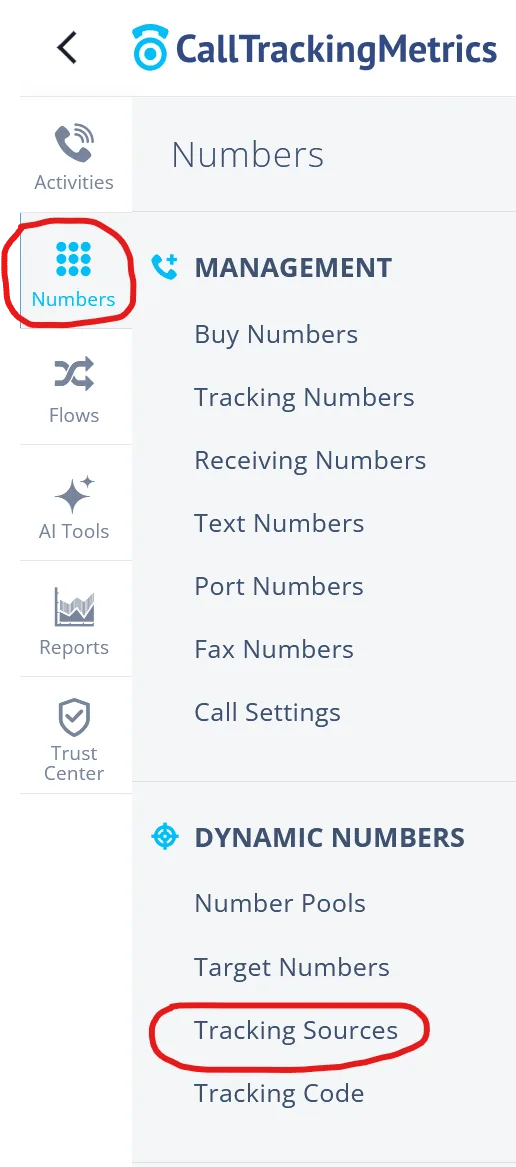
- Click New Tracking Source.
-
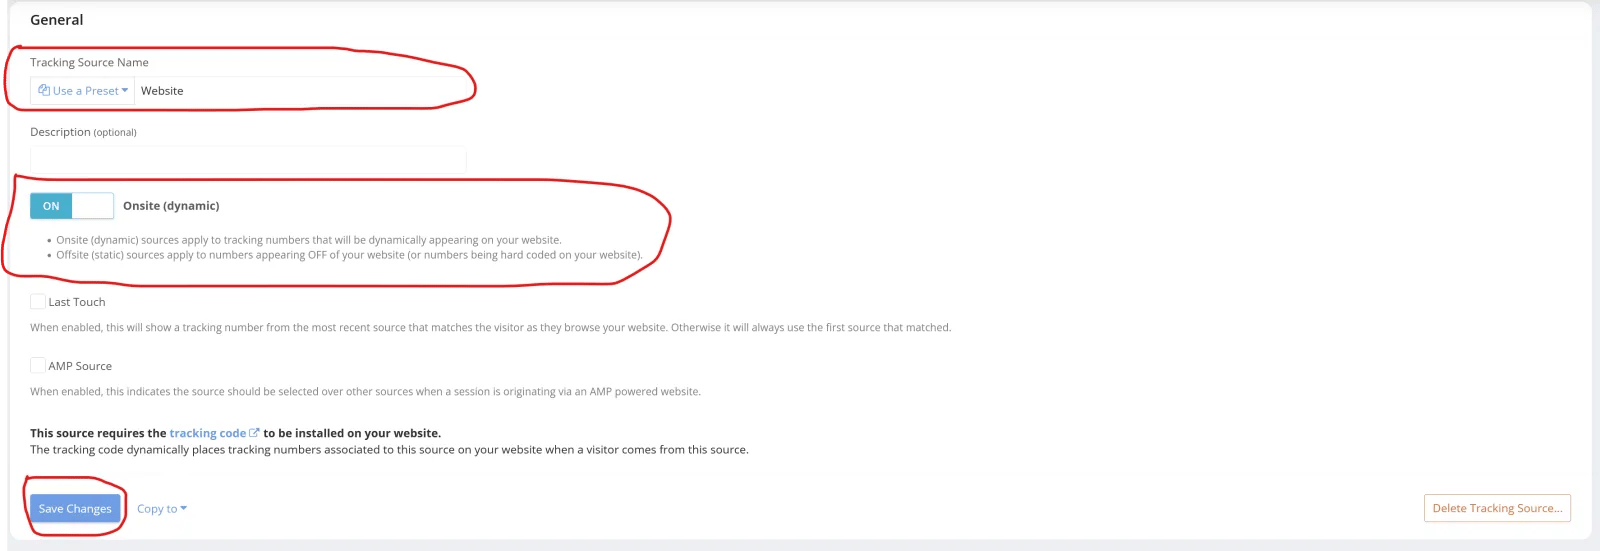
In the General section:
- Enter a Tracking Source Name.
- Toggle Onsite (dynamic) on.
- Click Save Changes.
-
In the Matching Conditions section, open the Landing URL tab:
- Enter your landing page URL.
- Click Save Changes.
Step 4: Install the tracking code
-
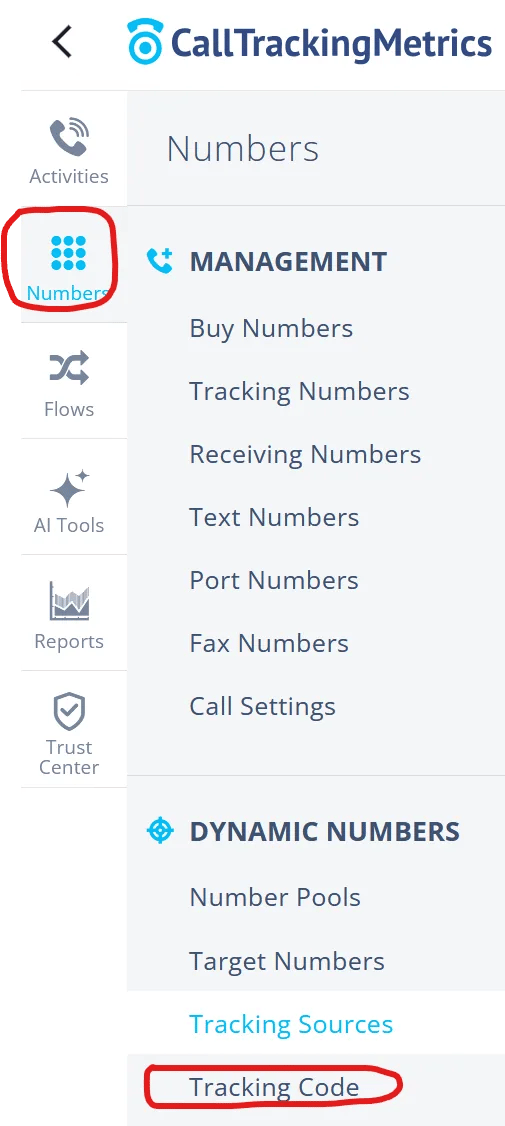
Go to Numbers, then Tracking Code.
-
Copy your Tracking Code Script and paste it into the
<head>section of your landing page. - Scroll down to Advanced Options, then expand the Custom Tracking Code section.
-
Paste the script below into the Custom Tracking Code box. Replace
YOUR-COMETLY-PIXEL-HEREwith thesrcURL of your Cometly pixel. To find it, go to Setup in Cometly, open the Install the Cometly pixel step, and copy the URL insidesrc="..."from the code under Install the pixel. See Install the pixel for details. - Click Save Changes.
Step 5: Create a custom field for the Comet token
-
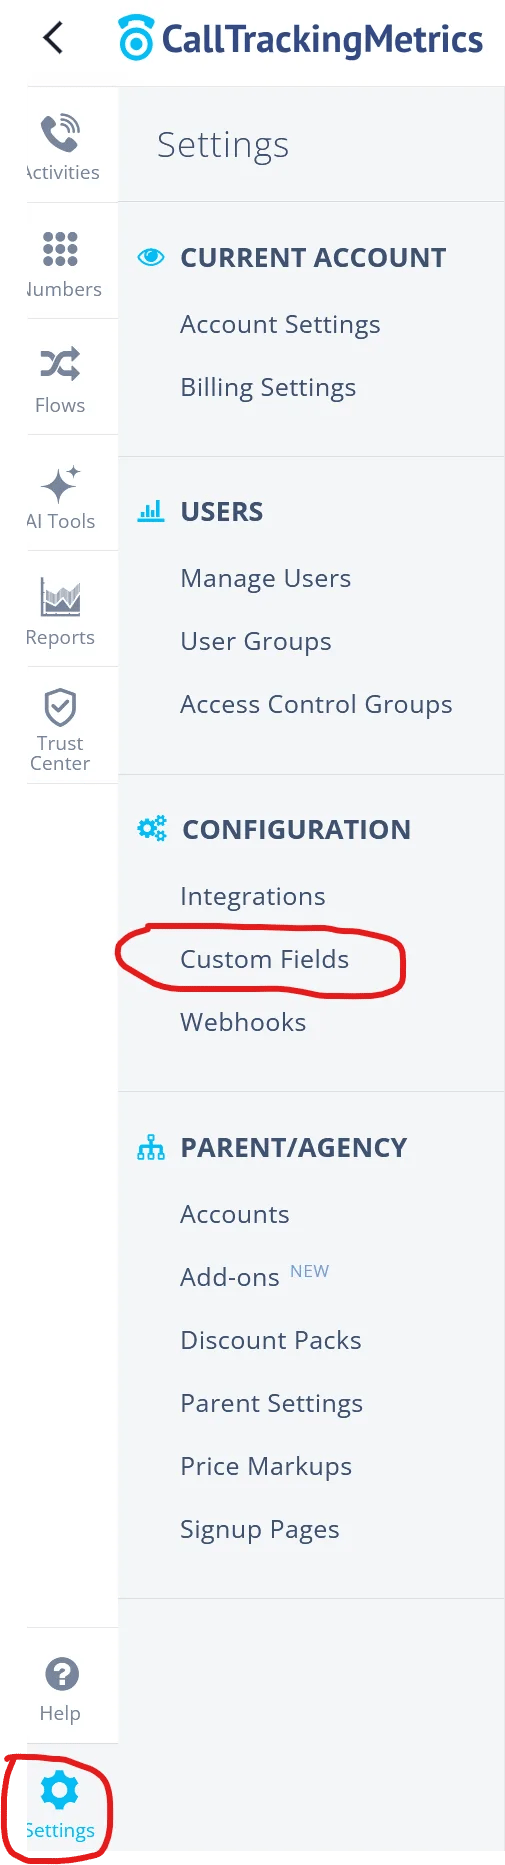
Go to Settings, then Custom Fields.
- Under the Contact section, click Add Field.
-
Enter the following details:
- Field Name: Comet token
- Type: Text
- Save to: Activity
- Check Log Visible

- Click Save Changes.
Step 6: Add an Update Field action
- After saving the field, click Add Action.
- Select Update Field.
- In the fields list, select Comet token.
- Under Set value to, select Session.
-
Enter
_comet_tokenas the value.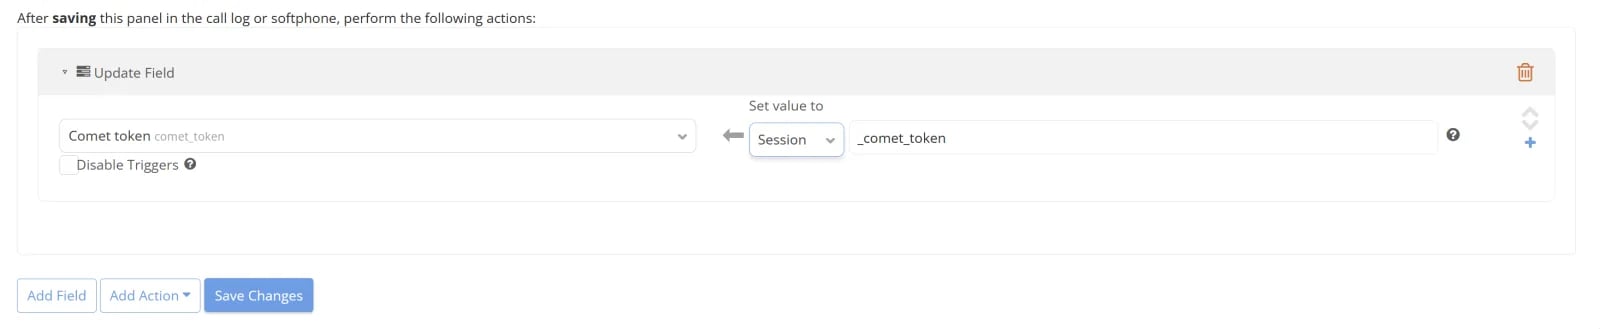
- Click Save Changes.
Step 7: Create a trigger
-
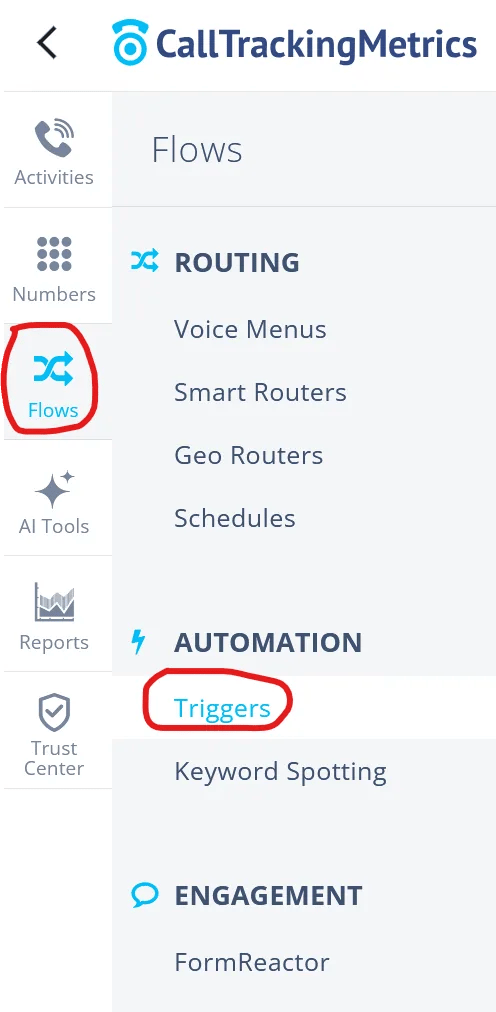
Go to Flows, then Triggers.
- Click New Trigger.
-
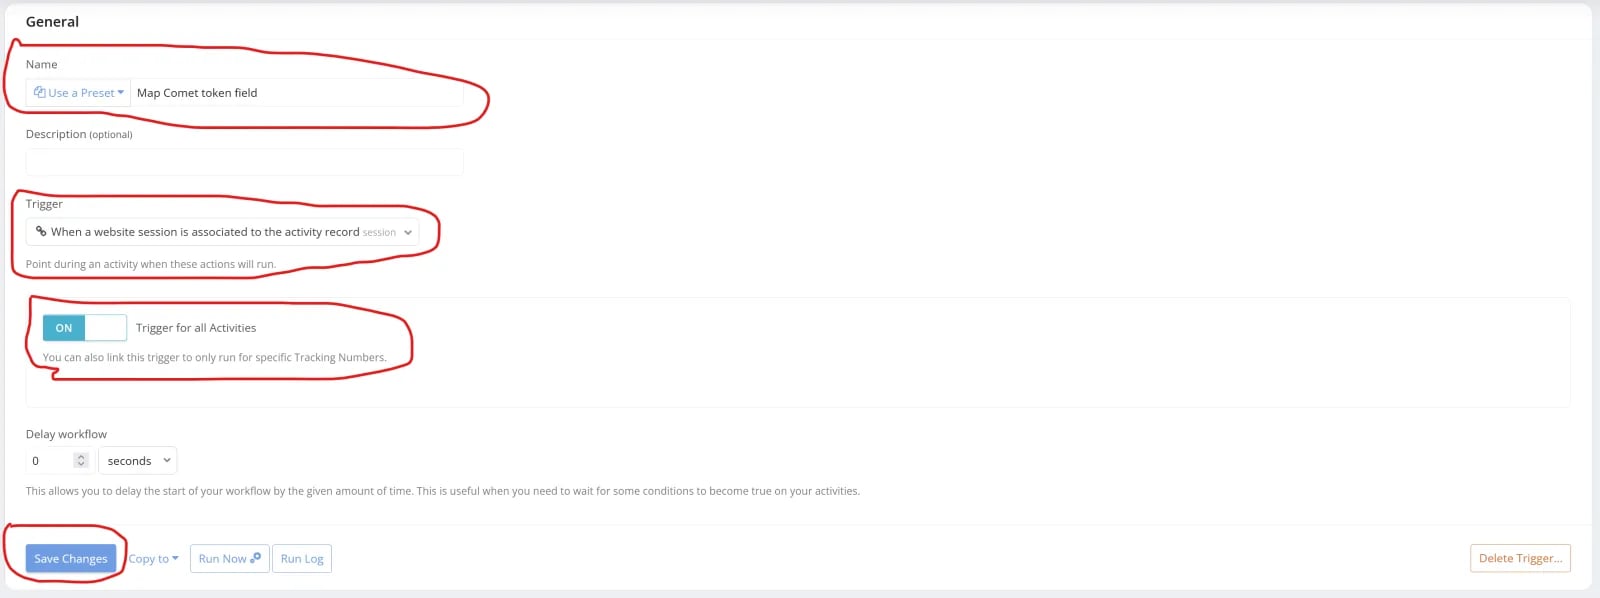
In the General section:
- Enter a name for the trigger.
- Set Trigger to When a website session is associated to the activity record.
- Toggle Trigger for all Activities on.
- Click Save Changes.
-
In the Workflow section:
- Click + Add Workflow.
- Remove the default rule (trash icon).
- Click Add Action and select Update Field.
- Fill in the fields the same way as in step 6 (Comet token, Session,
_comet_token). - Click Save Changes.
Step 8: Activate CallTrackingMetrics in Cometly
- Log in to Cometly.
-
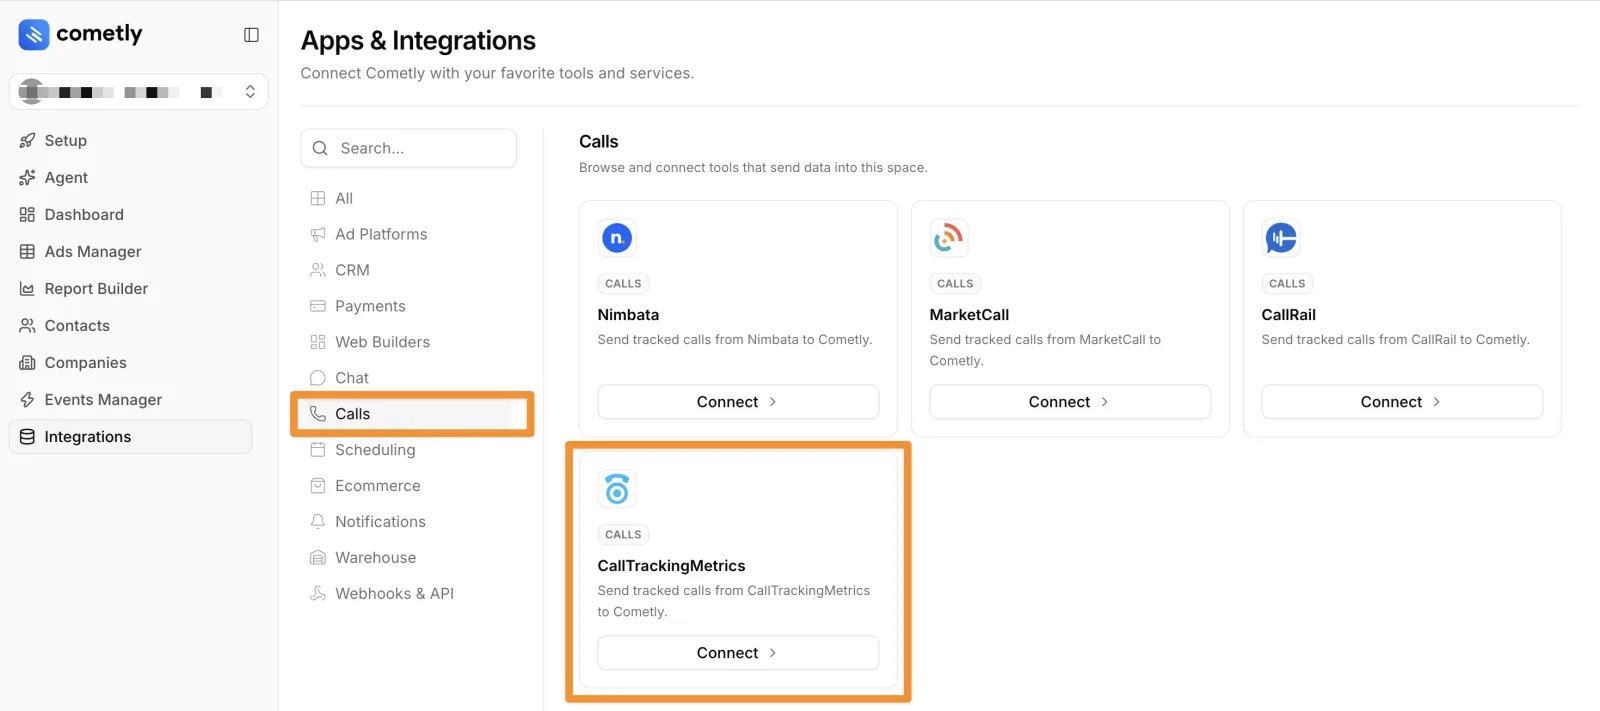
Click Integrations in the sidebar, select the Calls category, and click Connect on the CallTrackingMetrics card.
-
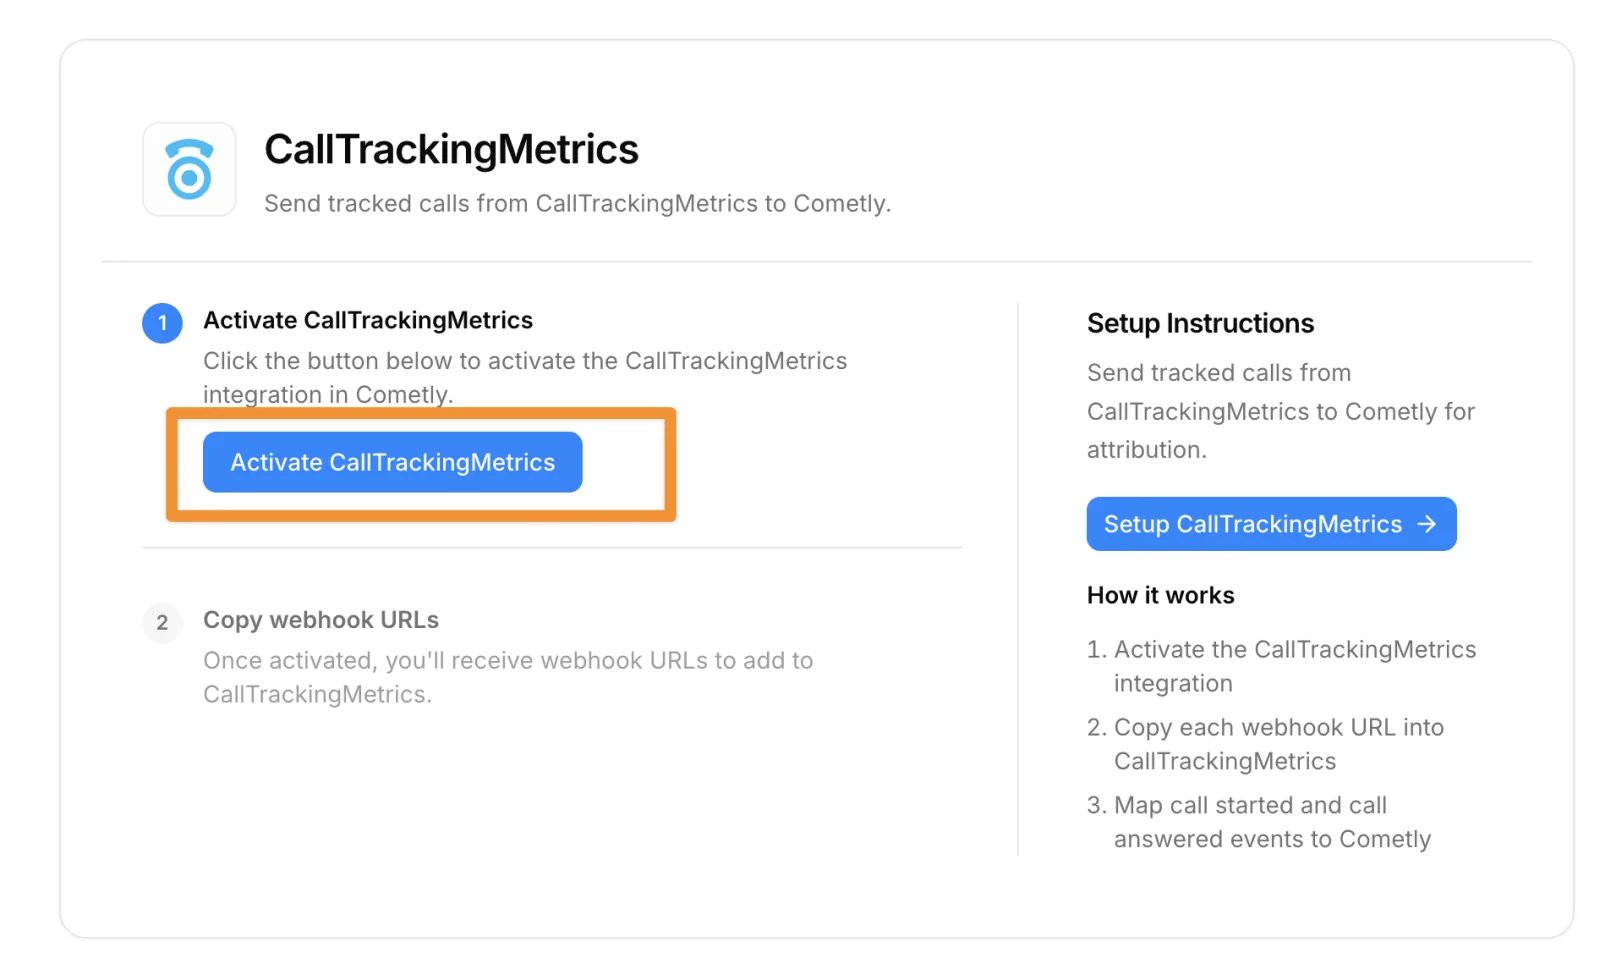
Click Activate CallTrackingMetrics.
-
After activation, the page shows two webhook URLs under Copy the webhook URLs:
- Call Started
- Call Answered
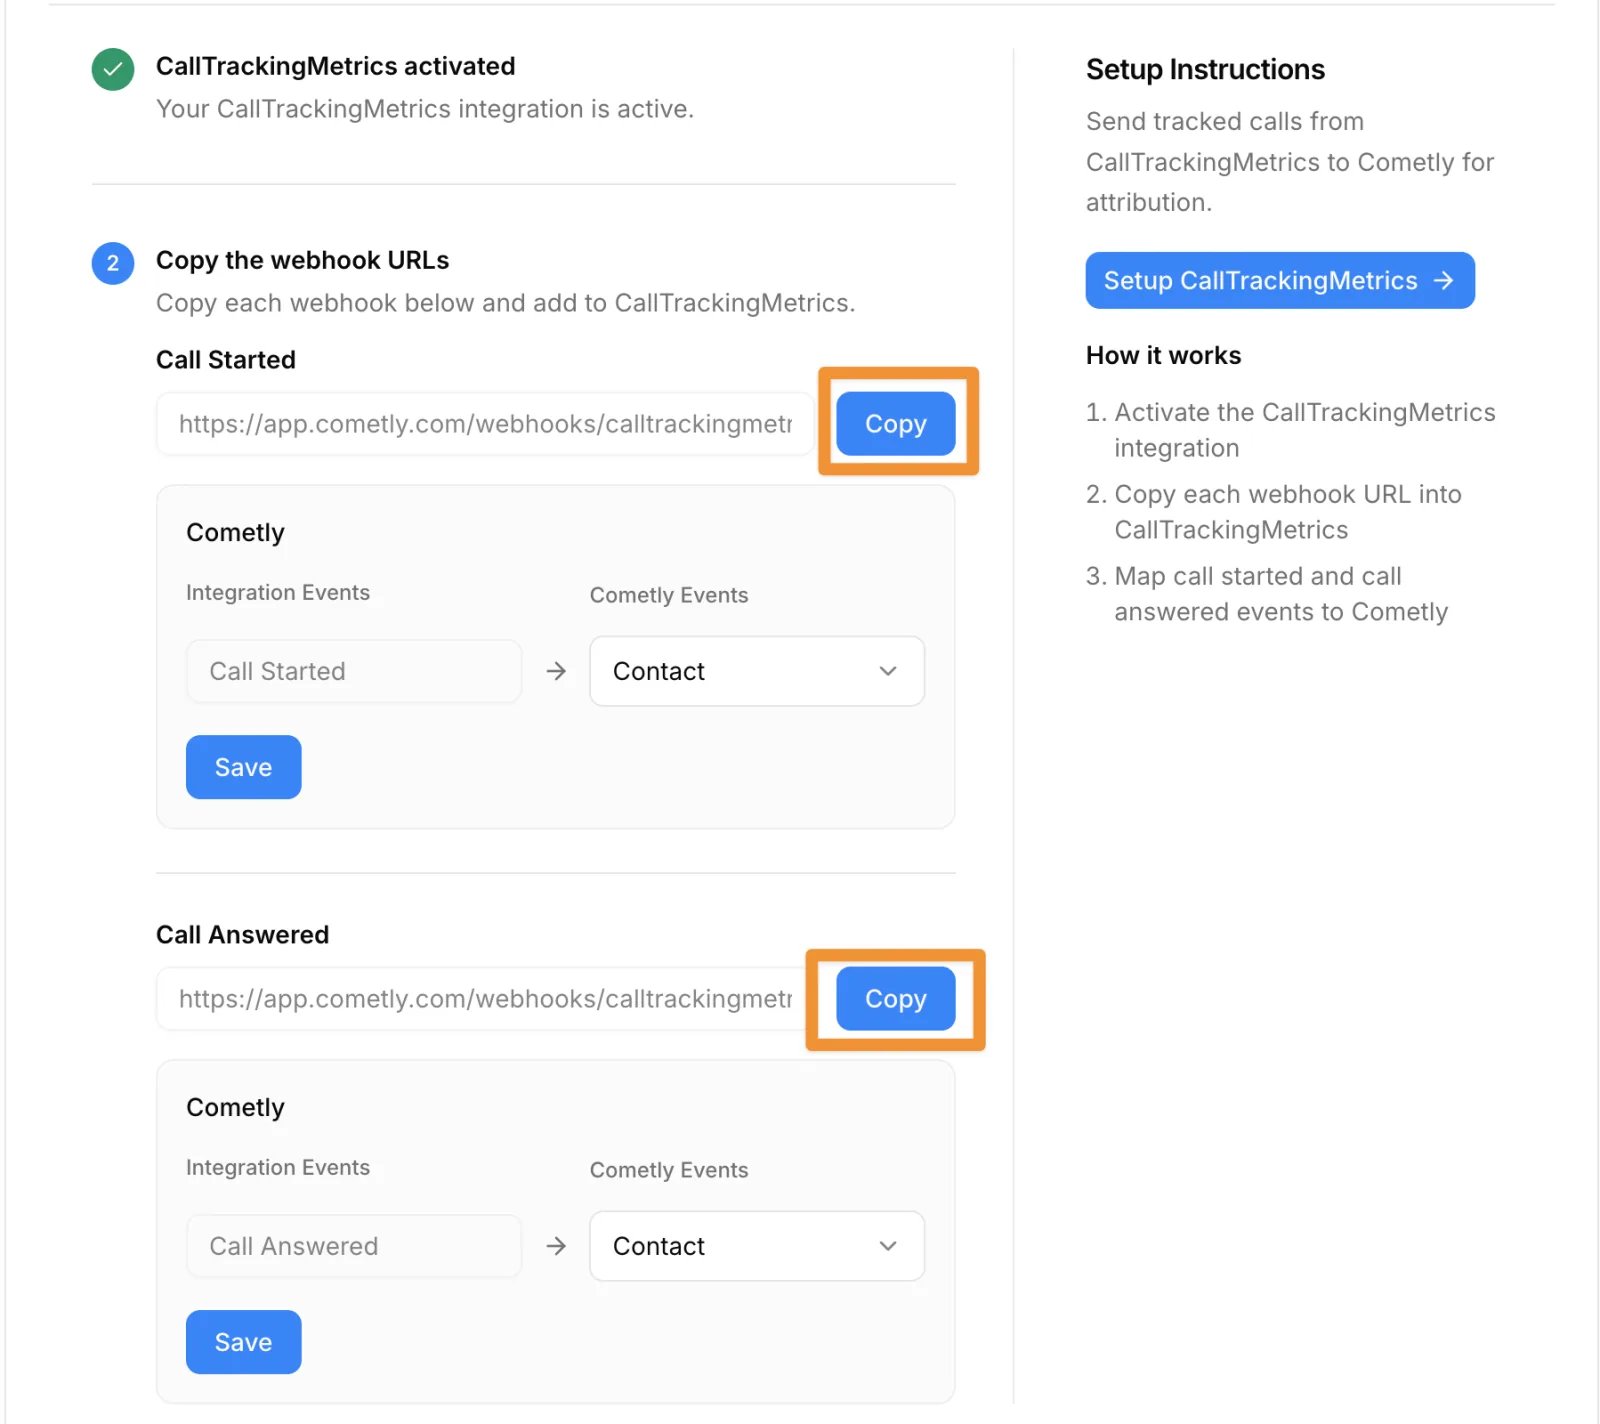
- Under each webhook URL you plan to use, pick the Cometly event the call should be recorded as in the Cometly Events dropdown, then click Save. The dropdown starts on Contact. Click Save even if you keep Contact, so the mapping is stored.
Step 9: Create webhooks in CallTrackingMetrics
-
In CallTrackingMetrics, go to Settings, then Webhooks.
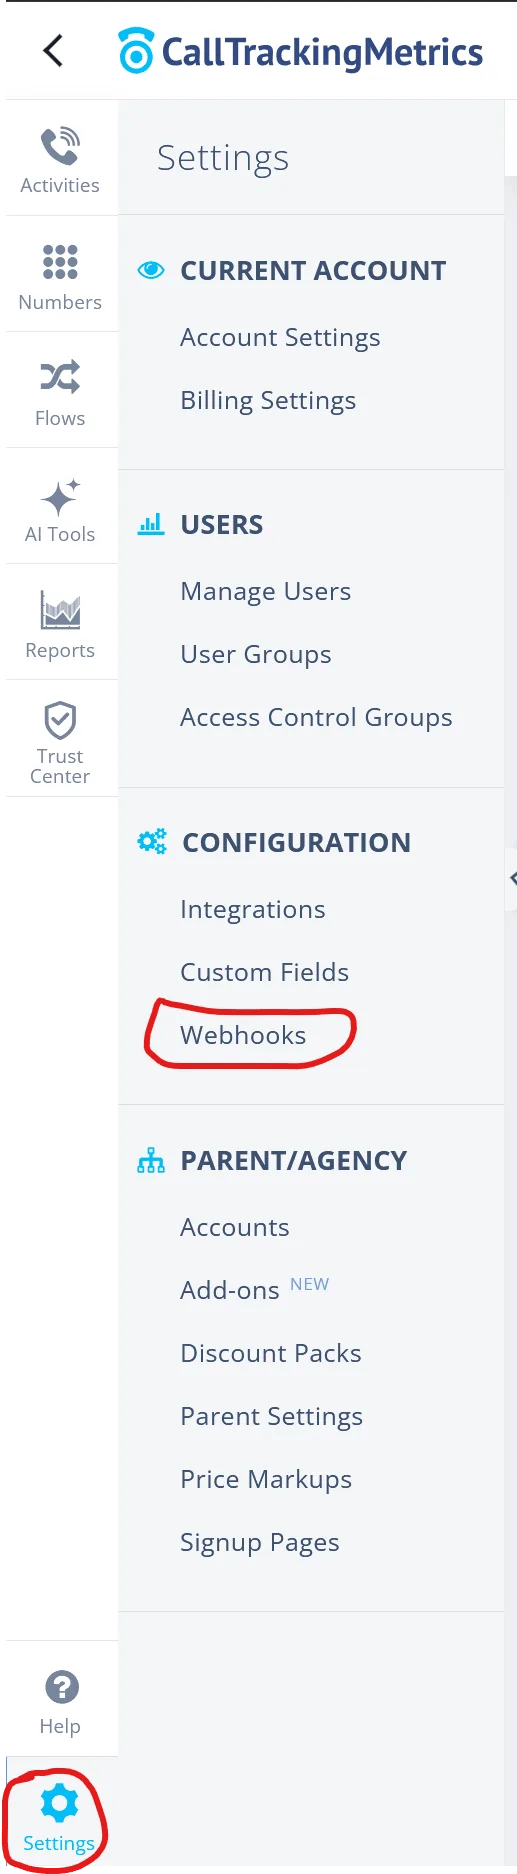
- Click New Webhook.
- Enter a name for your webhook.
-
Choose a trigger:
- For Call Started, select When an activity is received [start].
- For Call Answered, select When an agent answers a call queue [answered].
-
In the Connection section:
- Paste the matching webhook URL you copied from Cometly.
- Set Request Body Type to Log Data.
- Click Save Changes.
- Repeat for the other event type if you want to track both.
Check it worked
Visit your landing page, then call the tracking number it shows. In Cometly, open Events Manager and click the Events Log tab, with Source set to Server. The call appears in the log under the Cometly event you mapped it to.Frequently asked questions
Do I need both the Call Started and Call Answered webhooks in CallTrackingMetrics?
No. Each webhook URL works on its own, so you only create a webhook in CallTrackingMetrics for the event types you want to track. Use Call Started to record a call as soon as it comes in, and Call Answered to record a call when an agent answers it.Which Cometly event is a CallTrackingMetrics call recorded as?
By default, both Call Started and Call Answered are recorded as a Contact event. To use a different event, pick it in the Cometly Events dropdown under the webhook URL on the CallTrackingMetrics page in Cometly, then click Save.What call data does CallTrackingMetrics send to Cometly?
Cometly reads thecomet_token custom field, the caller’s name, the caller’s phone number and the time of the call from each webhook. The token links the call to the visitor’s journey, and the name and phone number are saved with the event.
Next steps
- Understand how events work in Cometly
- Learn what the comet_token is and how it links a call to a visit
- Send your call events back to the ad platforms
- Set up call tracking with the Cometly API instead