

Before you start
- Place the pixel on every website or domain you want to track: your main domain (for example
cometly.com) and any subdomains (go.cometly.com,blog.cometly.com,academy.cometly.comand so on). - The pixel goes in the
<head>section of every site you want to track, so you need to be able to edit your site’s code or its header settings. - Verification opens your website in a pop-up window, so allow pop-ups from Cometly in your browser.
Open the pixel step
In the left sidebar, click Setup, then open step 2, Install the Cometly pixel. The step has five numbered parts: Add domains, Pixel options, Install the pixel, Verify your pixel and Test form tracking.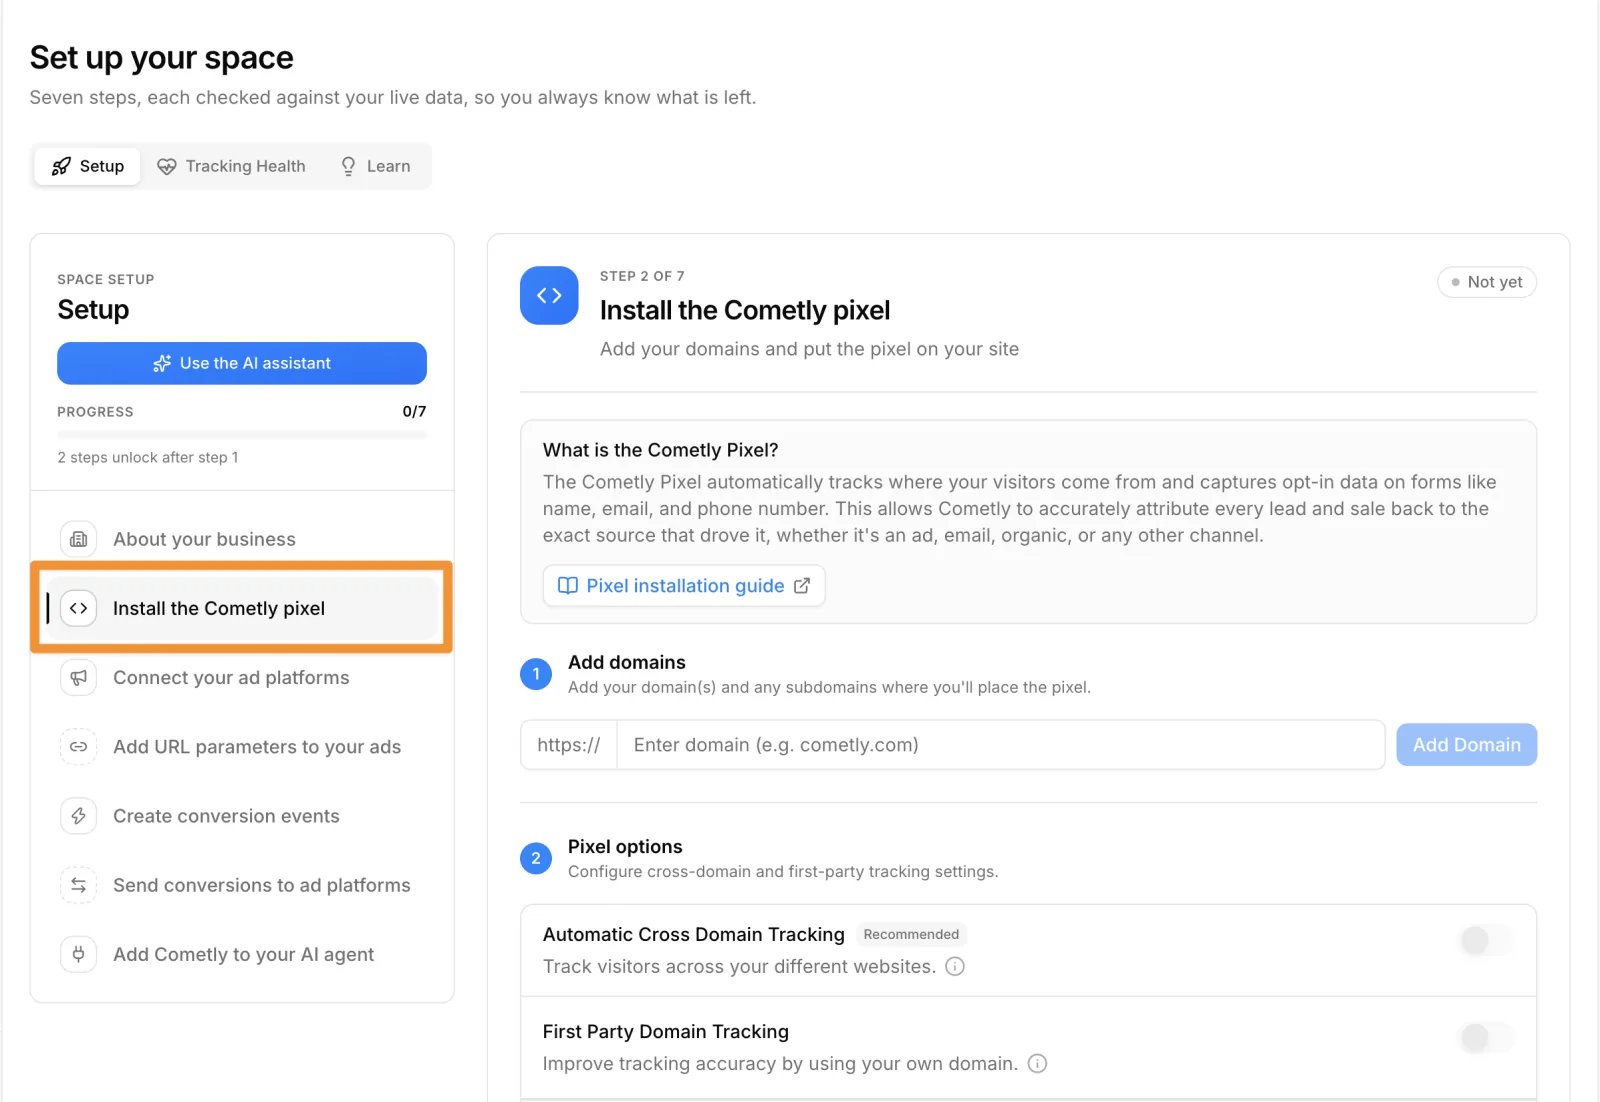
Add your domains
Under Add domains, add each domain and subdomain where you will place the pixel.- Open your website in a browser and check whether the address includes
www.when the page loads.- If it does, include
www.when you add the domain (for examplewww.yourdomain.com). - If it does not, leave
www.out (for exampleyourdomain.com).
- If it does, include
- Enter the domain and click Add Domain.
Install the pixel
Under Install the pixel, click Copy Code and paste the script into the<head> section of your website (or websites).
For platform-specific instructions, see pixel installation by platform.
The script changes when you add or remove domains, or change a setting under Pixel options. If Cometly tells you your tracking script has changed, copy it again and replace the old one on your website.
Verify the pixel
- Under Verify your pixel, click Verify next to a domain.
- A dialog explains that Cometly will open your website in a pop-up window and check whether the pixel is installed. This usually takes a few seconds. Do not close the pop-up until the check is finished.
- Optional: to check one page instead of the home page, expand Test a specific page and enter the page path. SaaS companies that only add the pixel to their login and registration pages typically use this.
- Click Verify in the dialog.
Verify an app domain (SaaS)
When you verify an app domain (likeapp.cometly.com), enter the path of the page you land on after logging in.
If you are already logged in, opening app.cometly.com redirects you straight to a page such as https://app.cometly.com/dashboard. If you leave the path empty, Cometly cannot match the redirect, so the verification fails.
To fix it, expand Test a specific page in the verification dialog and enter the path you land on after login.
Example:
- You are verifying
app.cometly.com. - After login, the site redirects you to
https://app.cometly.com/dashboard. - In the path field, enter
dashboard(only the path, not the full URL). - Click Verify.
If verification fails
See the troubleshooting section below, or the pixel troubleshooting guides.Automatic cross-domain tracking
Example: if traffic flows fromcometly.com to app.cometly.com, cross-domain tracking makes sure the visitor is tracked as the same person on both domains. SaaS companies with a separate app domain need it.
Under Pixel options, turn on Automatic Cross Domain Tracking. You need at least one domain under Add domains before you can turn it on. Once it is on, your domains use the comet_token to recognize the same visitor on each of them.
There are two ways to set up cross-domain tracking: automatic (recommended) and manual. Both are covered in Cross-domain tracking.
Use the Cometly Pixel Helper (Chrome extension)
The Cometly Pixel Helper is a Chrome browser extension that helps you check that Cometly is installed correctly on your website. It helps with two things:- Checking for errors in your pixel installation.
- Showing the Cometly events that load on your page, and confirming that the pixel captures data from your opt-in forms.
Check it worked
Under Verify your pixel, each domain you installed the pixel on shows Pixel detected. Once at least one domain is verified, step 2 of Setup counts as complete, and the Pixel Installed check on the Tracking Health tab of Setup passes.Troubleshoot common installation issues
The Setup page loads blank
If the page for installing and verifying the pixel appears blank, it is usually a browser issue. Clear your browser cache and cookies forapp.cometly.com, then refresh the page. See Clear cookies and cache.
The pixel script on your website is incorrect
If the script on your website is not the one Cometly shows for your space, tracking and integrations will not work properly. To fix it:- Replace the script on your website with the one shown in Setup under Install the pixel.
- Make sure the script is in the
<head>section of your website’s code.
Frequently asked questions
Can I install the Cometly pixel with Google Tag Manager?
Yes, the pixel works when it is installed through Google Tag Manager, but you may lose attribution data because of loading delays and privacy blockers. Placing the pixel directly in the<head> section of your website is the recommended setup. Do not do both: a pixel that is hard coded and also added through Google Tag Manager loads twice and causes tracking issues. See Google Tag Manager pixel installation.
How do I check that the Cometly pixel is capturing my forms?
Use Test form tracking, the last part of the same Setup step. It opens a page of your site in a pop-up window and tells you whether Cometly can see the forms on it and their email field. See Test form tracking.What is First Party Domain Tracking, and do I need it?
First Party Domain Tracking is an optional setting under Pixel options that serves the pixel from a subdomain you control instead ofjs.comet-serve.com. Ad blockers are less likely to block a script served from your own domain, so fewer events are lost. The default script keeps working while you set it up. See Set up First Party Domain Tracking.
Next steps
- Connect your ad platforms and ad accounts
- Test form tracking on your pages
- Set up cross-domain tracking
- Set up First Party Domain Tracking
- Check your Tracking Health score