

comet_token, and cross-domain tracking carries that token from one domain to the next.
This matters because a sign-up or sale often happens on a different domain from the page the ad sent the visitor to. With the same token on both, Cometly can tie that conversion back to the ad or channel that brought the visitor in, instead of counting a brand new visitor on the second domain.
Start here
The problem. When a visitor moves between different domains (for example from your marketing website to your application), thecomet_token may change. This breaks tracking continuity and makes it hard to connect what the visitor did on the marketing site with what they did in the app.
The solution. Turn on cross-domain tracking, either automatically or with a manual script. When a visitor clicks a button or link that leads to another of your domains, the comet_token is passed along, so the same token persists for the whole session.
How it works. For example:
- A visitor lands on
cometly.com. - They click a link that takes them to
app.cometly.com. - The
comet_tokenfromcometly.comis passed toapp.cometly.com, so both domains share the same token.
- Automatic setup (recommended)
- Manual setup
Automatic cross-domain tracking setup
All of these steps happen in Setup > Install the Cometly pixel.1
Add your domains
Under Add domains, add every domain and subdomain where the pixel is installed.
2
Turn on Automatic Cross Domain Tracking
Under Pixel options, turn on Automatic Cross Domain Tracking. The switch is disabled until you have added at least one domain.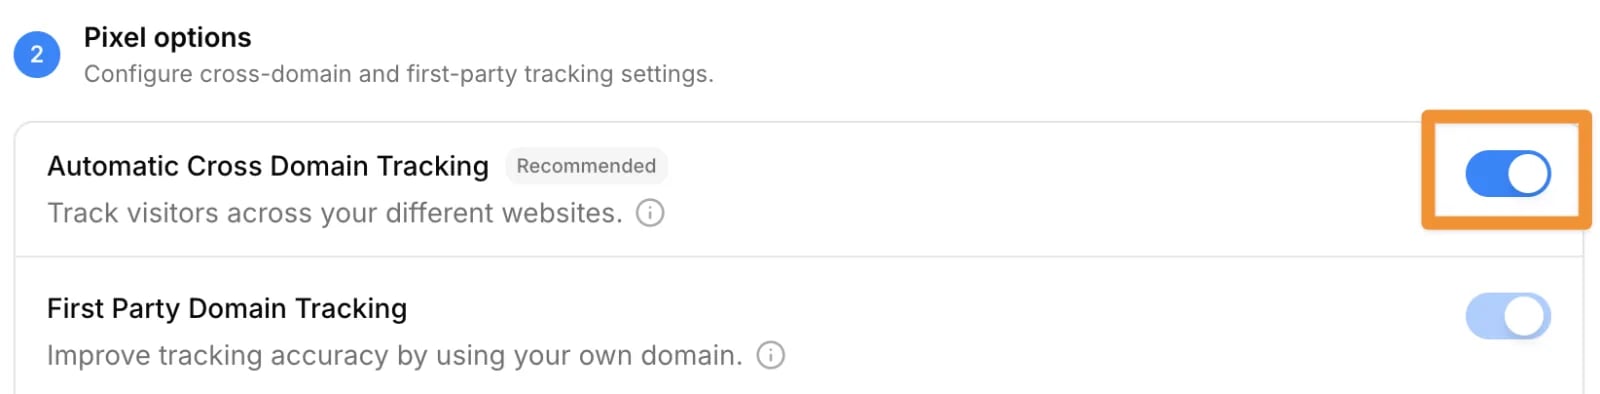
3
Install the updated pixel
Turning the option on changes your tracking script: the list of your domains is added to it. Copy the script again from Install the pixel and replace the one on your site.Add the pixel to the
<head> of every marketing page (including blogs and academies). If you are setting up tracking for a SaaS company, add the pixel to your app’s login and registration pages only, not the entire app. See Pixel setup for SaaS companies.4
Verify your domains
Under Verify your pixel, click Verify for each domain to confirm the pixel is detected.
- Automatic tracking: The
comet_tokenis passed between the domains you added. - One visitor journey: A visitor is recognized as the same person across your websites, instead of each domain treating them as a brand new visitor.
Manual cross-domain tracking setup
If you run into issues with the automatic option, or prefer to configure it yourself, install a domain override script on your marketing site. When a visitor clicks a button or link that leads to your app (for exampleapp.cometly.com), the script links the comet_token from the marketing site to the app domain, so the same token is used for the whole session.
Single domain example
If you are tracking between your marketing site and a single app domain (for exampleapp.cometly.com), use the following script:
Multiple domain example (optional)
If you are tracking several domains (for exampleapp.cometly.com, academy.cometly.com and go.cometly.com), list them all:
Verify cross-domain tracking
1
Check the link for cometly_token_override
-
On your marketing site, hover over a button or link that leads to one of your other domains (for example
app.cometly.com). -
Check that the URL includes a parameter like this:
comet_token from the marketing site is being passed to the app domain.2
Compare the comet_token in developer tools
On the marketing site:
- Right-click and select Inspect.
- Open the Network tab.
- In the search bar, type
cometto filter the network requests. - Look for Fetch/XHR requests and click the relevant one.
- Open the Payload section and find the
comet_token. - Note the last 4 characters of the
comet_token.
app.cometly.com) and repeat the same steps there. Do the same for any additional domains.Check it worked
If the last 4 characters of thecomet_token match on every domain, cross-domain tracking is working correctly.
Frequently asked questions
What happens if I don’t set up cross-domain tracking?
Each of your domains treats the visitor as a brand new visitor, so what they did on your marketing site is not connected to what they do on your app. For SaaS companies and businesses with several domains, it can also lead to events with no source in your reports. See Understanding No Source in reports.Will my own domains show up as referral sources?
No. When you add a domain under Add domains, Cometly also adds it to that space’s referrer exclusion list, so clicks from one of your domains to another (for example fromcometly.com to app.cometly.com) are left out of your referral reports. To exclude more domains, see Exclude referral domains.
Do I need anything else if my app uses Google or social login?
Yes. If people sign up through Google or another social login (OAuth), you need a small extra setup so Cometly can connect the sign-up back to the ad that brought them in. Follow Track OAuth sign-ups.Next steps
- Set up the pixel for a SaaS company
- Track sign-ups that use Google or social login (OAuth)
- Install and verify the Cometly pixel
- Exclude referral domains from your reports
- Fix No Source events