

Open custom event management
- Click Events Manager in the sidebar.
- Click Manage custom events.
You only see Manage custom events if your space role is Administrator, or you own the account.
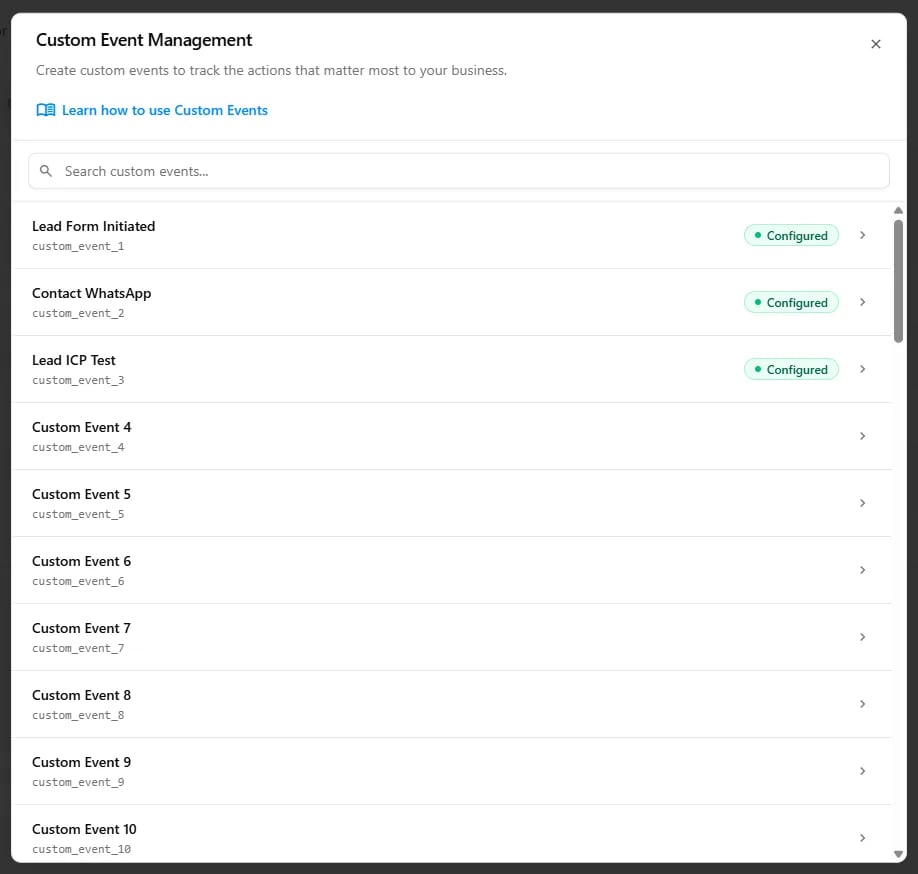
event_name, shown under its name:
custom_event_1custom_event_2custom_event_3- and so on, up to
custom_event_50
event_name when you send events to Cometly with the Cometly API or Zapier.
Configure a custom event
- Click a custom event in the list.
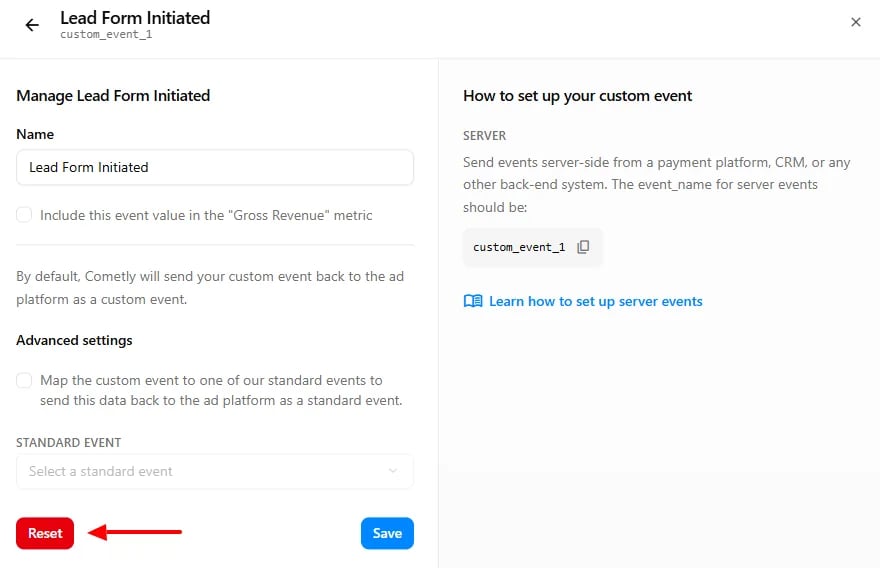
- Give it a Name.
- Choose the options below.
- Click Save.
Include this event value in the “Gross Revenue” metric (optional)
Tick this option if the value of this event should count toward the Gross Revenue metric.- Use it for events that are confirmed revenue.
- Leave it off for events whose value is only potential, such as “Deal Created”. This keeps Gross Revenue limited to revenue you have actually earned.
- ROI (Return on Investment): how much profit you made compared to what you spent.
- ROI%: the percentage return on your investment.
- ROAS (Return on Ad Spend): how much revenue you earned for every dollar spent on ads.
- Net Profit: the profit left after subtracting costs from Gross Revenue.
Map the custom event to a standard event (optional)
By default, Cometly sends your custom event back to the ad platform as a custom event. Under Advanced settings, you can tick “Map the custom event to one of our standard events to send this data back to the ad platform as a standard event” and pick a Standard event (for example Lead or Purchase). Mapping helps when your ads are optimized for a specific event. For example, if you send data with Cometly’s Conversion API (the server-side connection that sends your conversions back to the ad platforms) and your campaigns optimize for Lead, mapping a custom event to the Lead standard event lets the ad platform recognize it and use it for that conversion goal.Check that the event is configured
Once a custom event is saved with a name, it shows a Configured badge in the list, and you can start sending data for it:
Reset a custom event
To clear a custom event and all of its data:- Click the custom event in the list.
- Click Reset.
- Confirm with Yes, reset the data.
Analyze custom event data
Once an event is configured, its data appears in every reporting area of Cometly: the Ads Manager columns, the Report Builder and your dashboards. For each event you get the count of events, the cost per event, the event value and the event ROAS.Check it worked
In Events Manager, click Manage custom events. The event you set up appears at the top of the list under the name you gave it, with a Configured badge. Once data arrives for the event, its metrics show up in the Ads Manager columns, the Report Builder and your dashboards.Frequently asked questions
Can I rename a custom event in Cometly without losing its data?
Yes. Open the custom event, change its Name and click Save. The data stays with the event, because it is stored under the fixedevent_name (for example custom_event_1), not under the name you chose.
Which event_name do I send for a custom event through the API or Zapier?
Send the fixedevent_name of the custom event, such as custom_event_1, not the name you gave it. To find the exact value, open the custom event in Manage custom events and look under How to set up your custom event, where you can copy it.
Can I reuse a custom event slot for a different event?
Yes, by resetting it. A reset clears the event’s name, its settings and all of its past data, so the slot is empty again and you can set it up as a new event. The deleted data cannot be recovered, so only reset an event you no longer need.Next steps
- Create and configure events
- How events work
- Send events with the Cometly API
- Conversion API overview
- Metrics glossary