

Where to find it
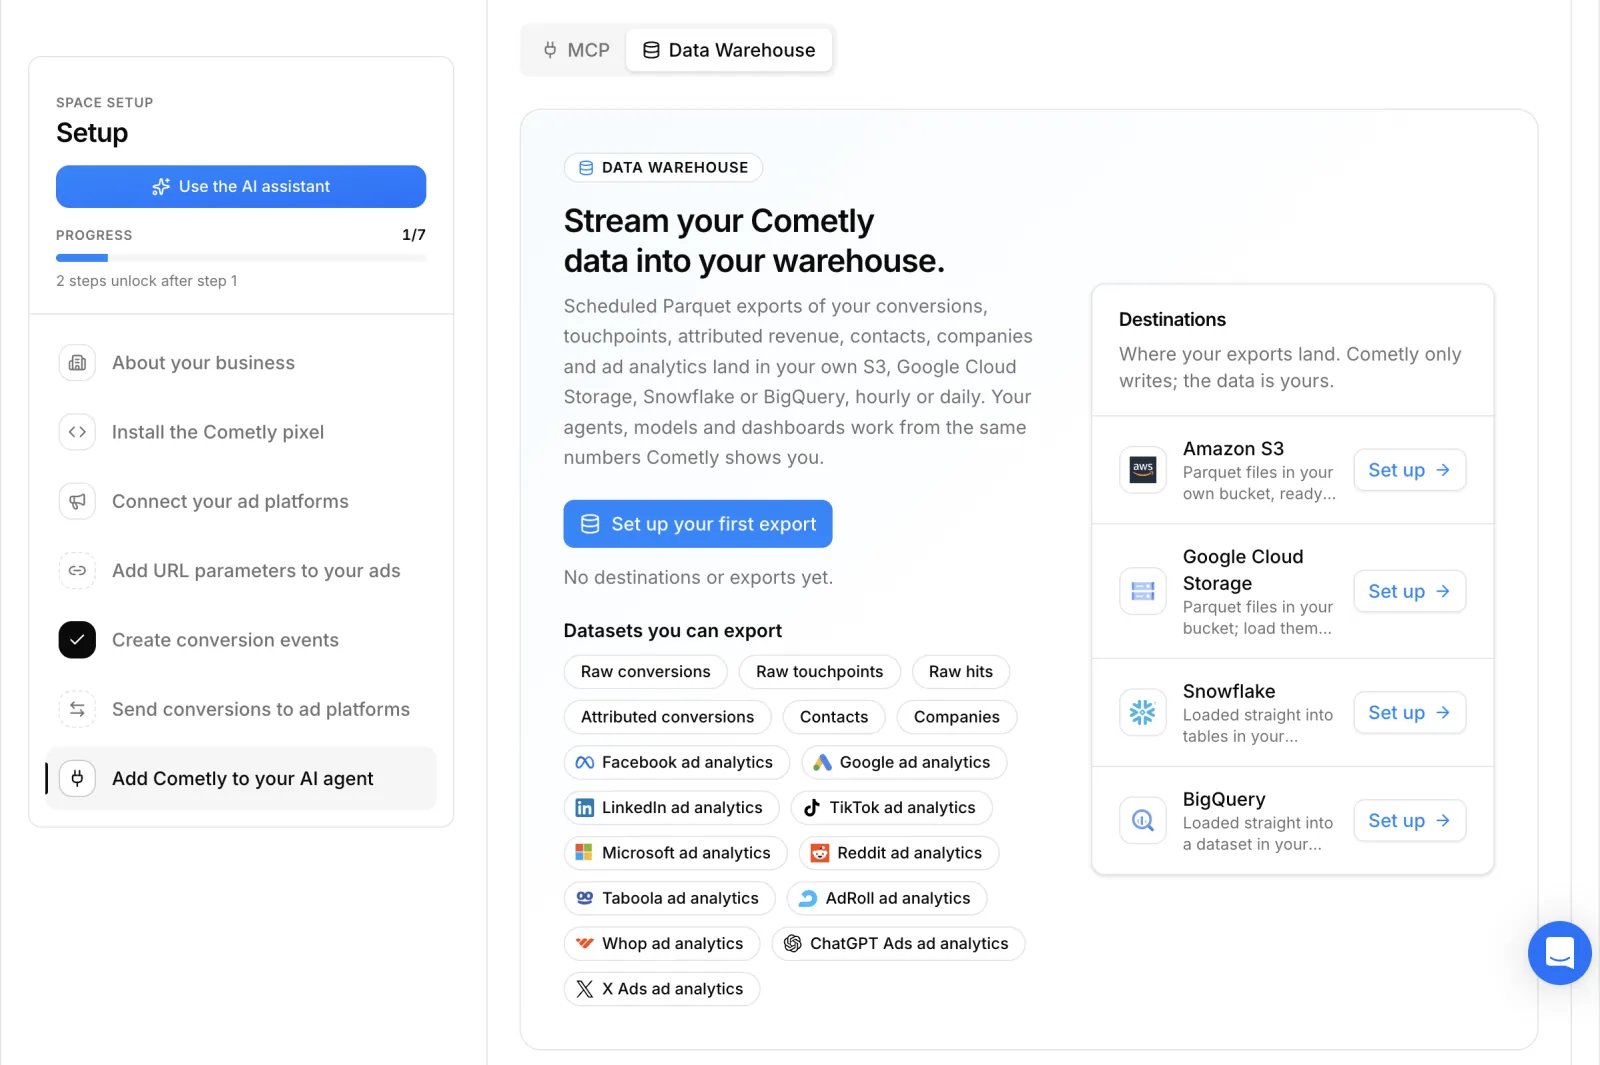
In the left sidebar, click Setup, then open step 7, Add Cometly to your AI agent.MCP tab
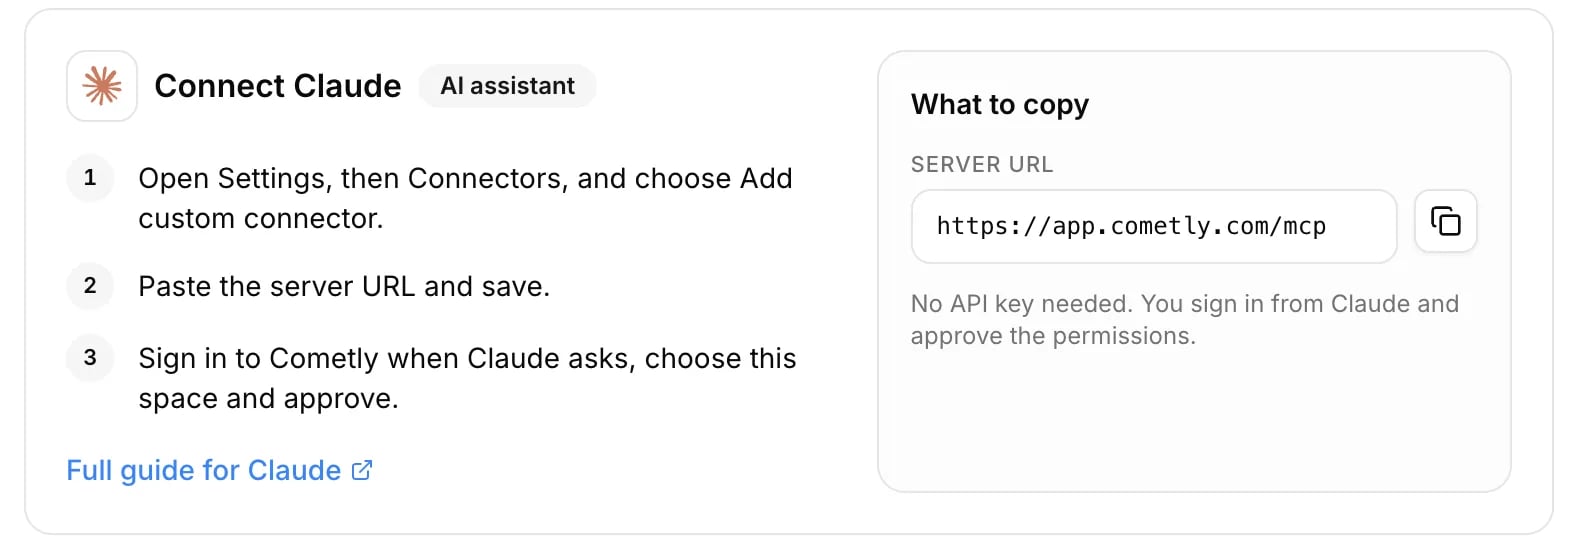
- Your MCP server URL, with a Copy button. There is no API key: you add the URL to your tool, sign in to Cometly from it, pick the space and approve the access.
- Guides: choose your tool (Claude, ChatGPT, Grok, Henry, Cursor, Claude Code, Gemini CLI, VS Code or Windsurf) to see its steps and, under What to copy, the Server URL plus a command or config snippet for the tools that use one. Selecting ChatGPT swaps the URL for the one ChatGPT needs.
- What you can do: example prompts for an AI assistant and for a coding agent.
- Server-side agents and your own integration: create an access token for an agent that cannot sign in through a browser. See Authentication.
Data Warehouse tab
- Set up your first export (Manage exports once you have one), next to a count of your destinations and active exports.
- Datasets you can export.
- Destinations: Amazon S3, Google Cloud Storage, Snowflake and BigQuery, each with a Set up or Manage button.
Check it worked
You cannot tick this step by hand. Its badge shows Connected when either of these is true:- An AI tool connected over MCP has asked Cometly something about this space in the last 30 days.
- At least one data export is active.
Frequently asked questions
Can an AI agent change my Cometly data?
Mostly no. Nearly every tool the agent gets is read-only. Three tools can edit fields on a single contact, company or event, and no tool can create or delete data or change attribution. A connection made by a Viewer has no write tools at all.Can I connect more than one Cometly space to the same AI tool?
Yes. When you approve the connection, you choose one space, specific spaces or All my spaces, plus a default space. The agent works in the default space unless it names another space the connection covers.How do I disconnect an AI tool from Cometly?
Open Settings → Integrations → MCP, find the tool’s token under Server-side (headless) agents and click Revoke. Connections you approved from a tool such as Claude or Cursor appear in that list too, named after the tool. The tool’s next request is refused until you connect it again.Next steps
- MCP overview
- Connect Claude Desktop, ChatGPT, Cursor or Claude Code
- Data warehouse exports
- Create an export
- Set up Cometly