

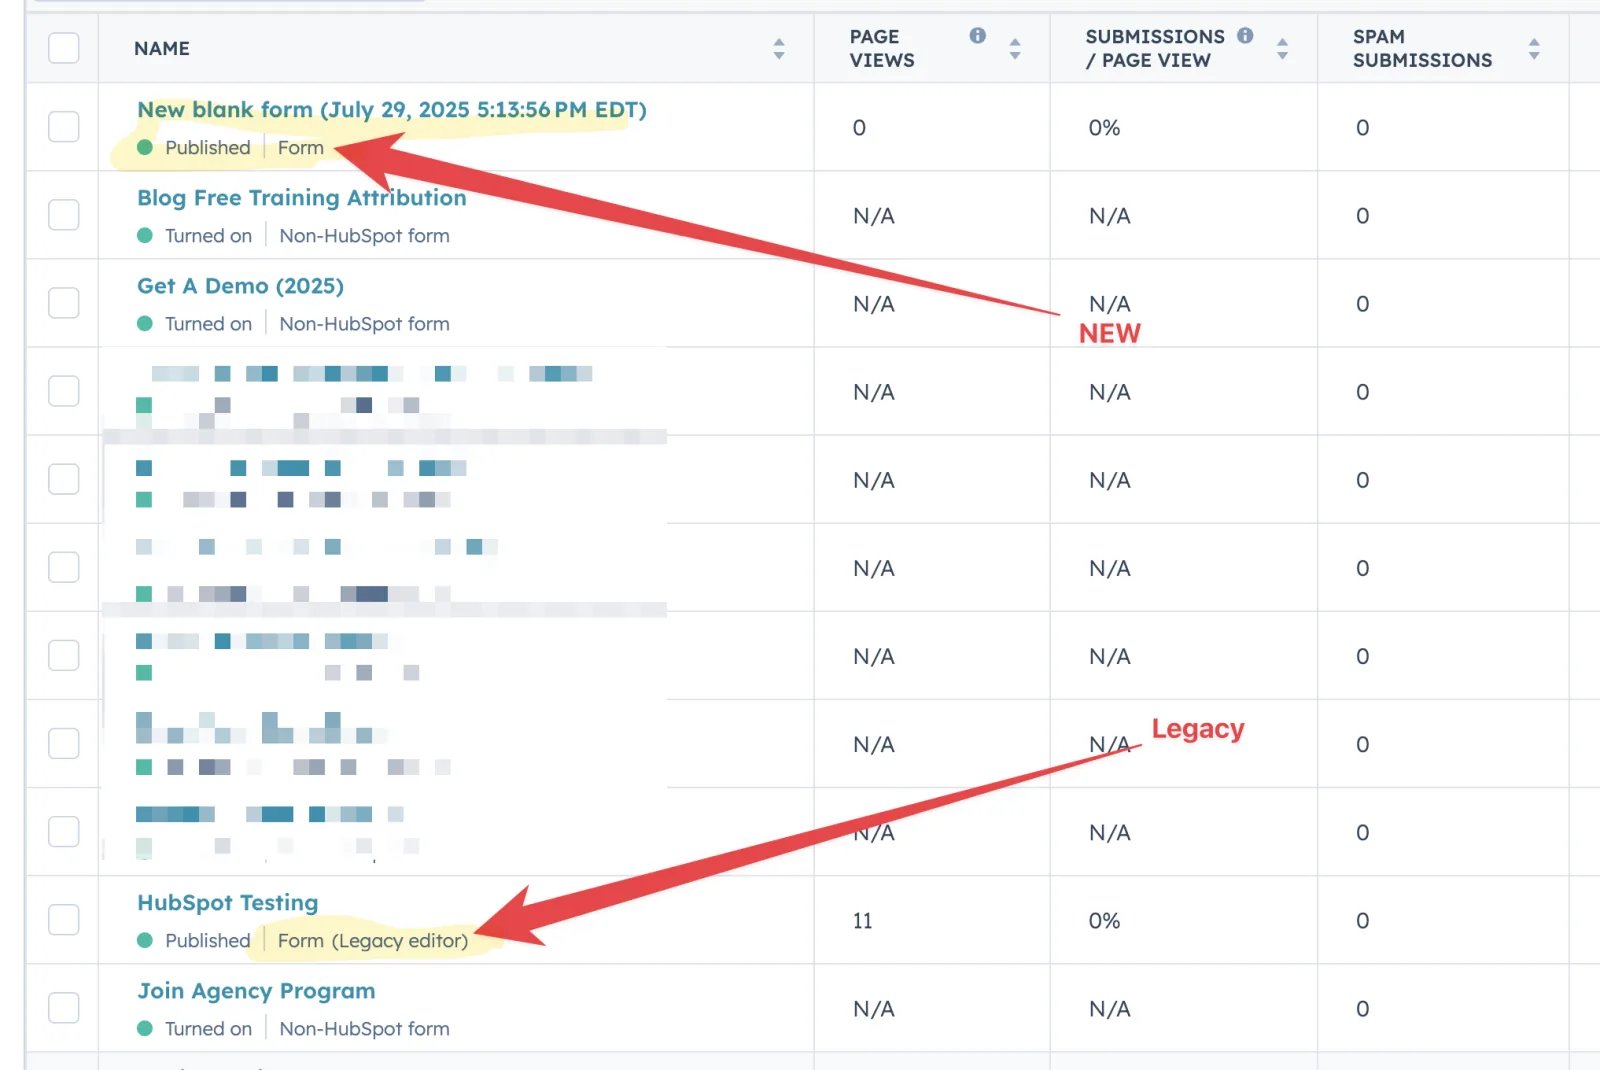
- Legacy forms, built with the old editor.
- New forms, built with the updated editor.
Step 1: Install and verify the Cometly pixel
Make sure the Cometly pixel (the tracking script that records the visitors who reach your site) is installed on every web page that holds one of your HubSpot forms. If you have not installed and verified the pixel yet, see Install the Cometly pixel.Step 2: Add a hidden field to your HubSpot form
1
Add a Multi-line text field
In the HubSpot form editor, click the + sign in the top left to add a new field. Drag a Multi-line text field onto your form, above the form button.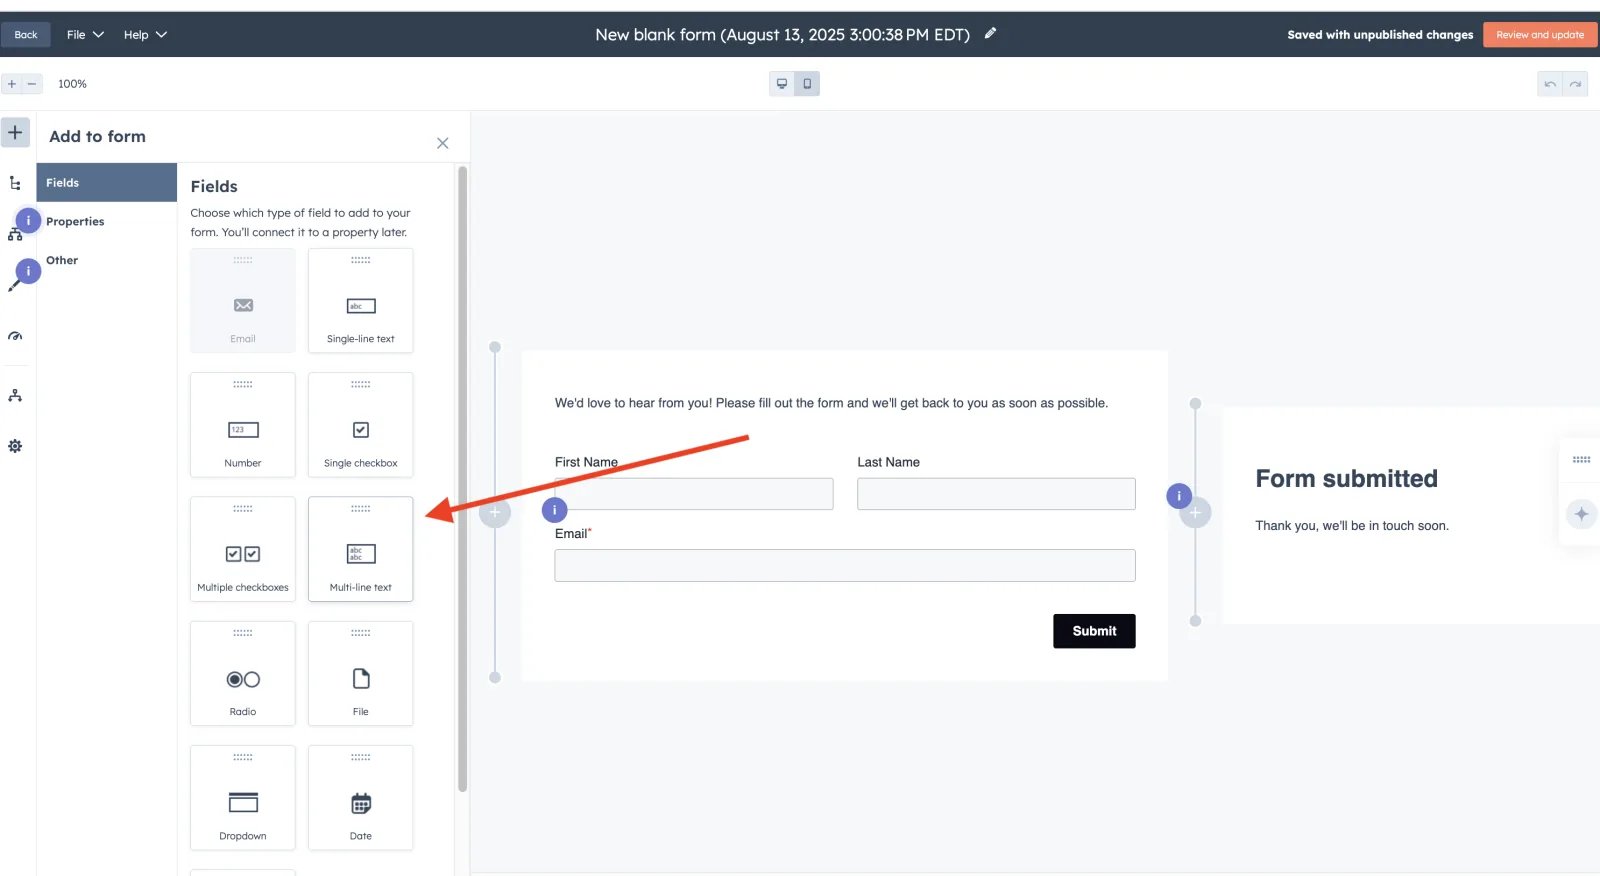
2
Create a new property
Click Create new property.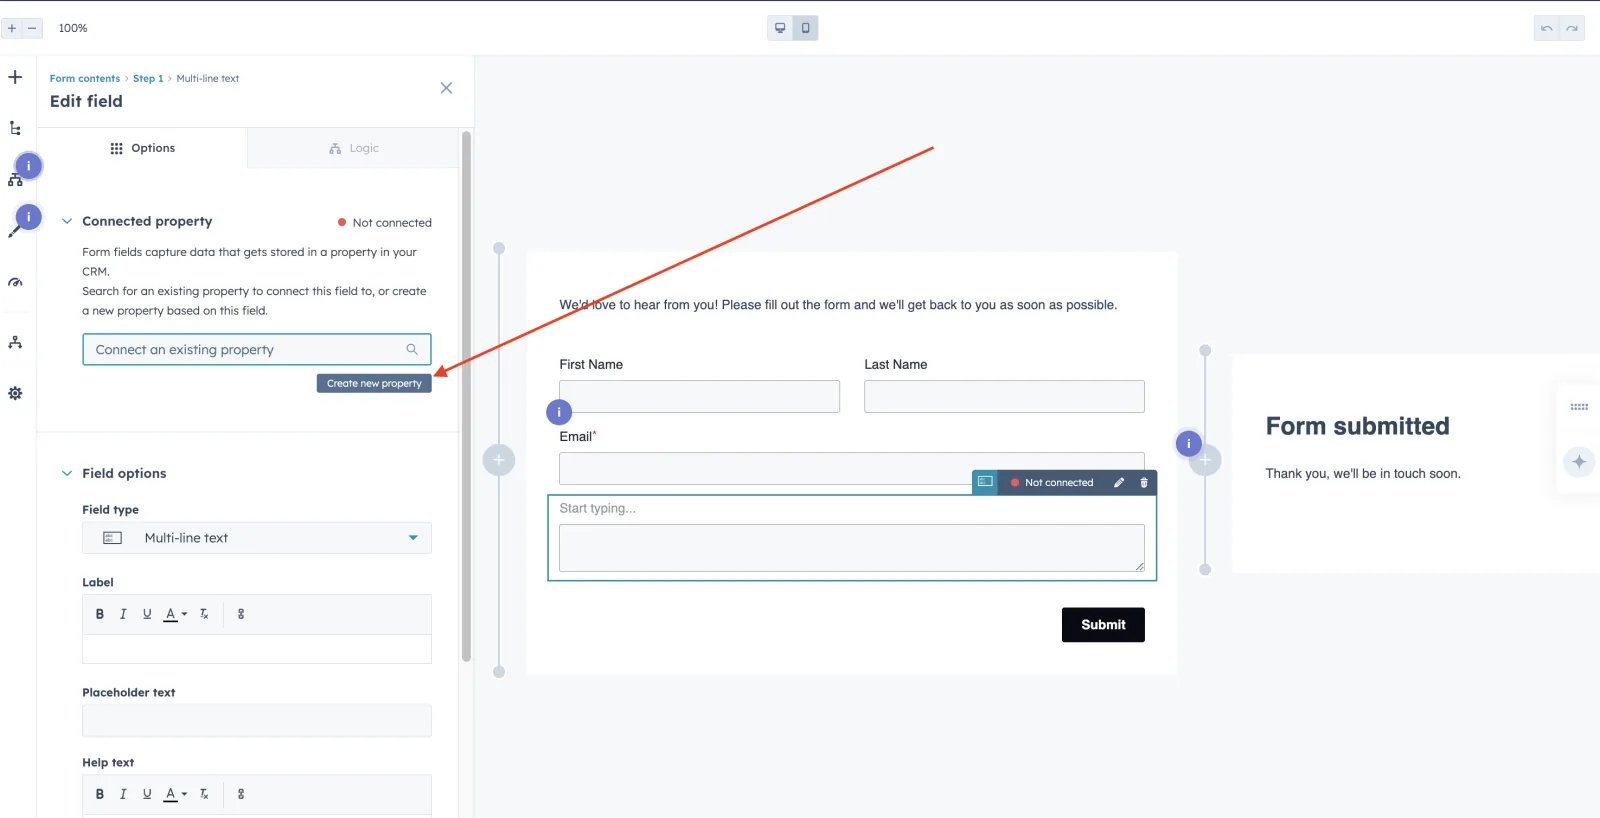
3
Name the property comet_token
For the Property label, enter exactly 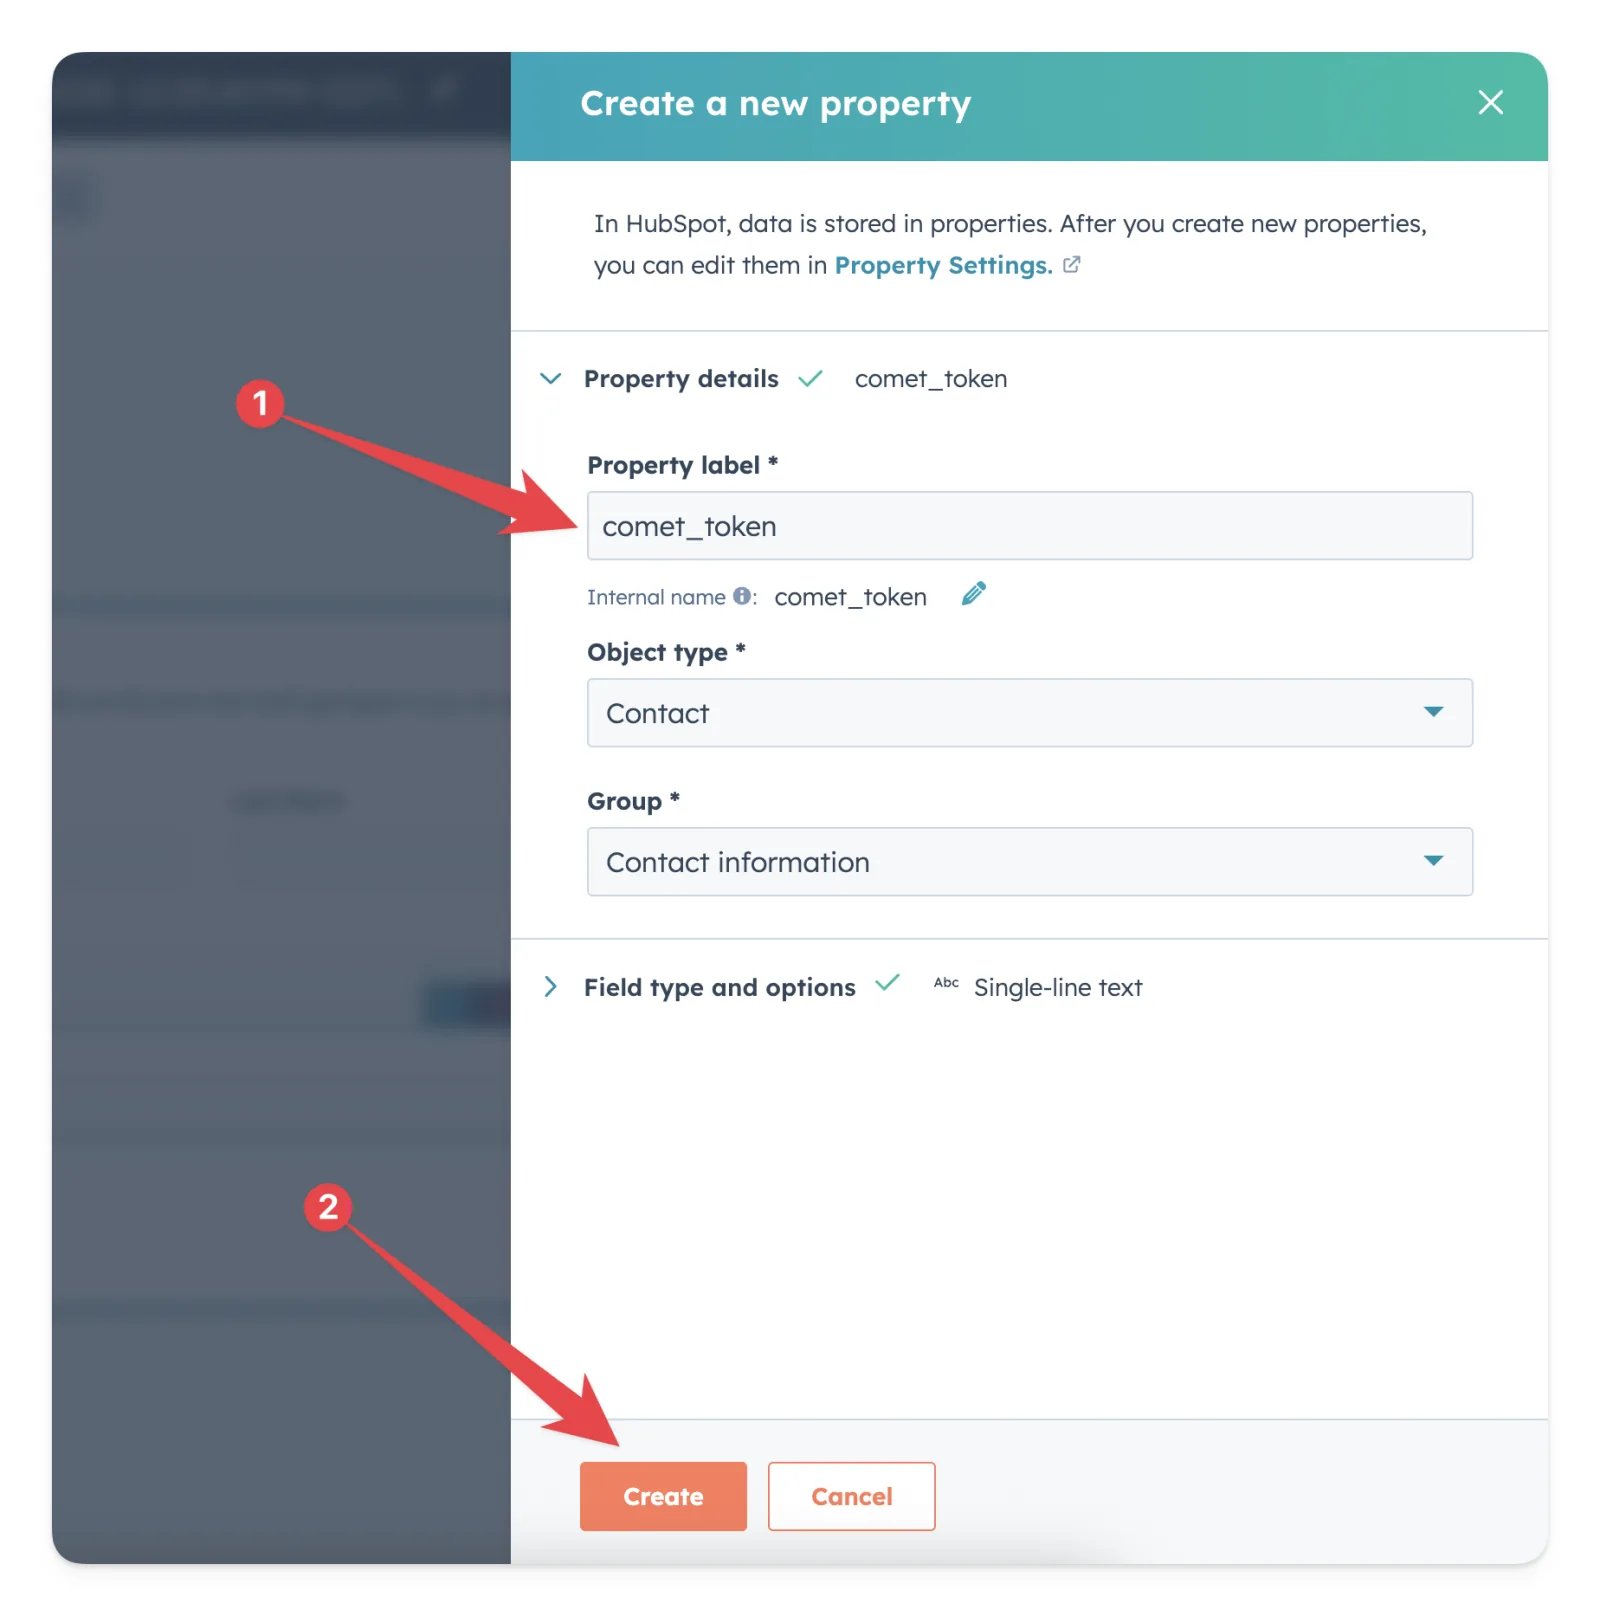
comet_token.- Make sure Object type is set to Contact.
- Make sure Group is set to Contact information.
4
Check the connected property
After the property is created, make sure 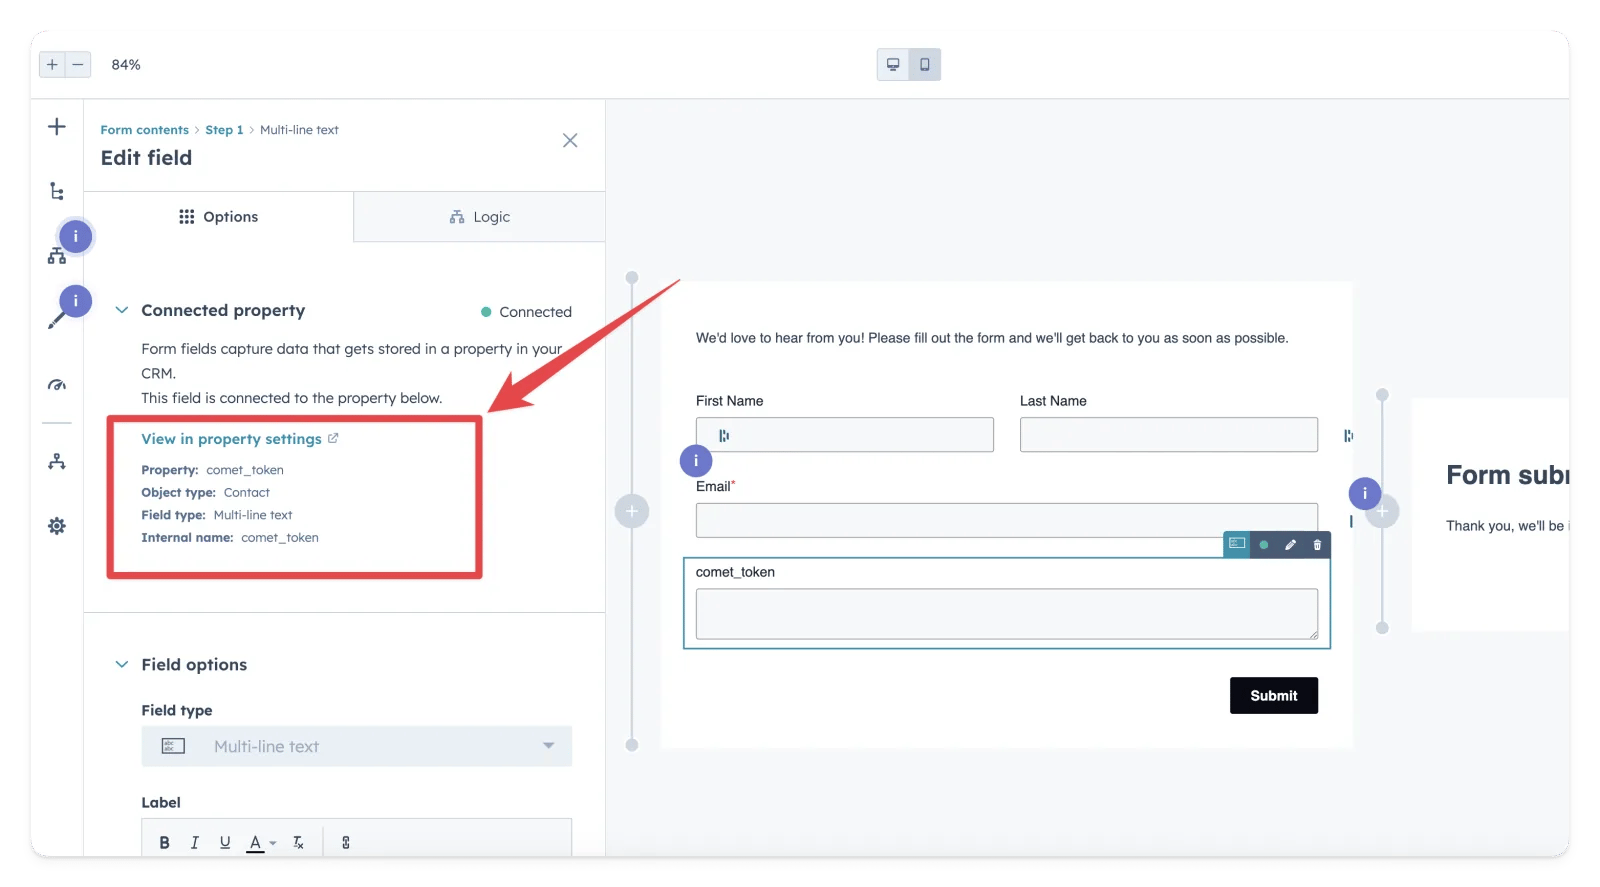
comet_token is the connected property of the Multi-line text field.5
Hide the field and publish
Scroll to the bottom of the field options and turn on Hidden field for the 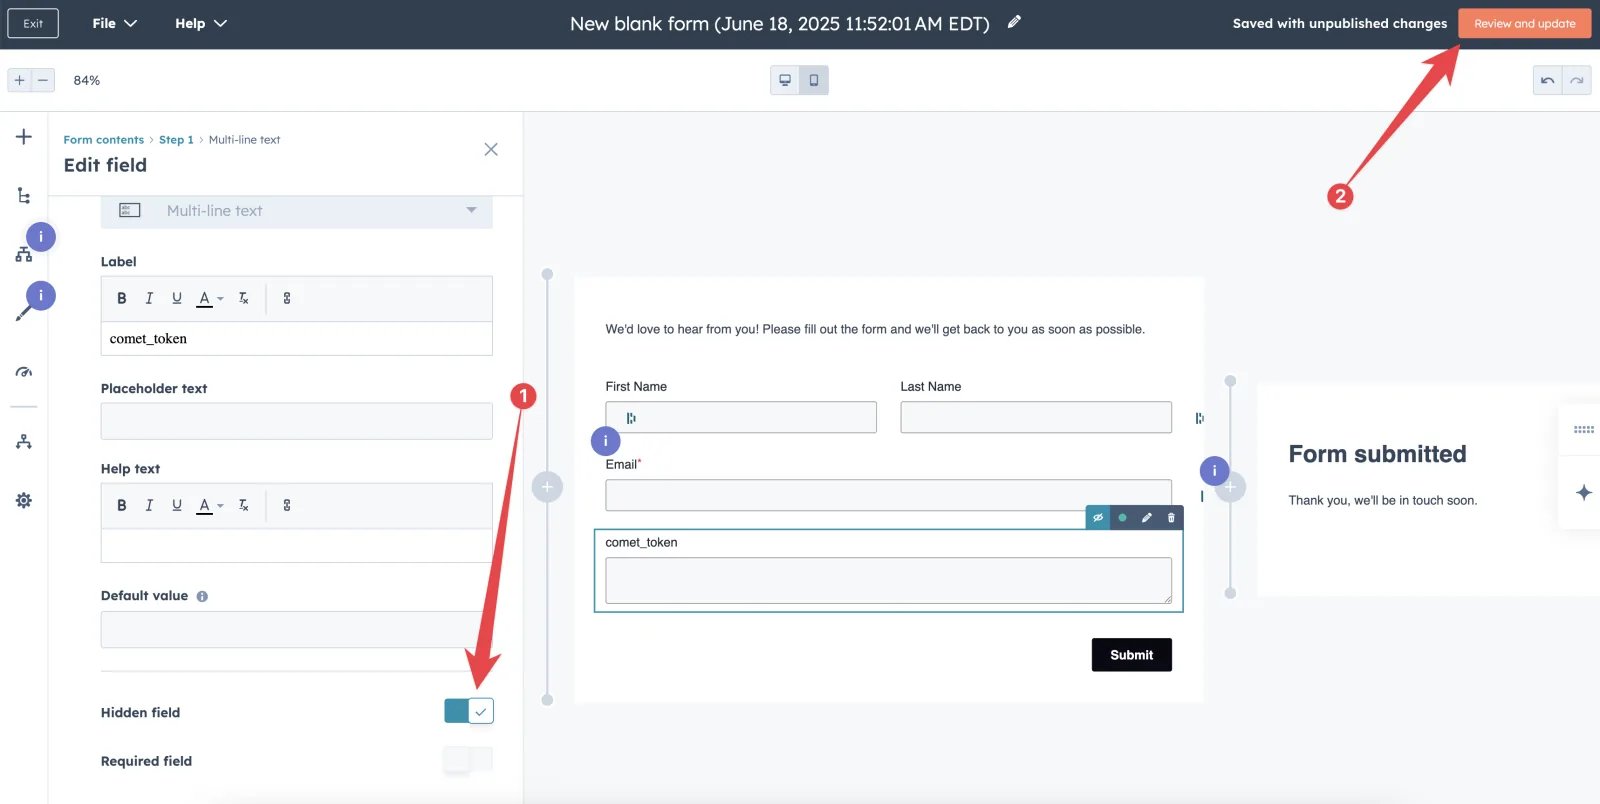
comet_token field. Do not set it as a required field.Save your changes by clicking Review and update.Step 3: Add the script to your landing page footer
Place this code just before the closing</body> tag of your web page HTML, on every page where your new HubSpot form is embedded. It fills the hidden field with the visitor’s Comet Token once the HubSpot form has loaded.
Step 4: Map comet_token in your HubSpot events
When you send events from HubSpot to Cometly, map the Comet Token field to thecomet_token property from HubSpot. In the Configure Mapping step of the event, click Add Field, choose Comet Token under Cometly Fields, and select the comet_token property under Data Fields. This lets Cometly attribute the event to the right visitor.
To create HubSpot events in Cometly, see the HubSpot integration.
Check it worked
Submit a test entry on a page that holds your form, then open the new contact in HubSpot: itscomet_token property should hold a value. In Cometly, once your HubSpot event is active and its trigger fires for that contact, the event is listed in the Events Log tab of Events Manager.
Frequently asked questions
What is the Comet Token in a HubSpot form?
The Comet Token is a unique identifier from the Cometly pixel that links a visitor’s browser session to their attribution data. Saving it in the hiddencomet_token field stores it on the HubSpot contact. When HubSpot later sends an event for that contact, Cometly uses the token to attribute the event to the right visitor.
Why is the comet_token property empty on my HubSpot contacts?
The script reads the token from the Cometly pixel, so the pixel must be installed on the page that holds the form. Also check that the script from step 3 is on that same page, that the form was built with the new editor, and that the property is named exactlycomet_token.
Do I still need to map Email when I map the Comet Token?
Yes. Email and Event Time are required in the Configure Mapping step of a HubSpot event. Comet Token is an extra field you add with Add Field.Next steps
- Create HubSpot events with the HubSpot integration
- Check incoming events in the Events Log
- Test form tracking on your pages
- Set up HubSpot legacy forms
- Learn how events work in Cometly