

What the ClickFunnels Cometly integration tracks
In a few clicks, you can set Cometly up to receive event data from ClickFunnels for any of these triggers:- Contact Submitted Form
- One-Time Order Paid
- Subscription Invoice Paid
- Subscription First Payment Received
- Opportunity Created
- Opportunity Closed
- Opportunity Moved Stage
- Opportunity Updated
- Contact Course Enrollment
- Contact Completed Course
This page is for ClickFunnels 2.0, which appears as ClickFunnels in Cometly. If you use ClickFunnels 1.0, follow the ClickFunnels Classic integration guide instead.
Before you start
Install the Cometly pixel (the tracking script that records visits to your pages) in your ClickFunnels account. If you have not done this yet, follow the ClickFunnels pixel installation guide. The Cometly pixel automatically captures key form field data on your ClickFunnels pages, including first name, last name, email and phone number. This links each new event sent to Cometly to the original customer journey, so you can see detailed source data in your Cometly account.Step 1: Create the event
In Cometly, open the Events Manager page and click Create Event.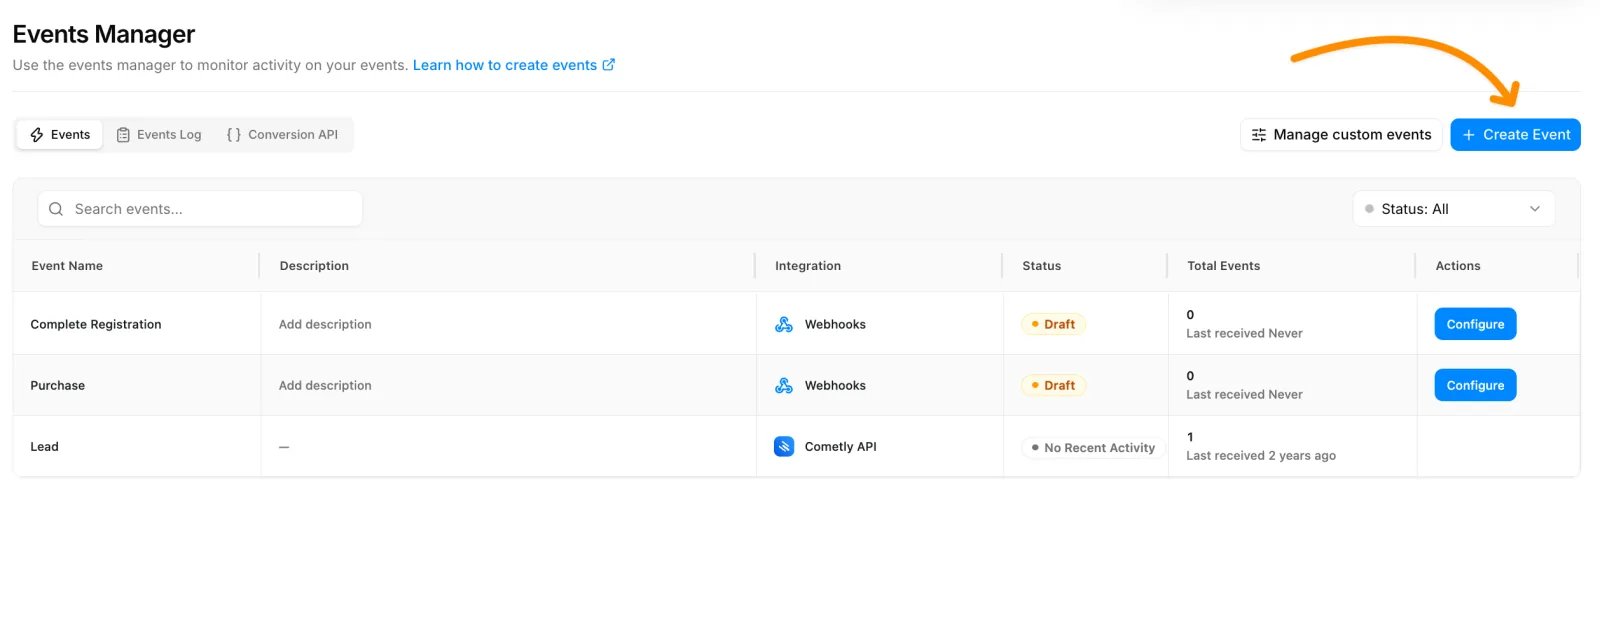
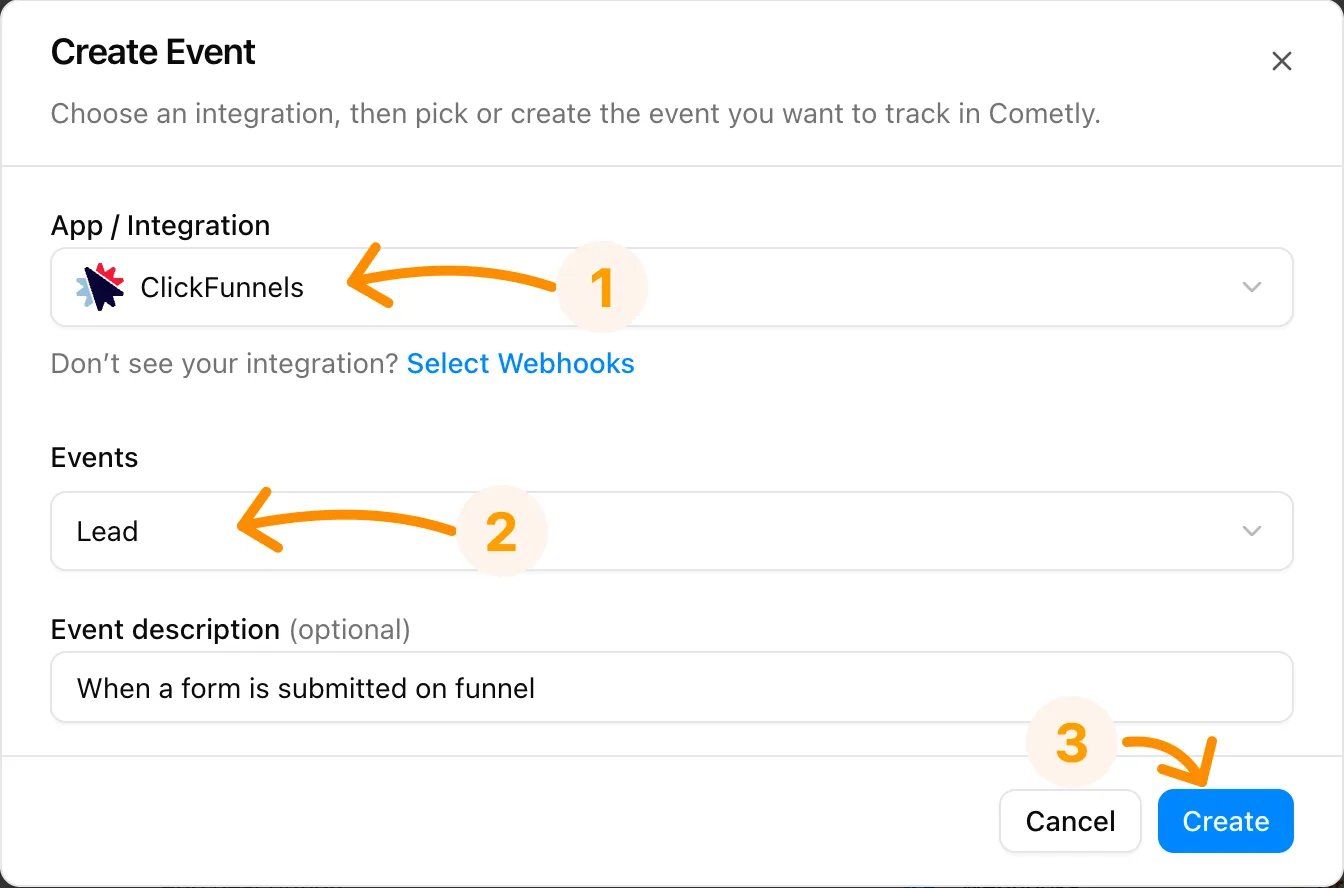
- Under App / Integration, select ClickFunnels.
- Under Events, choose your event name. You can pick an existing event or click Create New Event.
- Optionally, add an event description.
- Click Create.
Step 2: Choose an account and trigger
The new event appears in the Events Manager with a Draft status. Click Configure on its row to start setting up the ClickFunnels integration.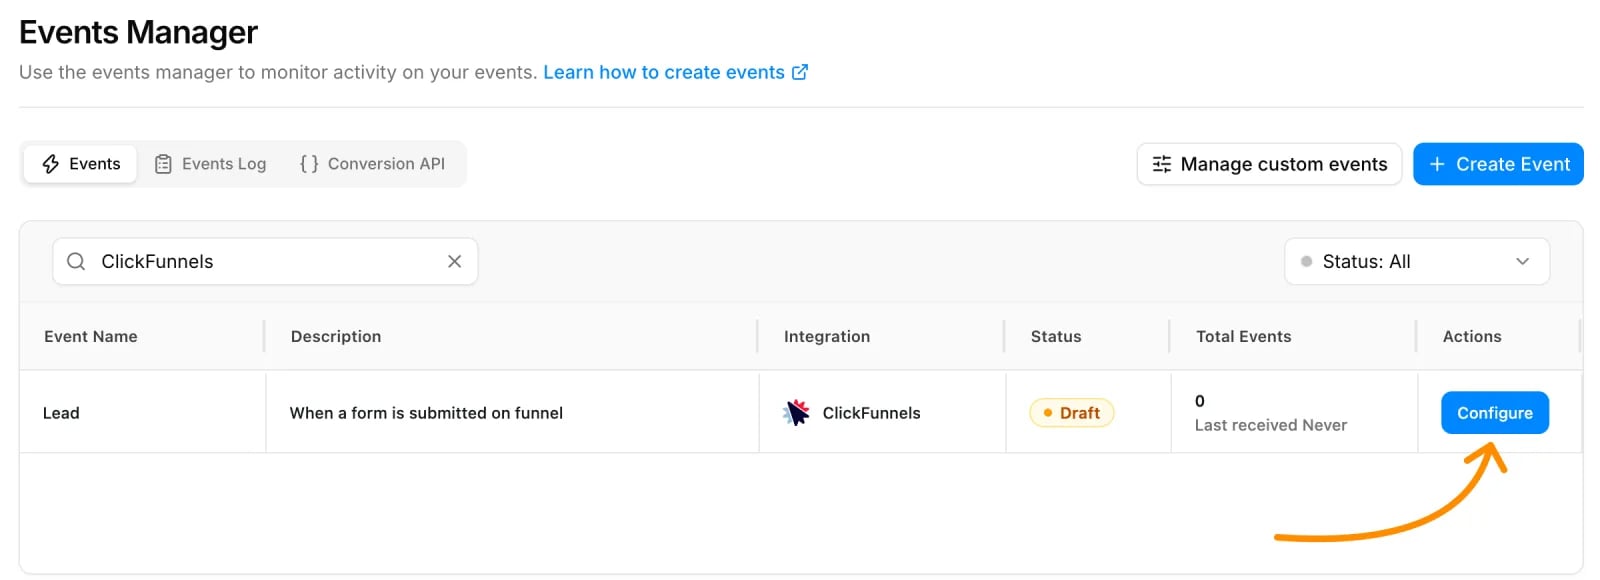
- App The App field is already set to ClickFunnels.
-
Account
- Click the Select an account dropdown.
- Select the ClickFunnels account you want to use.
- If this is your first time connecting ClickFunnels to Cometly, click Connect new account to add your ClickFunnels connection.
-
Trigger
Click Choose trigger and pick when an event should be sent to Cometly:
-
Click Continue
- Once you select the Account and Trigger, they cannot be changed. To use a different account or trigger, you have to create a new event.
- Double-check your selections before you continue.
Step 3: Receive test data
To configure and test the integration for a specific ClickFunnels trigger, you need to fire that trigger yourself in ClickFunnels.-
Go to your ClickFunnels account and complete the action that would naturally fire the trigger you chose. For example:
- Submit a form
- Pay for a one-time order
- Complete the first payment on a subscription
- Move an opportunity to a new stage
- Enroll a contact in a course
- Back in Cometly, click Check for Data. This pulls in the most recent event data from ClickFunnels for that trigger.
- Choose the record that matches the test action you just performed.
- Click Continue With Selected Record.
Step 4: Configure mapping
Map the data fields from ClickFunnels to Cometly fields. This makes sure the event data you send, such as email addresses, event times or other custom data, lines up with Cometly’s reporting. Email and Event Time are required fields.- Email: Choose the email address field from your selected record (for example
email@example.com). - Event Time: Choose the dynamic option The time we receive the event.
- First Name
- Last Name
- Phone
- Amount
Step 5: Configure filters and activate the event
Filters let you control when an event in ClickFunnels should create an event in Cometly. This step is optional, but highly recommended when you track changes to a contact status or opportunity stage and only want to send the event under certain conditions.Common use cases for filtering in ClickFunnels
- Only create the event in Cometly when Opportunity = Contract Sent
- Send the event only when a custom contact field (like Business Type) contains a specific value
- Skip events for contacts that don’t meet your qualification criteria
Add filters
- Click Add Filters (or Add Another Filter if you already have one).
- Select the field from your test record that you want to filter by.
- Choose your condition (for example
(text) is,(text) containsor(text) starts with). - Enter the value you want to match.
Test result
Cometly checks your filters against your test record:-
If your test data matches the filter, you see a green success message, Your Webhook would have successfully continued, with a line for each filter such as:
phone (+1234567890) (text) contains 90 - PASS - If the data doesn’t pass, you see a message telling you the webhook would not have continued.
Check it worked
In the Events Manager, your ClickFunnels event now shows the status Active instead of Draft. The next time the trigger fires in ClickFunnels, open the Events Log tab in the Events Manager: the event shows there within 60 seconds.Prefer webhooks?
We strongly recommend the direct ClickFunnels integration described on this page. You authenticate your ClickFunnels account and events are sent to Cometly automatically, which is the fastest and easiest way to get data flowing. If you prefer to use webhooks, follow Send ClickFunnels events with webhooks to send event data manually.Frequently asked questions
How long does it take for ClickFunnels events to show up in Cometly?
A ClickFunnels event shows in the Events Log within 60 seconds of being sent. It can take up to 15 minutes to appear in the reporting areas, such as the Report Builder or Ads Manager.Why are my ClickFunnels purchases paid with Stripe missing an ad source?
When Stripe takes the payment on your funnel, the Cometly pixel cannot capture the email address from the Stripe form, so Cometly cannot link the purchase to the visitor. Add a hidden comet_token field to your ClickFunnels form and map it to your purchase event. See Track ClickFunnels purchases paid with Stripe.Next steps
- Use the Events Log to confirm ClickFunnels events arrive
- Send conversions back to your ad platforms
- Track ClickFunnels purchases paid with Stripe
- Learn how standard and custom events work
- Understand No Source in reports