

What you can do with the Monday.com Cometly integration
- Select a specific board such as Leads, Deals or Quotes & Invoices.
- Choose a trigger type:
- New Item in Board: triggers an event when a new item is created.
- New Update in Board: triggers an event when a new update is posted.
- Specific Column Value Changed in Board: triggers an event when a column value (like a status or stage) changes.
- Item Moved to Group: triggers an event when an item is moved to a group.
Step 1: Install the Cometly pixel
The Cometly pixel is the tracking script that records your website visitors, so Cometly can match each Monday.com event to the ad the contact clicked. Install the Cometly pixel on every page of your website, inside the<head> tags. Make sure the pixel is also installed on the thank you page.
See Install the pixel.
Step 2: Create the event
In Cometly, go to the Events Manager page and click Create Event.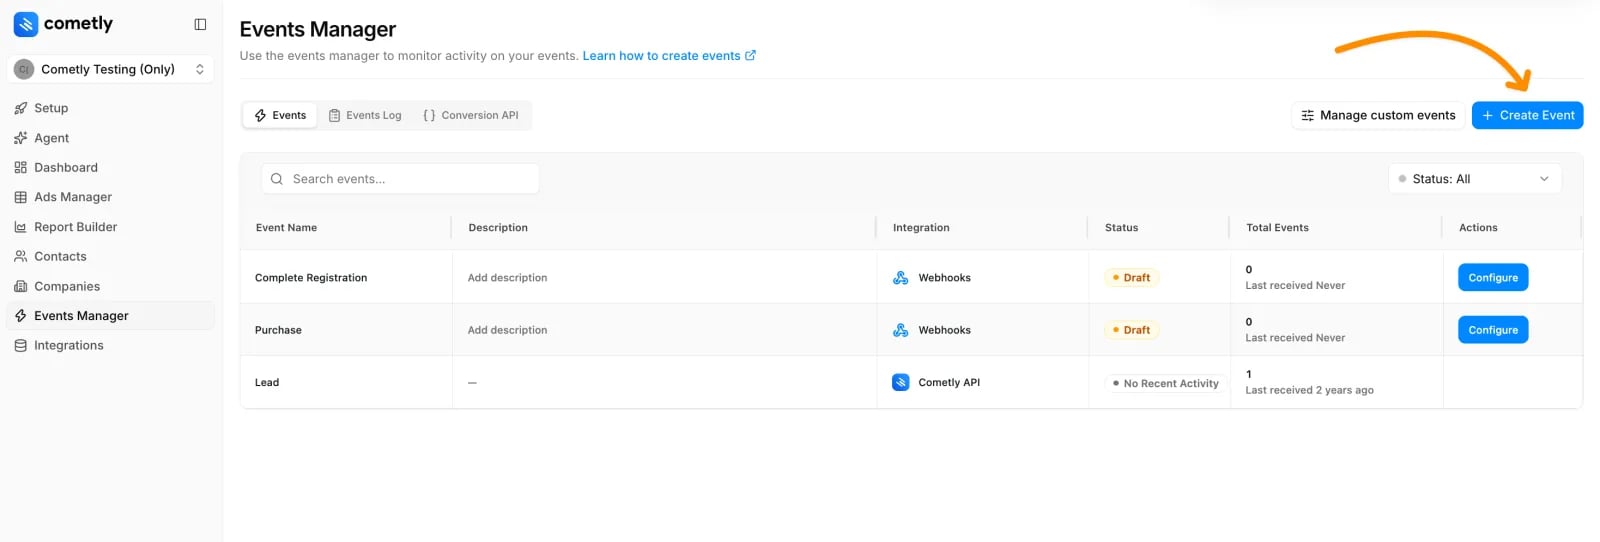
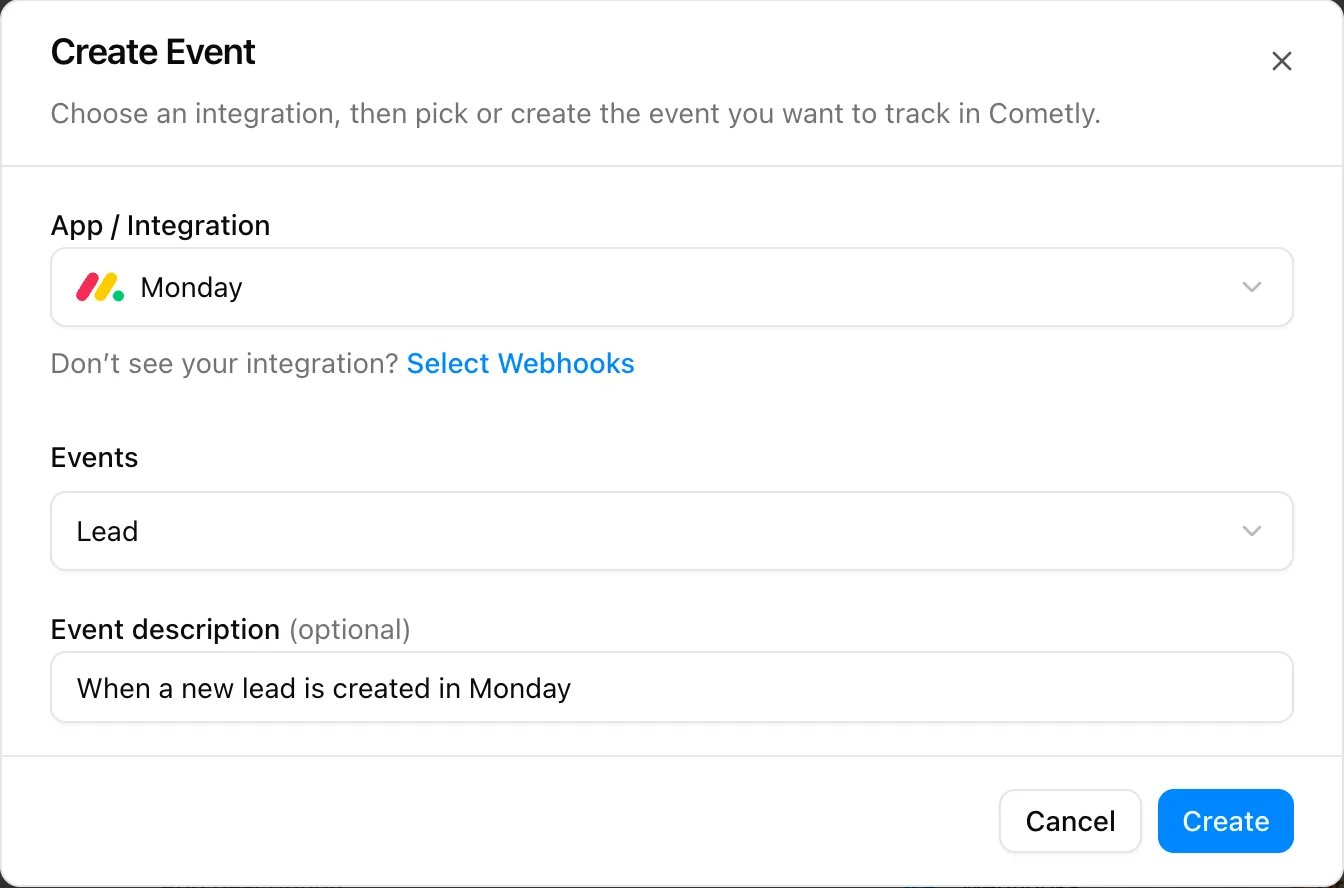
- Under App / Integration, select Monday.
- Under Events, choose your event name. You can pick a default event or click Create New Event.
- Click Create.
Step 3: Configure the event and the Monday.com connection
The new event appears in the Events Manager as a draft. Click Configure on its row to begin setting up the Monday.com integration.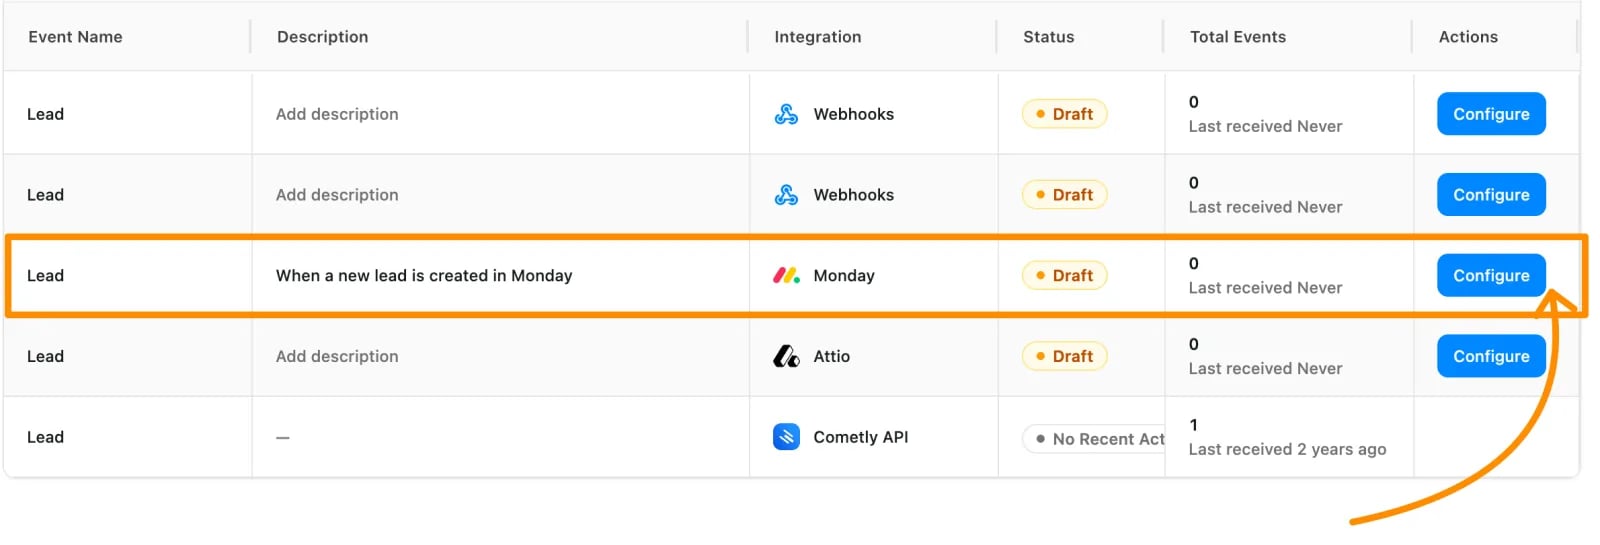
Choose an account
- Click the Select an account dropdown.
- Select the Monday.com account you want to use.
- If this is your first time connecting Monday.com to Cometly, click Connect new account to authorize access.
Select a board
Next, choose the Monday.com board you want Cometly to listen to. You can select any board from your connected account, such as Leads, Deals or Contacts, depending on where the activity you want to track happens.Choose a trigger
Now decide when Cometly should receive the event, based on activity in the board. The available triggers are:- New Item in Board: triggers when an item is created in the selected board.
- New Update in Board: triggers when a new update is posted on the board.
- Specific Column Value Changed in Board: triggers when a column’s value changes in the selected board (for example, Status or Stage).
- Item Moved to Group: triggers when an item is moved to a group.
Retrieve test data for your trigger
To test and complete the setup, Cometly needs a sample record from Monday.com. Follow the steps below for the trigger you chose. If no data is available yet, click Save & Return When Data is Ready. You can come back later to map your event once data has been sent from Monday.com.New Item in Board trigger
This trigger fires when a new item is created in the selected Monday.com board.- Create a test item in the selected board. Go to the connected board in your Monday.com account (for example, “Leads”) and manually add a new item.
- Click Check for Data. This pulls in the most recent item from the board.
- Select your event record. Choose the item that matches your test.
- Click Continue With Selected Record. Cometly uses the selected item to complete your integration setup.
No data appearing? Make sure your test item was created on the correct board and try again.
Specific Column Value Changed in Board trigger
This trigger fires when a column value (for example, Status or Stage) is updated on an item in the selected board.- Update a column value on any item in the board. In your Monday.com board, change a value (for example, change “Status” from “New” to “Qualified”).
- Click Check for Data. Cometly fetches the latest column change events.
- Select your event record. Choose the item that reflects the recent column change.
- Click Continue With Selected Record. Cometly uses the selected item to finish your event setup.
Didn’t work? Make sure you changed a column value on an item in the board you selected during setup and try again.
New Update in Board trigger
This trigger fires when a new update is posted on an item in the board.- Post a test update on any item. Open any item on your chosen board and post an update in the activity section.
- Click Check for Data. Cometly fetches the most recent updates posted.
- Select your event record. Choose the update you just created.
- Click Continue With Selected Record. Cometly uses the selected update to finish setup.
Step 4: Configure mapping
Map the data fields from Monday.com to Cometly fields. This step makes sure the event data you send, such as email addresses, event times or other custom data, lines up with Cometly’s reporting. Email and Event Time are required fields.- Email: choose the email address field from your selected record (for example, the field that holds
email@example.com). - Event Time: by default, The time we receive the event is selected.
- First Name
- Last Name
- Phone Number
- Amount
- and so on
Step 5: Configure filters and activate the event
Filters let you control when an item in Monday.com should trigger an event in Cometly. This step is optional but highly recommended, especially when you use the column value trigger and only want to send the event under specific conditions.Common use cases for filtering in Monday.com
- Only trigger the event when the Status column equals “Qualified”.
- Send the event only when a custom column like Lead Score is greater than 70.
- Prevent events from triggering if an item has not reached a certain stage or condition.
Add filters
- Click Add Filters (once you have a filter, the button reads Add Another Filter).
- Select the field you want to filter by (for example,
status). - Choose your condition (for example,
equals,contains,starts with). - Enter the value you want to match (for example,
Qualified).
Test result
-
If your test data matches the filter, you see a green success message with a line like:
Status (text) equals Qualified Lead - PASS - If the data does not pass, you see a message telling you the webhook would not have continued.
Check it worked
In Events Manager, the event’s row now shows the status Active. Trigger the event once more in Monday.com (for example, add an item to the board), then open the Events Log tab: the new event is listed there, and the row’s Total Events count goes up.Frequently asked questions
Can I track more than one Monday.com board in Cometly?
Yes. Each event listens to one board and one trigger, so create a separate event in Events Manager for every board or trigger you want to track. You can use the same connected Monday.com account for all of them.Does the Monday.com integration import existing items into Cometly?
No. The triggers fire when something happens on the board, so Cometly receives events from the moment your event is set up. Items that already existed arrive only if later activity on them matches your trigger, such as a column value change.Which Monday.com fields can I map to Cometly fields?
Cometly receives the item’s name and the values of its columns, and you can map any of them on the Configure Mapping step. Email is required, so the item needs a column that holds the contact’s email address.Next steps
- Check incoming events in the Events Log
- Learn how events work in Cometly
- Manage your custom events
- Send your Monday.com conversions back to your ad platforms with the Conversion API
- Browse all Cometly integrations