

Before you begin
Copy your pixel from Cometly. In the sidebar, click Setup and open the step Install the Cometly pixel. Under Install the pixel, click Copy Code. For details, see Install and verify the Cometly pixel.Add the pixel to every page of your site
-
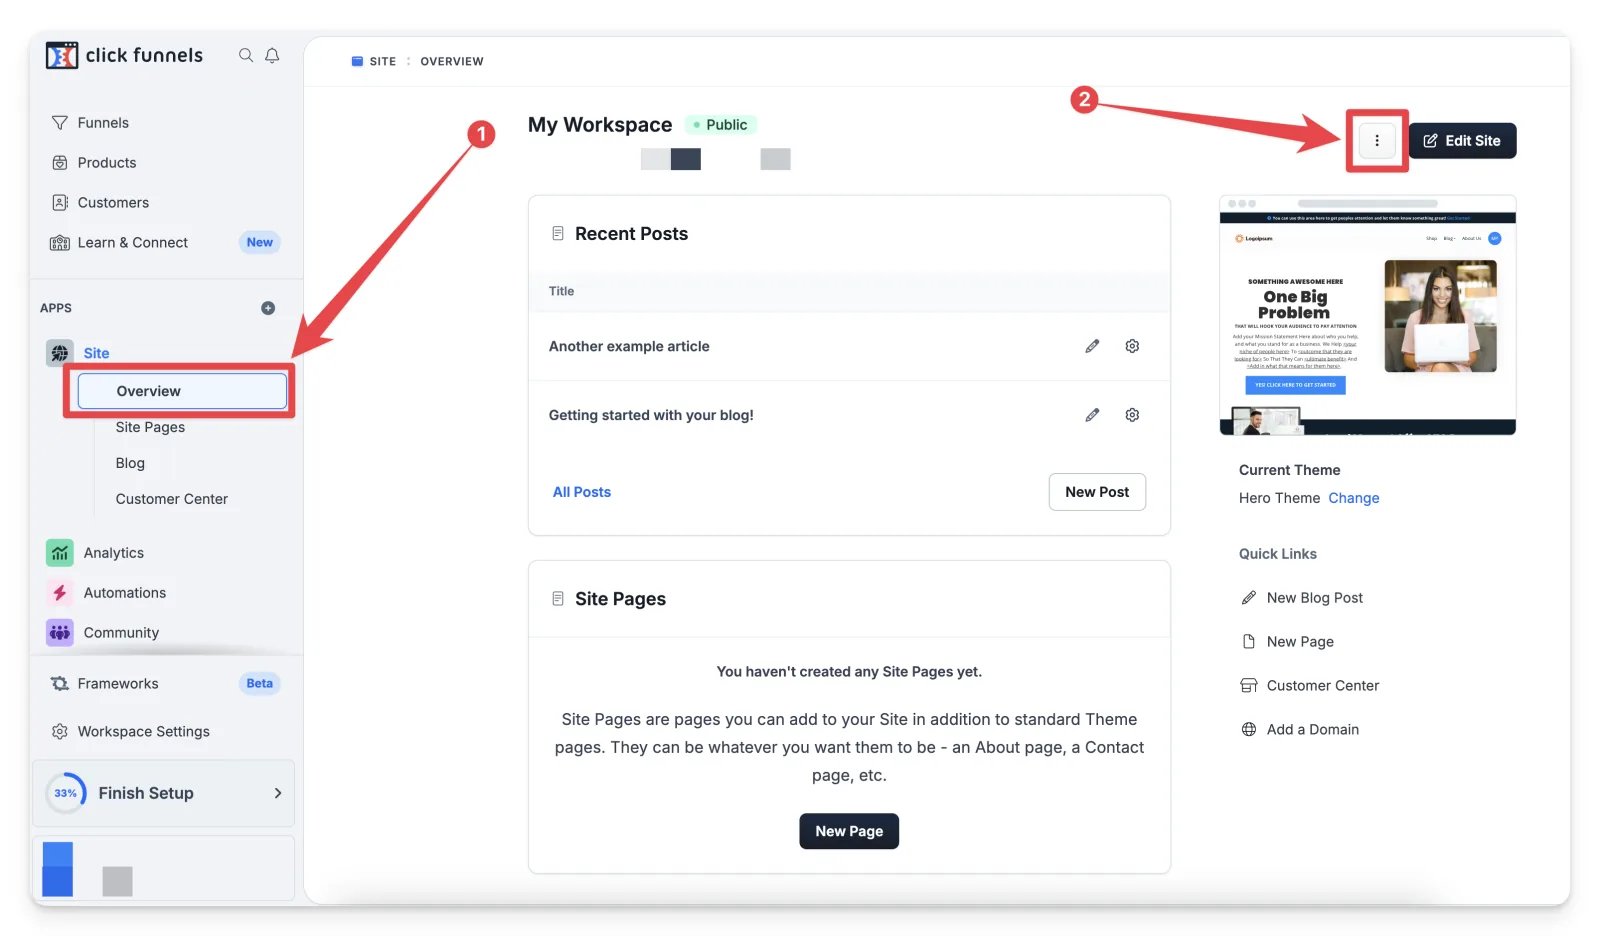
Navigate to the Site > Overview app in ClickFunnels. Click the three-dot menu.
-
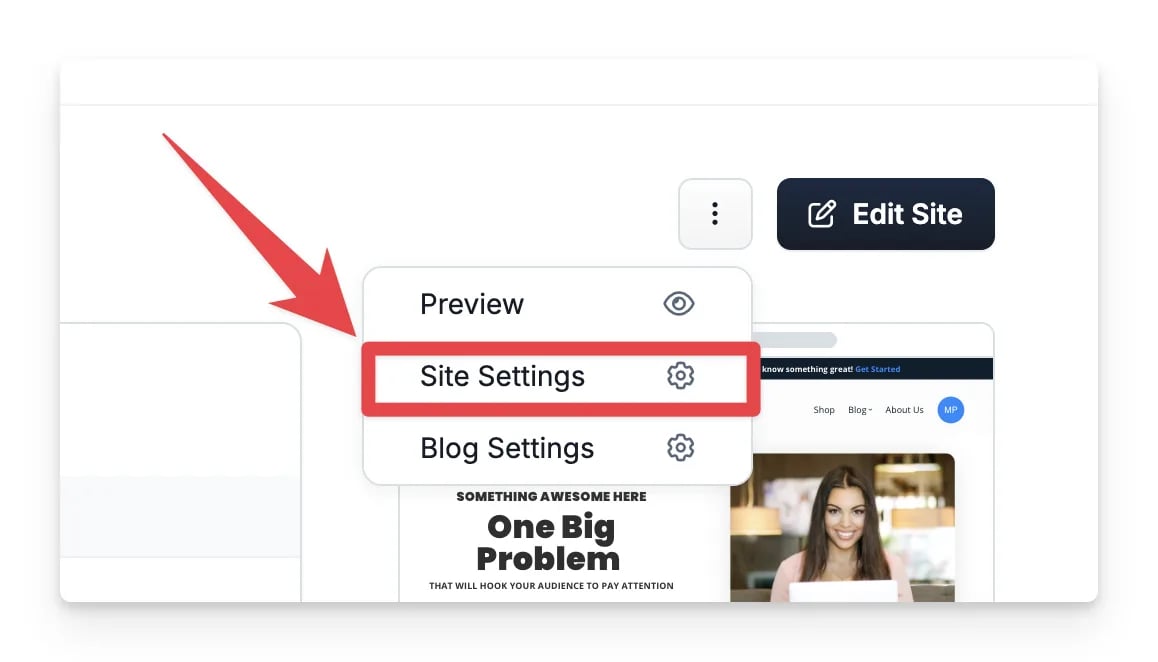
Open Site Settings from the three-dot menu.
-
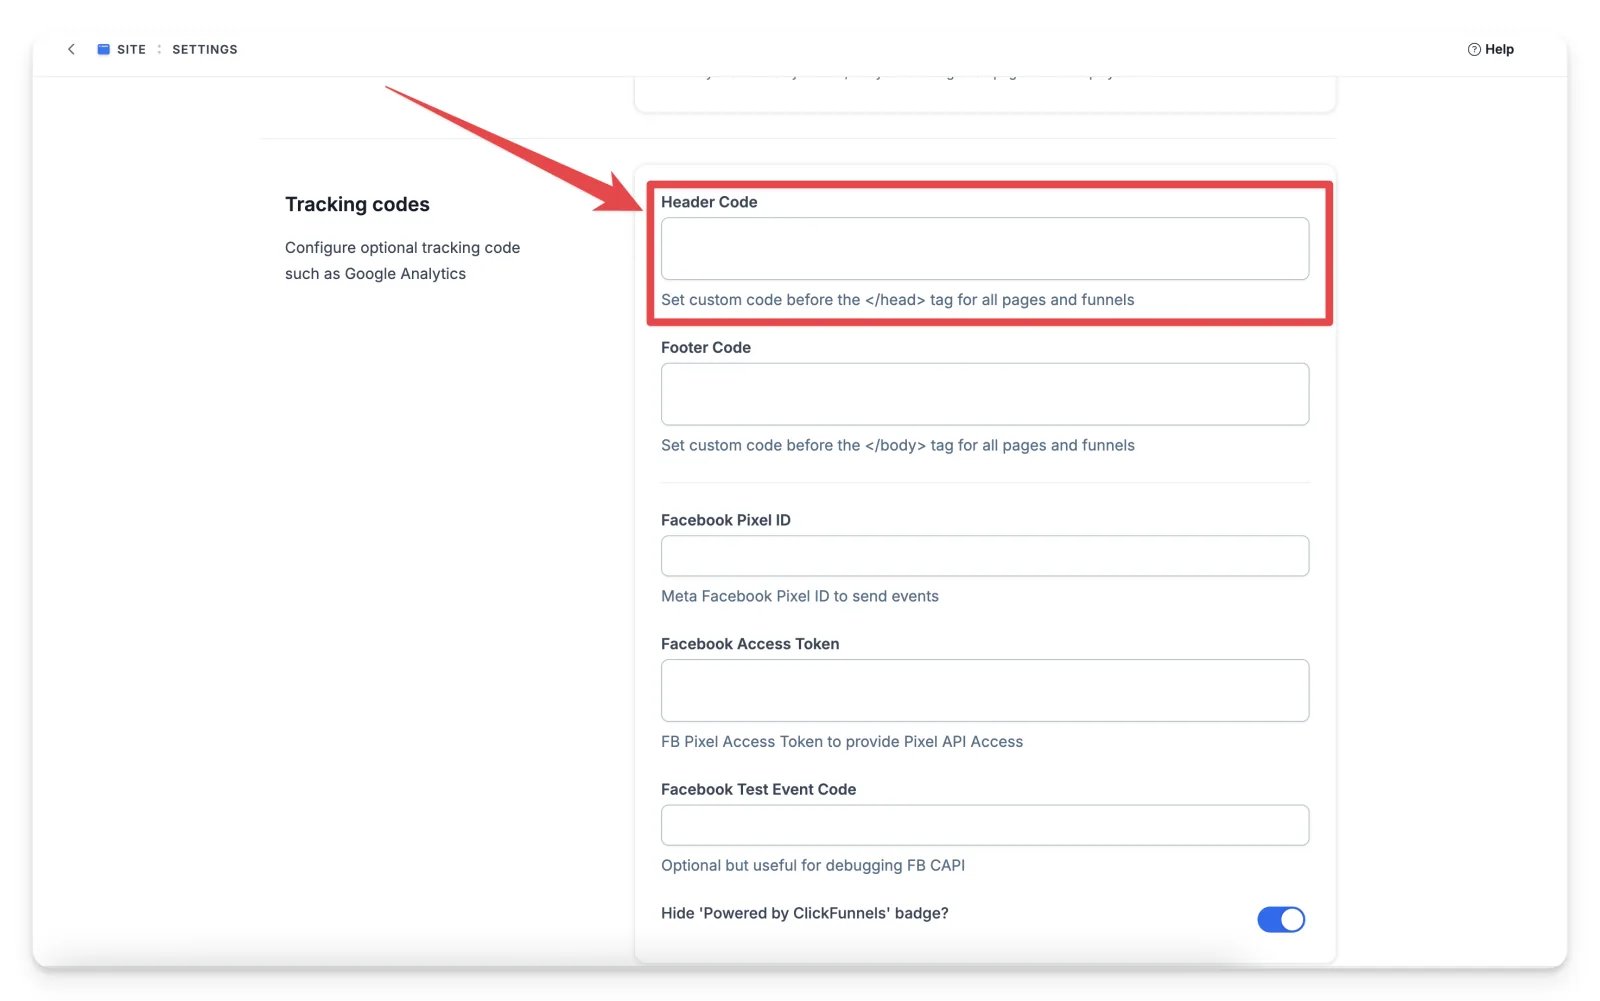
Paste the Cometly pixel into the Header Code section.
-
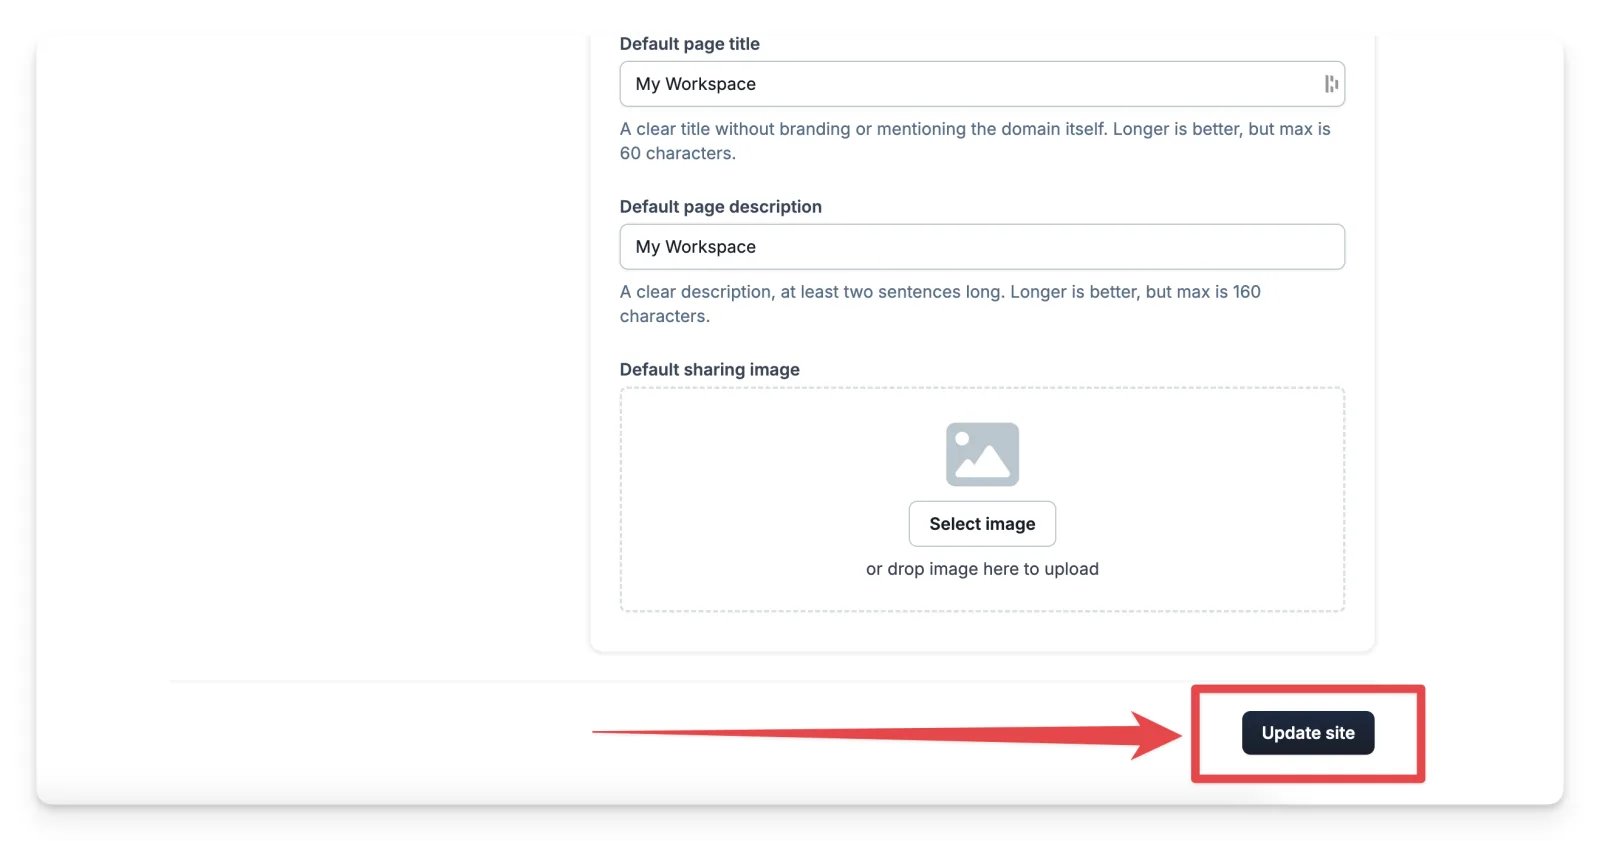
Scroll to the bottom and click Update site to save your changes.
Check it worked
Back in Cometly, check that the pixel is detected on your domain. In Setup, open Install the Cometly pixel and, under Verify your pixel, click Verify next to your ClickFunnels domain. The domain shows Pixel detected when the pixel is installed correctly. See Install and verify the Cometly pixel.Frequently asked questions
Does the Cometly pixel track ClickFunnels orders and payments?
Not on its own. The pixel records visits and captures the name, email and phone number entered in your ClickFunnels forms. To send orders, subscription payments and opportunities to Cometly, set up the ClickFunnels integration or ClickFunnels webhooks after you install the pixel.Why does Cometly say “Pixel not detected” on my ClickFunnels site?
Pixel not detected means Cometly could not find the pixel on that domain. Check that the script in Header Code matches the one shown in Cometly under Install the pixel, and that you clicked Update site. The script changes when you add or remove domains in Cometly, so copy it again if it has changed, then click Retry.Can I install the Cometly pixel on ClickFunnels through Google Tag Manager?
The pixel works through Google Tag Manager, but you may lose attribution data because of loading delays and privacy blockers. Pasting it into Header Code as shown above is the recommended setup. Do not do both: a pixel that loads twice causes tracking issues. See Google Tag Manager pixel installation.Next steps
- Set up the ClickFunnels integration to send form, order and subscription events
- Send ClickFunnels events to Cometly with webhooks
- Test form tracking on your pages
- Check your pixel with the Cometly Pixel Helper
- Connect your ad platforms and ad accounts