

Start here
This page is for ClickFunnels Classic (ClickFunnels 1.0). If you use ClickFunnels 2.0, follow the ClickFunnels integration guide instead. The ClickFunnels Classic integration only sends purchase events to Cometly. To send other types of events, use Cometly Webhooks to track and map the additional data. Here is how the ClickFunnels Classic integration works:- Automatic purchase tracking: Purchases made in your ClickFunnels Classic funnels are automatically sent to Cometly.
- Upsell tracking: If your funnel includes upsells, the total upsell value is added to the original purchase value. The entire transaction is recorded as a single purchase in Cometly and sent to ad platforms through the Conversion API. You can view the upsell details on the contact’s timeline in Contacts.
- Data capture: The Cometly pixel (the tracking script you add to your funnel pages) automatically captures key customer details, including email address, first name, last name and phone number.
Using Stripe for payment processing: If you already send purchase events to Cometly from Stripe (and Stripe is the only payment processor used in your funnel), you do not need this integration. ClickFunnels Classic is typically integrated with Stripe by default, so those purchase events are already being sent to Cometly.
Step 1: Install the Cometly pixel in your funnels
Install the Cometly pixel in your ClickFunnels Classic funnels by pasting it into the Head Tracking Code section in the funnel’s settings. This applies the pixel to all pages within the funnel. View the ClickFunnels Classic pixel installation guideStep 2: Add the Cometly webhook URL to ClickFunnels
In this step you copy the ClickFunnels Classic webhook URL from Cometly and add it to your ClickFunnels funnel.-
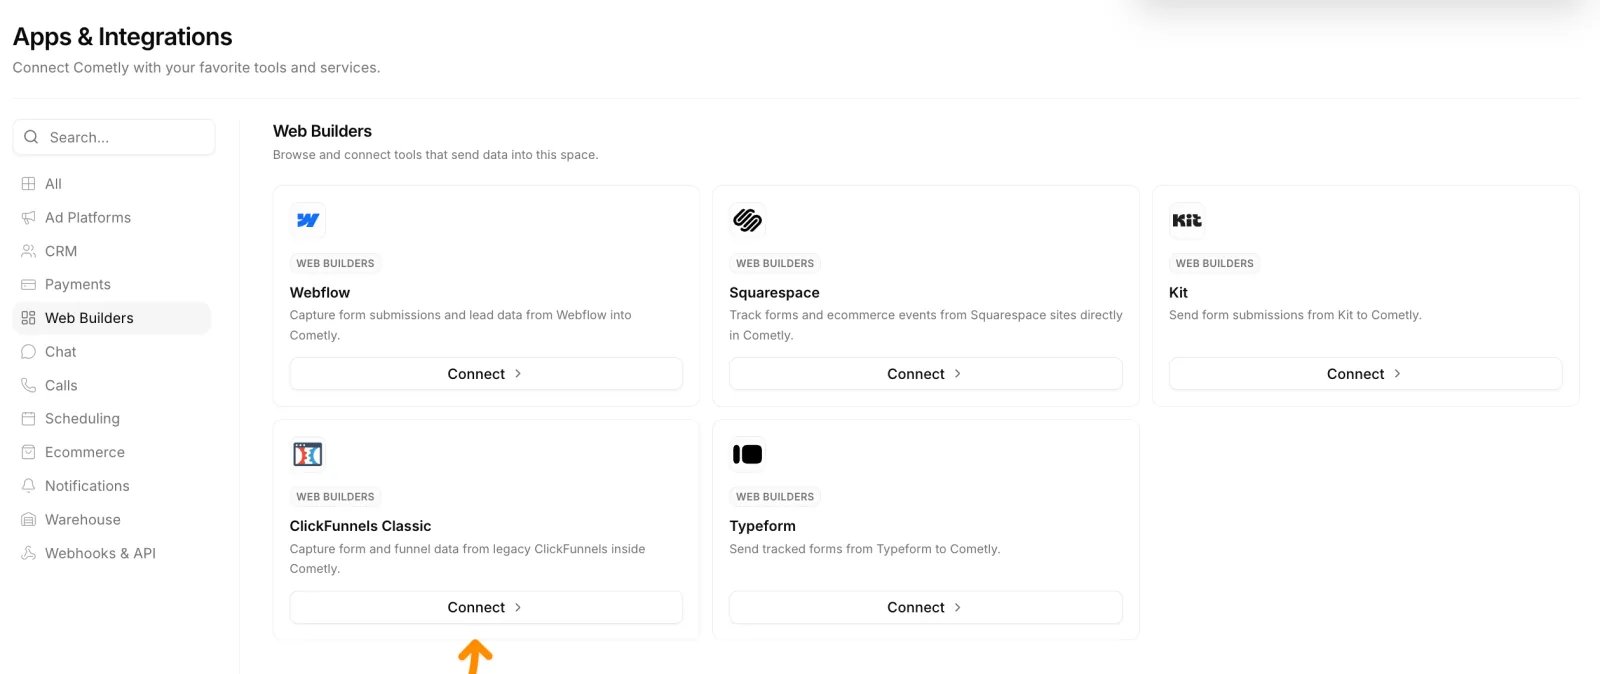
In Cometly, click Integrations in the sidebar. Find the ClickFunnels Classic card (it is in the Web Builders category) and click Connect.
The ClickFunnels Classic page opens.
- Click Activate ClickFunnels.
- Under Copy the webhook URL, click Copy.
- Log in to your ClickFunnels account and open the funnel’s Settings.
-
Scroll down the Settings page to the Webhooks section and click Manage Your Funnel Webhooks.
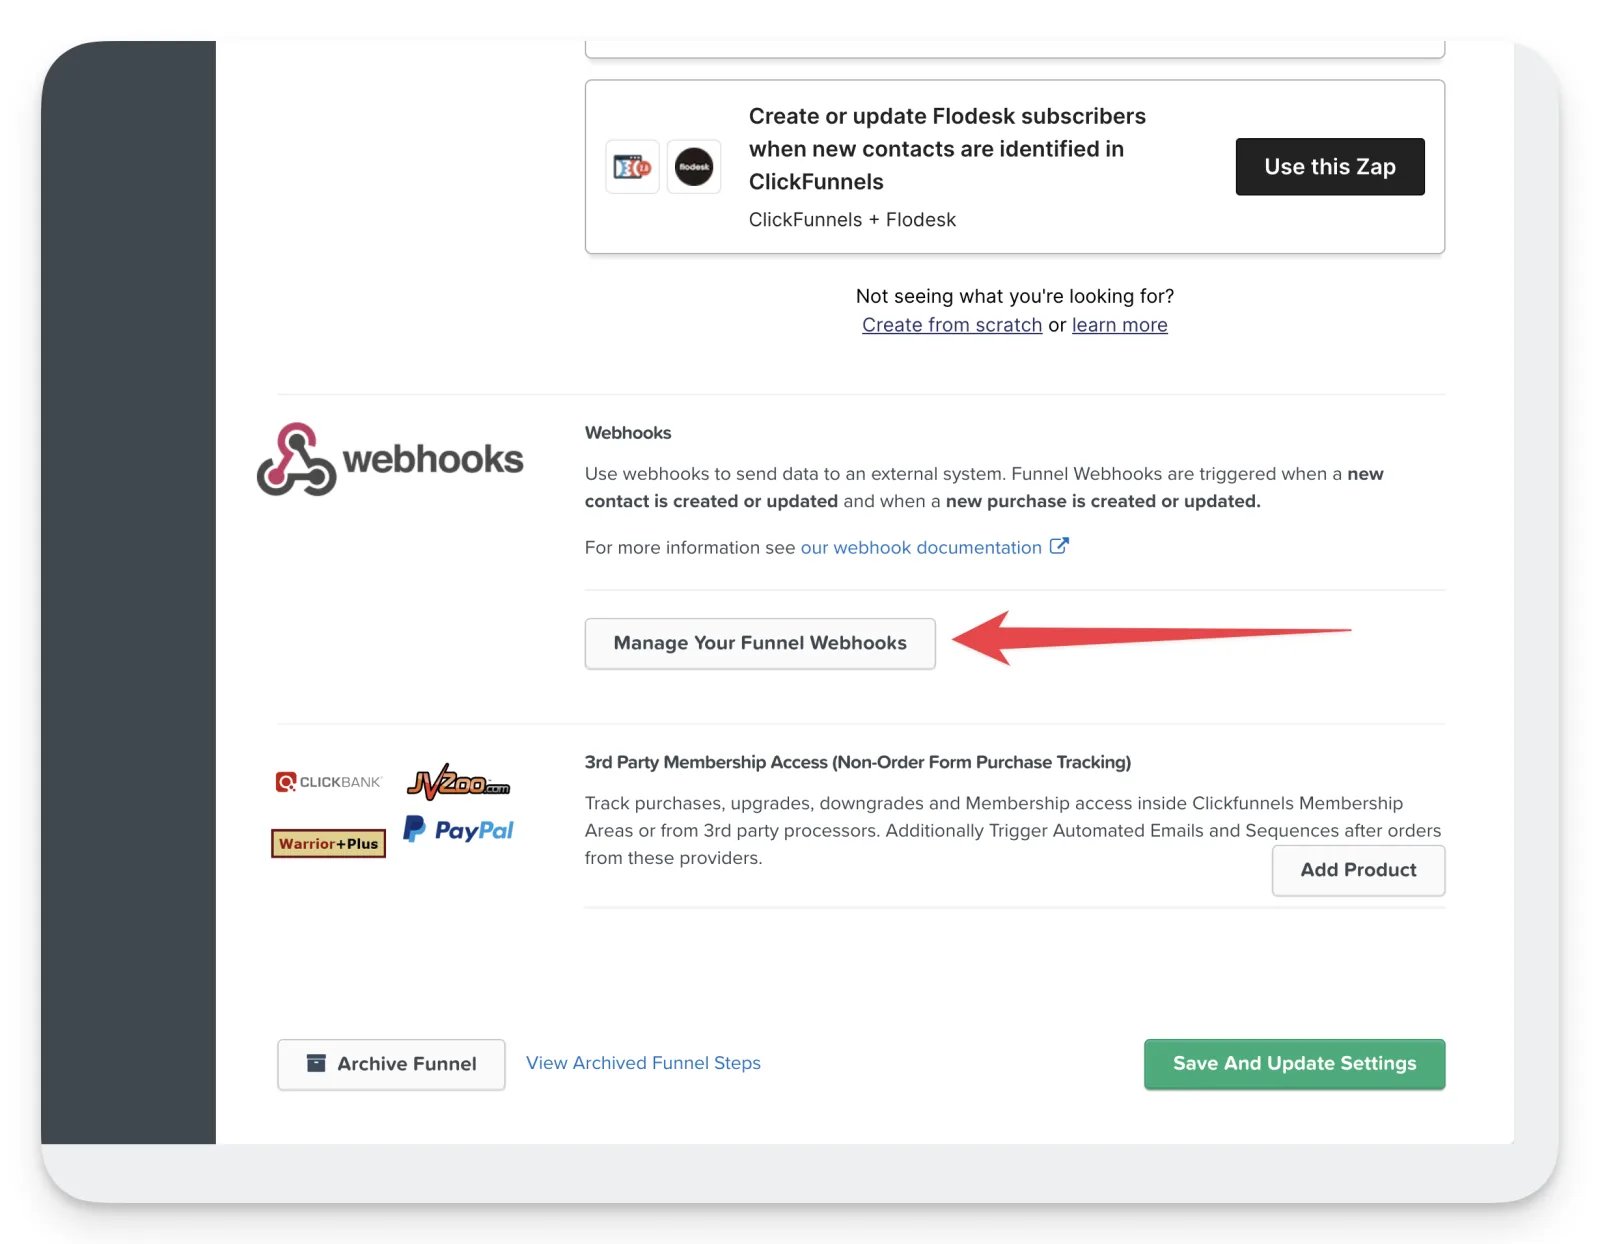
- Click + New Webhook.
-
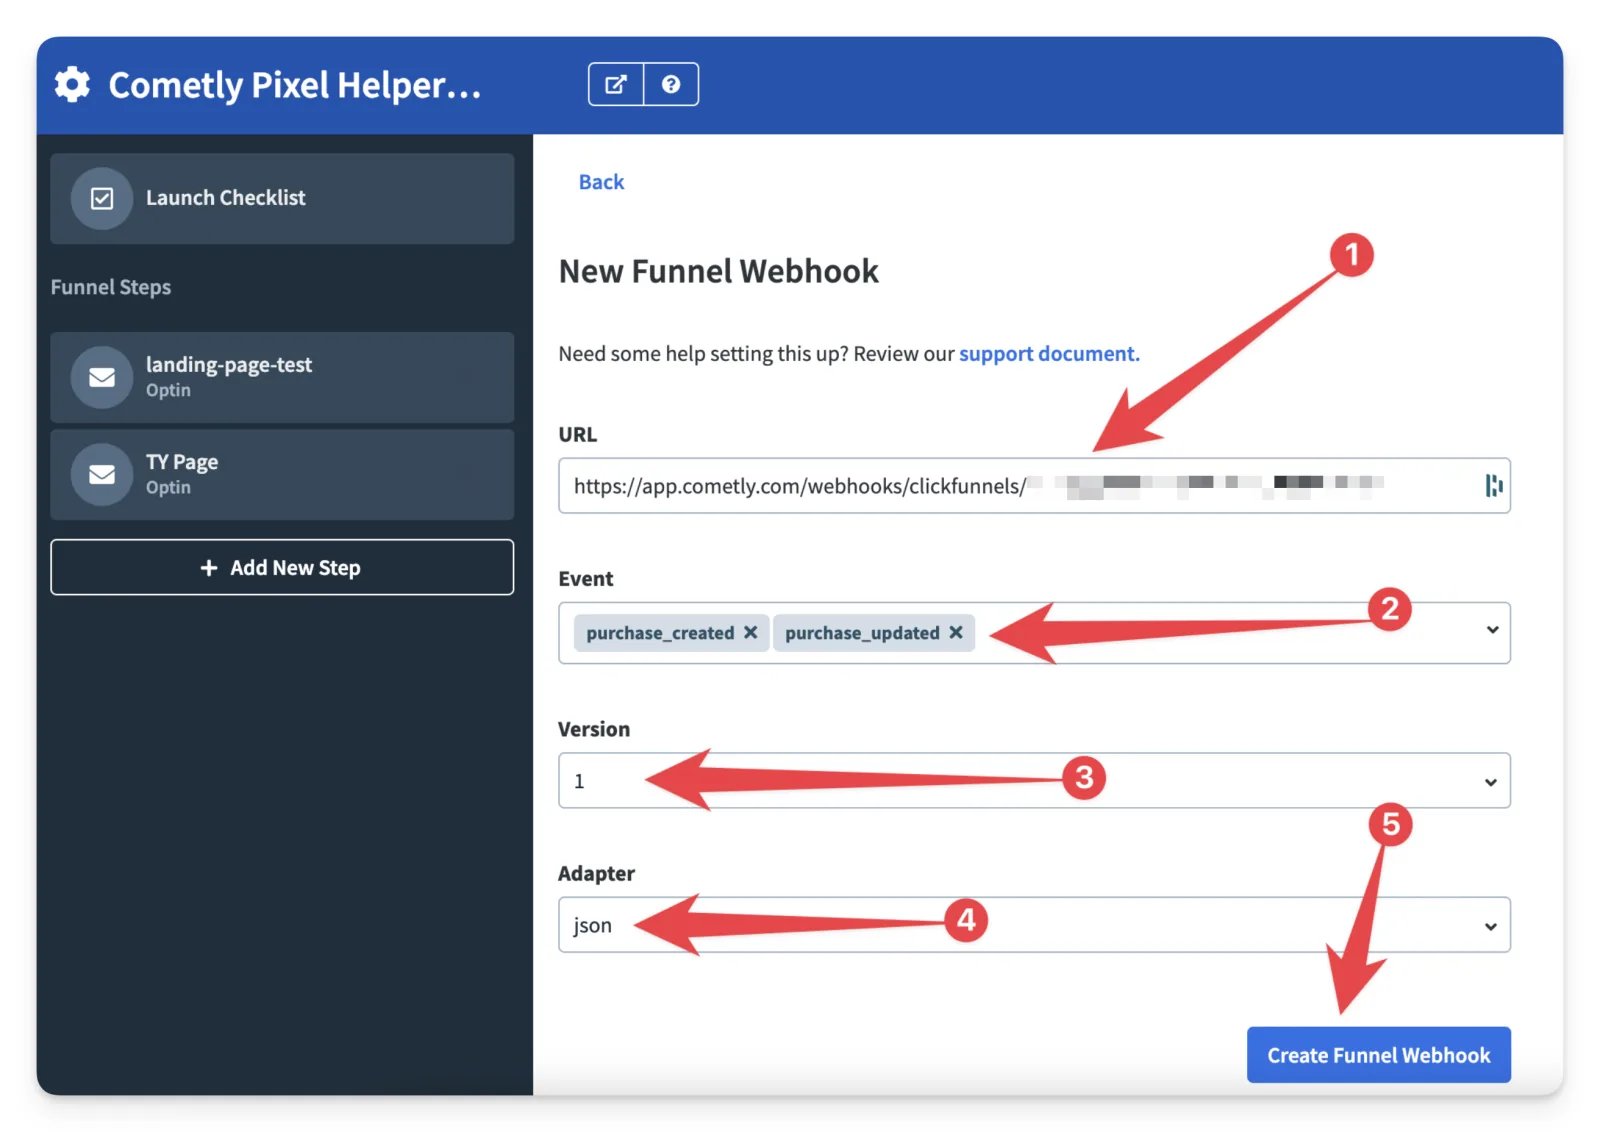
Fill in the new webhook:
- Paste the webhook URL you copied from Cometly into the URL box.
- In the Event box, choose purchase_created and purchase_updated.
- Select json for the Adapter.
- Click Create Funnel Webhook.
- Back on the ClickFunnels Classic page in Cometly, under Map ClickFunnels events to Cometly, choose which Cometly event ClickFunnels purchases should be mapped to and click Save.
Check it worked
The ClickFunnels Classic page in Cometly now shows ClickFunnels activated, with your webhook URL and event mapping below it. To test the full path, make a purchase in your funnel, then open Contacts in Cometly: the buyer appears with the purchase on their timeline. Only paid purchases are recorded.Set up Cometly Webhooks to send additional events
Refer to the Cometly Webhooks guide for detailed instructions on:- Creating your webhook in Cometly.
- Selecting the event (or creating a new event) for the webhook.
- Mapping the webhook data to the appropriate fields in Cometly.
- Setting up filters so that only the data you want is tracked.
Frequently asked questions
Which ClickFunnels Classic purchases does Cometly record?
Cometly records purchases that ClickFunnels reports as paid. A purchase with any other payment status, such as a failed payment, is not saved as an event.What happens if my ClickFunnels Classic funnel charges in a different currency?
Cometly converts the purchase amount into the currency of your space (the workspace in Cometly that holds one business’s tracking and reports). Your revenue figures stay in one currency, even if a funnel sells in another.Do I have to add the Cometly webhook to every ClickFunnels Classic funnel?
Yes. In ClickFunnels Classic, webhooks are managed per funnel, in each funnel’s Settings. Add the Cometly webhook URL, and the Cometly pixel, to every funnel whose purchases you want to track.Next steps
- Install the Cometly pixel in ClickFunnels Classic
- Send leads and other events with Cometly Webhooks
- Learn how events work in Cometly
- Connect Stripe to Cometly
- Use the ClickFunnels 2.0 integration instead