

Before you start: create a Klaviyo segment
Set up a segment in your Klaviyo account specifically for Klaviyo form submissions. The Zap you build below triggers when a new Klaviyo profile is added to a segment or list, and you select this segment in the Zap’s Klaviyo trigger step. Because the segment only includes people who filled out a Klaviyo form, the Zap only triggers when a new profile joins that segment. Profiles added to Klaviyo from other sources, or from tools you have synced with Klaviyo, are left out. This gives you better control and accuracy when tracking form submissions. You also need Cometly connected to Zapier. See the Zapier integration guide. The Cometly pixel must be installed on the pages that show your Klaviyo forms. See Install and verify the Cometly pixel.Send Klaviyo form submissions to Cometly as events
-
Create a new Zap in Zapier
- In your Zapier account, click Create Zap.
- Select Klaviyo as the trigger app.
-
Choose the trigger event
-
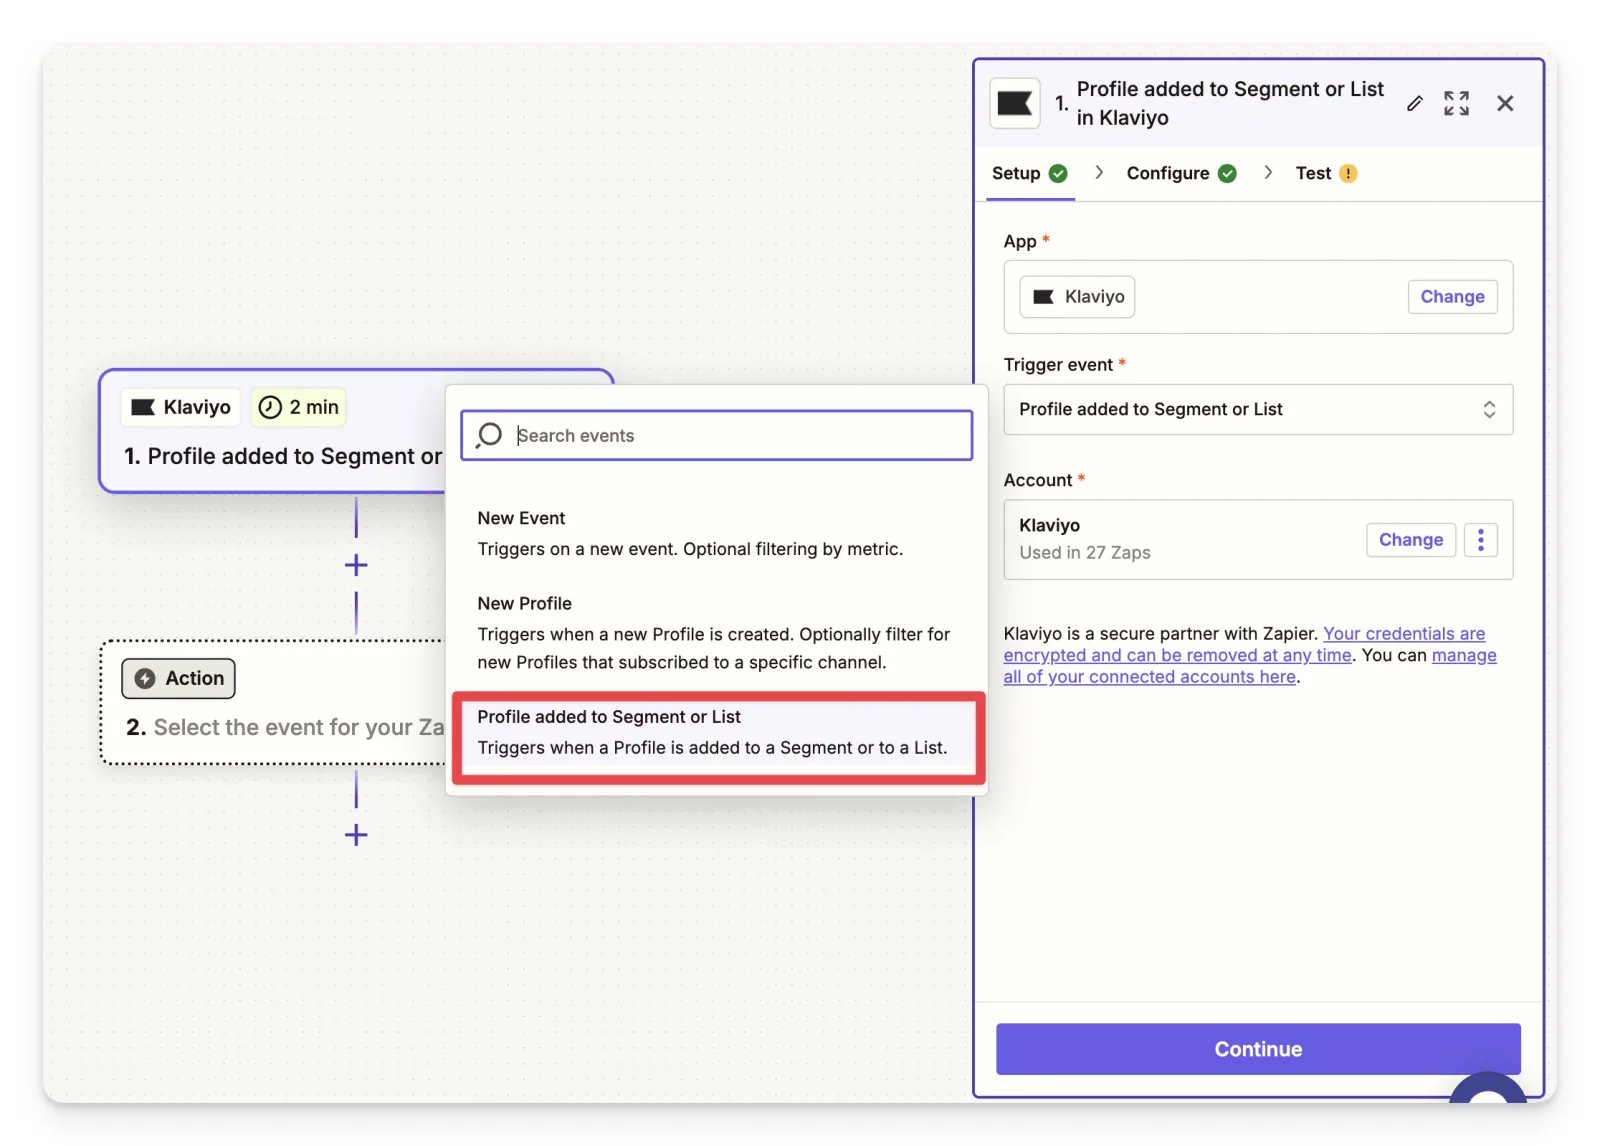
Select Profile added to Segment or List as the trigger event. When a new profile is added to a segment in Klaviyo, this triggers the Zap to send the event to Cometly.
-
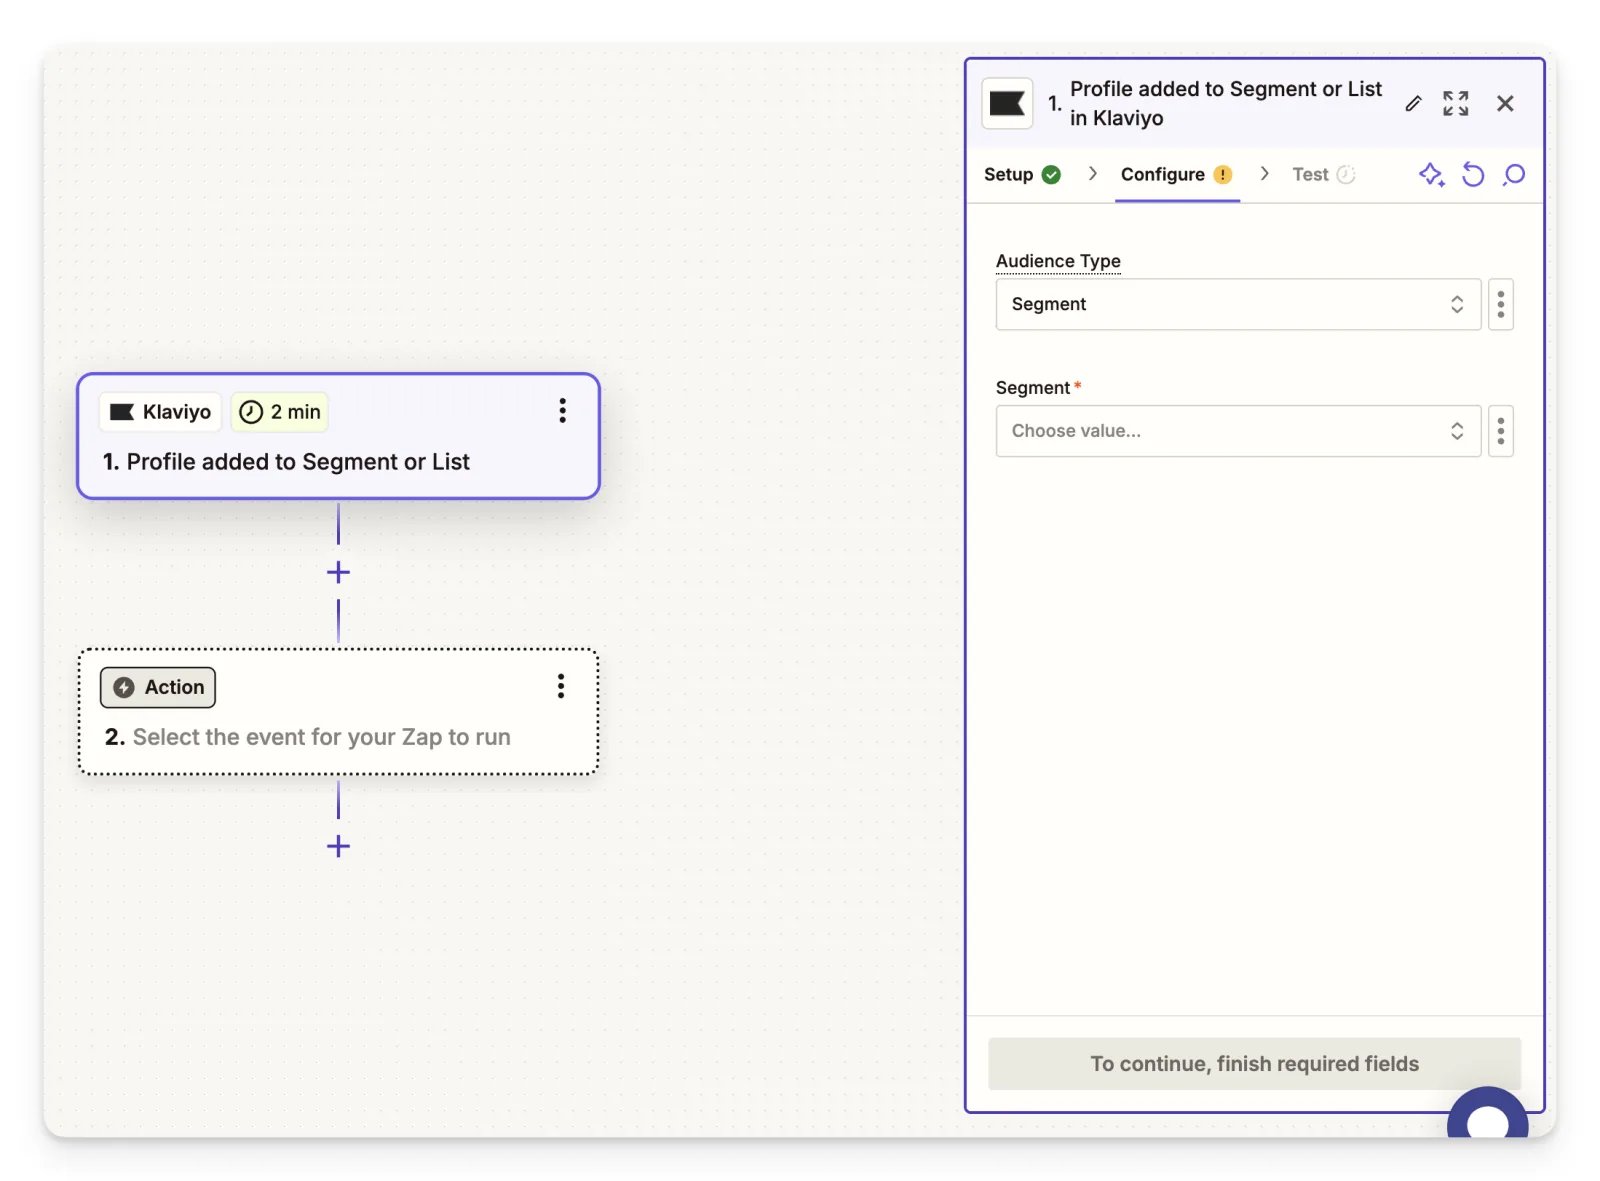
On the Configure step, choose Segment as your Audience Type, then choose the segment you created.
-
Select Profile added to Segment or List as the trigger event. When a new profile is added to a segment in Klaviyo, this triggers the Zap to send the event to Cometly.
-
Choose Cometly as the action
- For the event action, choose Send Event.
- Choose your event. You can use the Lead event or create a new event.
- Follow the steps in the Zapier integration guide to set up Cometly as an action.
Check it worked
In Zapier, click Test Step on the Cometly action to send a test event. Then open Events Manager in Cometly and check the Events Log tab: the event you chose appears there, which confirms Cometly received the data.Set up email and SMS tracking with Klaviyo
Klaviyo can automatically add URL parameters to the links in your emails and SMS messages. Add thecomet_source parameter so that email and SMS touchpoints show up on your contacts’ timelines.
View the Klaviyo email and SMS tracking guide
Frequently asked questions
Does Cometly have a direct Klaviyo integration?
No. Klaviyo connects to Cometly through Zapier: Klaviyo is the trigger of your Zap and Cometly is the action. You connect Zapier to Cometly once with an API token, as described in the Zapier integration guide.Can I send a Klaviyo form submission to Cometly as an event other than Lead?
Yes. In the Cometly action of your Zap you can select another pre-configured event, or a custom event you created in Cometly.Do I need the Cometly pixel on my site to track Klaviyo forms?
Yes. The pixel records the visit and captures the form fields, which is how Cometly links the event from Zapier to the visitor’s journey and the ad that brought them. Map the email field from Klaviyo in your Zap so the event can be matched to that contact.Next steps
- Set up email and SMS tracking with Klaviyo
- Connect Cometly to Zapier and send events
- Learn how events work in Cometly
- Install and verify the Cometly pixel