

Before you start
- Install the Cometly pixel (the tracking script that records visits to your site). See Install the Cometly pixel.
Create an API key in Paddle
-
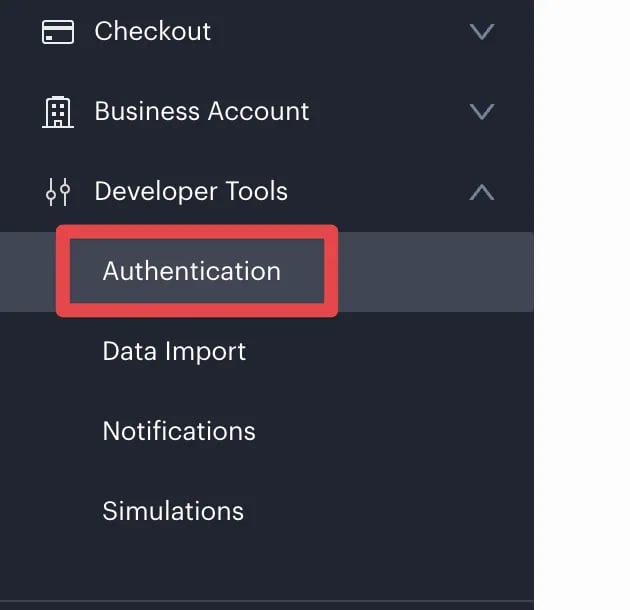
Log in to Paddle. In the left side menu, go to Developer Tools > Authentication.
-
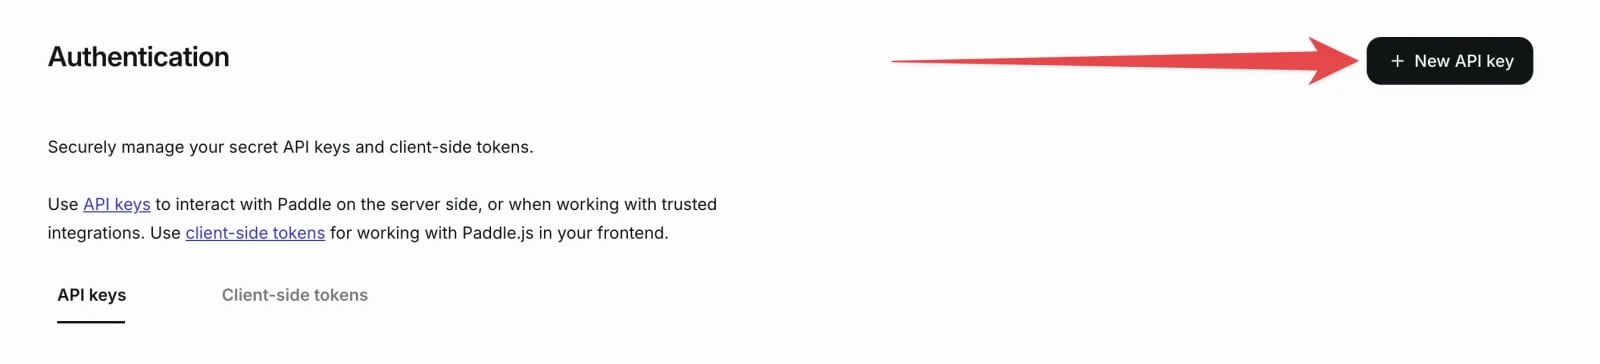
On the Authentication page, click + New API key.
-
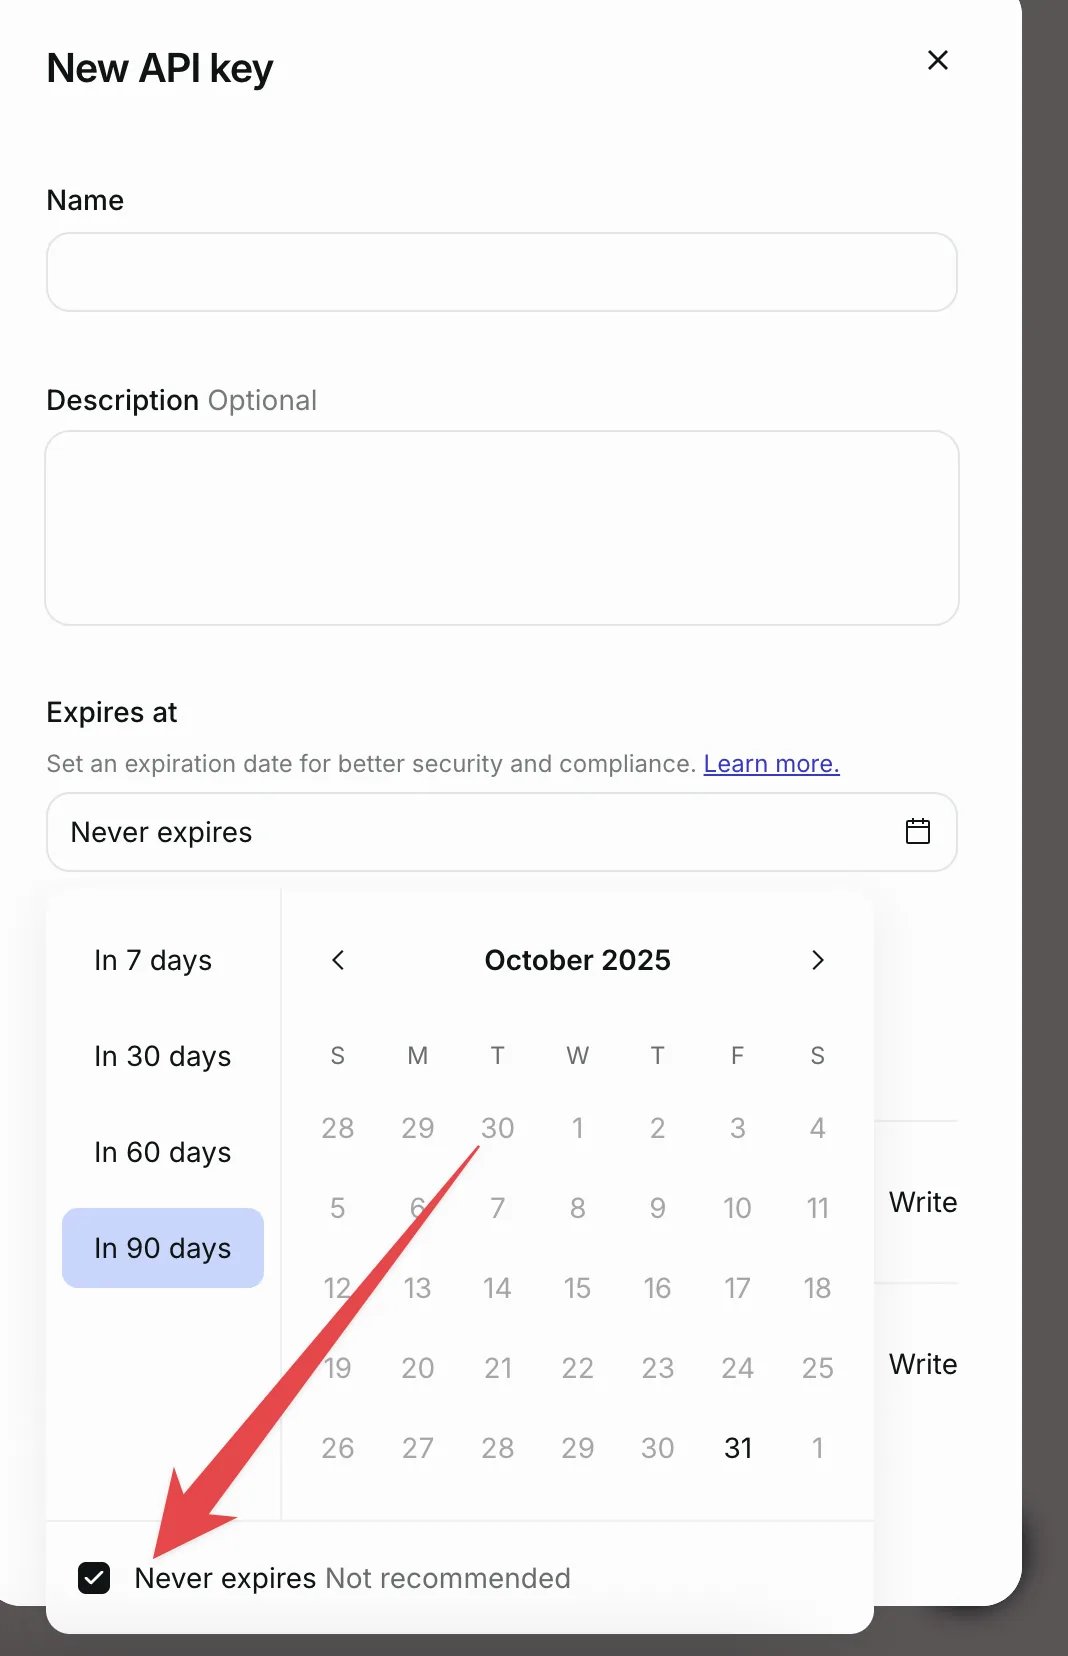
In the New API key window, fill out these fields:
- Name: any name you like. We recommend “Cometly Integration” so the key is easy to find if you have several API keys.
- Expires at: choose Never expires.
-
Set these permissions:
- Customers: Read
- Notification settings: Read, Write
- Notifications: Read, Write
- Subscriptions: Read
- Transactions: Read
- Click Save.
-
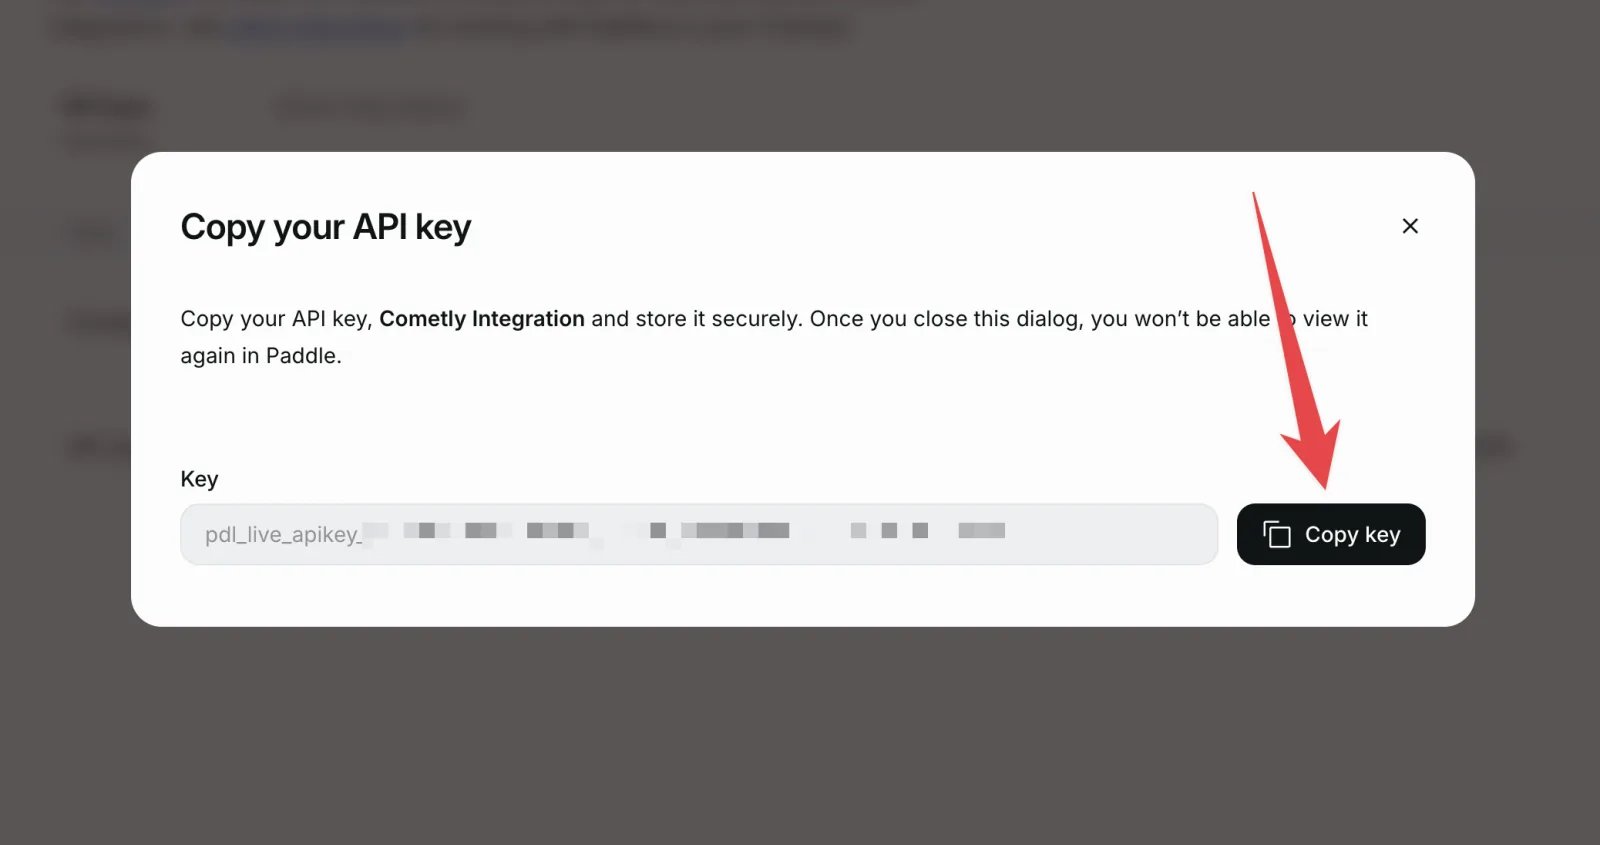
In the “Copy your API key” window, click Copy key.
Connect Paddle to Cometly
-
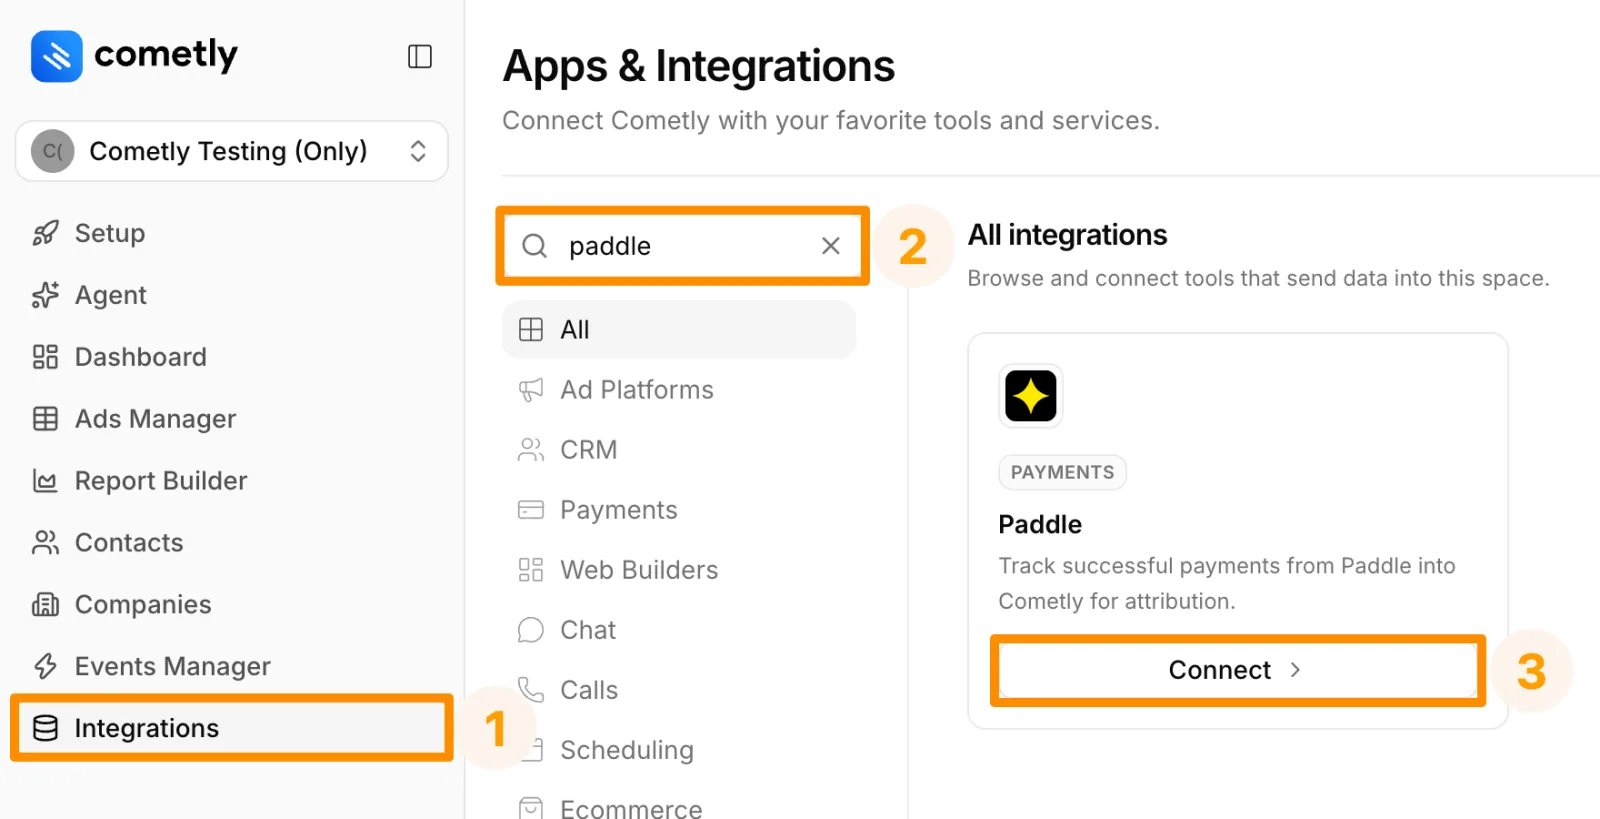
Log in to Cometly and click Integrations in the sidebar. On the Apps & Integrations page, type “Paddle” in the search box, then click Connect on the Paddle card.
-
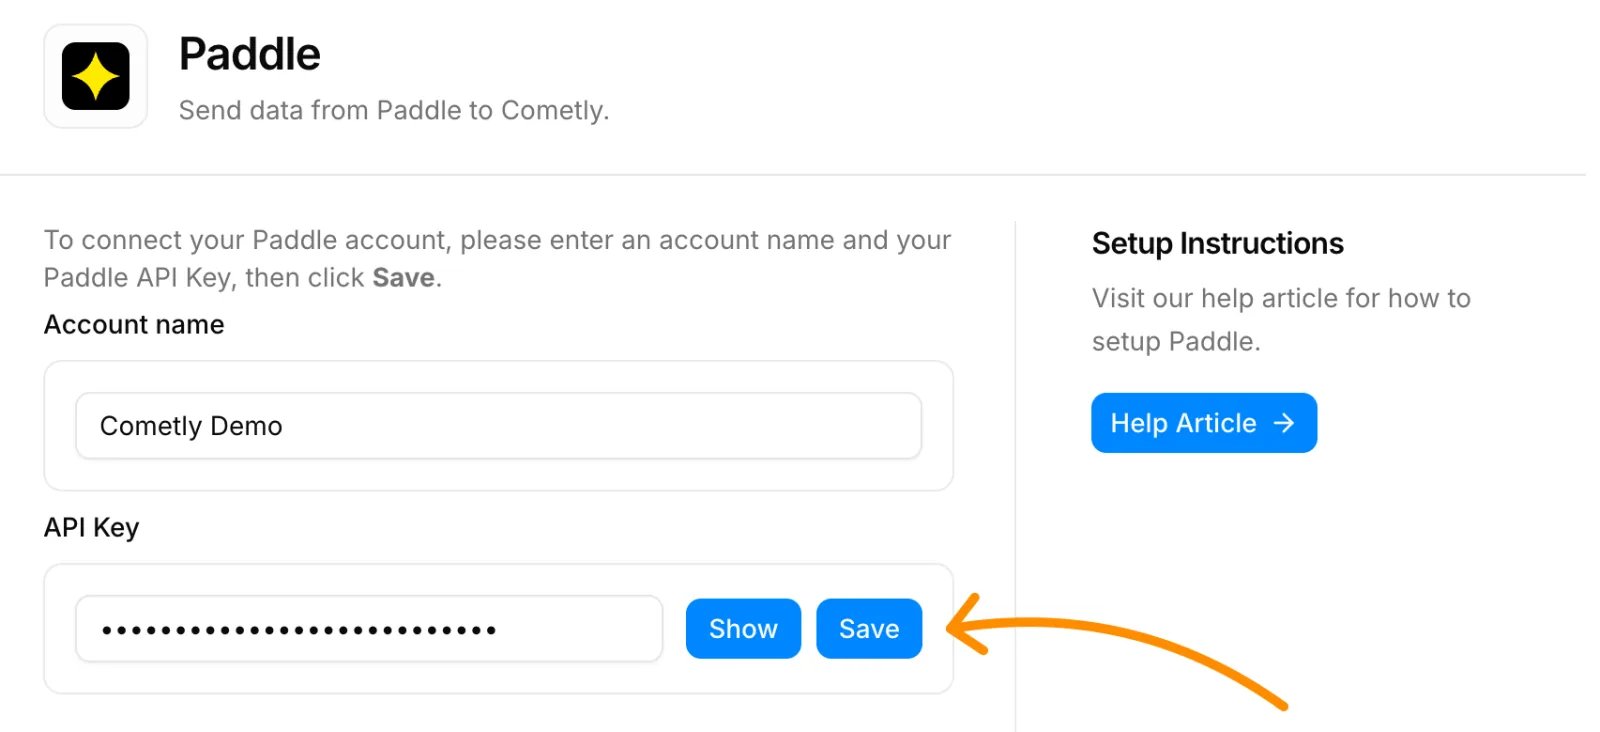
On the Paddle page, enter an Account name (a label that helps you recognize this Paddle account in Cometly), paste the key you copied from Paddle into API Key, then click Save.
Create an event
-
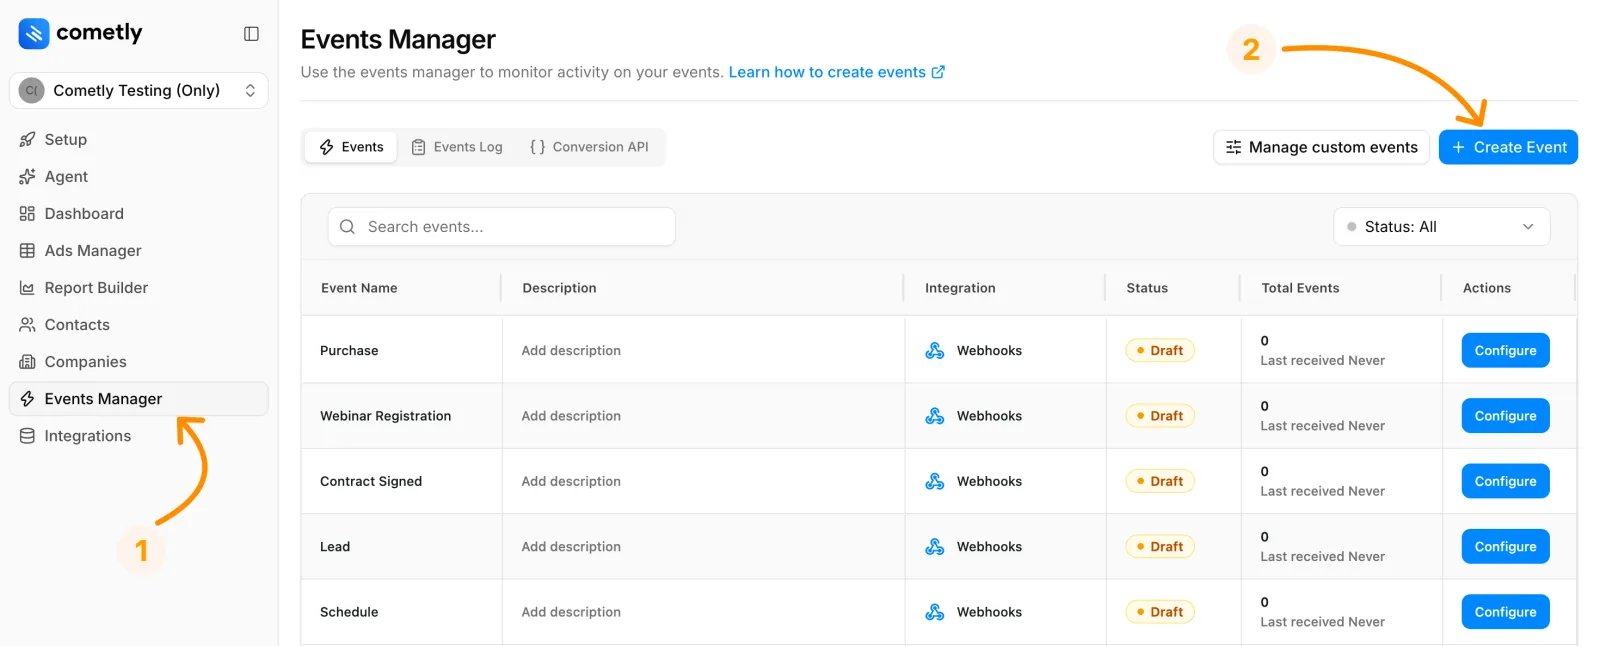
Click Events Manager in the sidebar, then click Create Event.
-
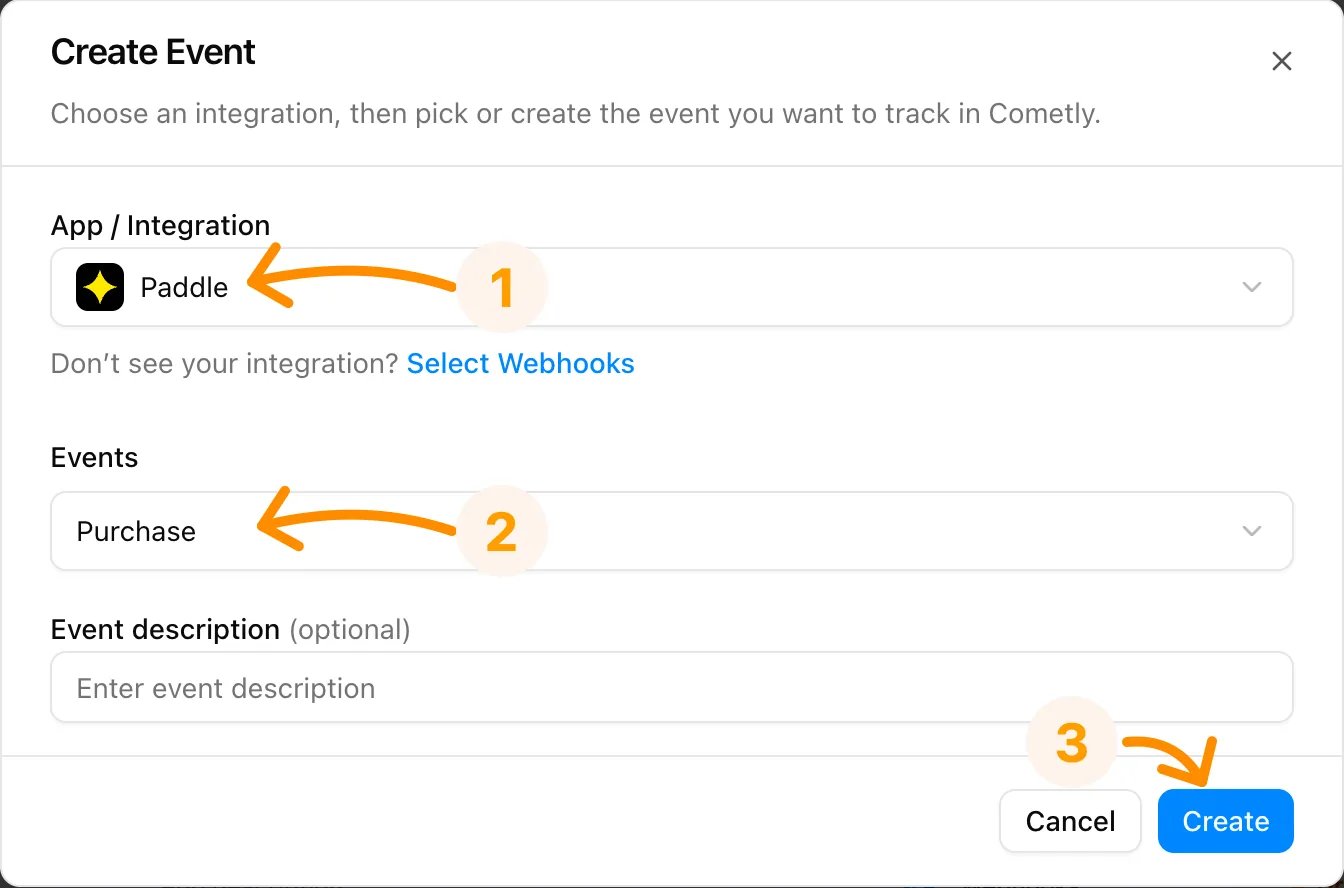
Under App / Integration, search for Paddle and select it. Under Events, choose the event you want to track. Then click Create.
-
Find the event you just created in the Events Manager table and click Configure.
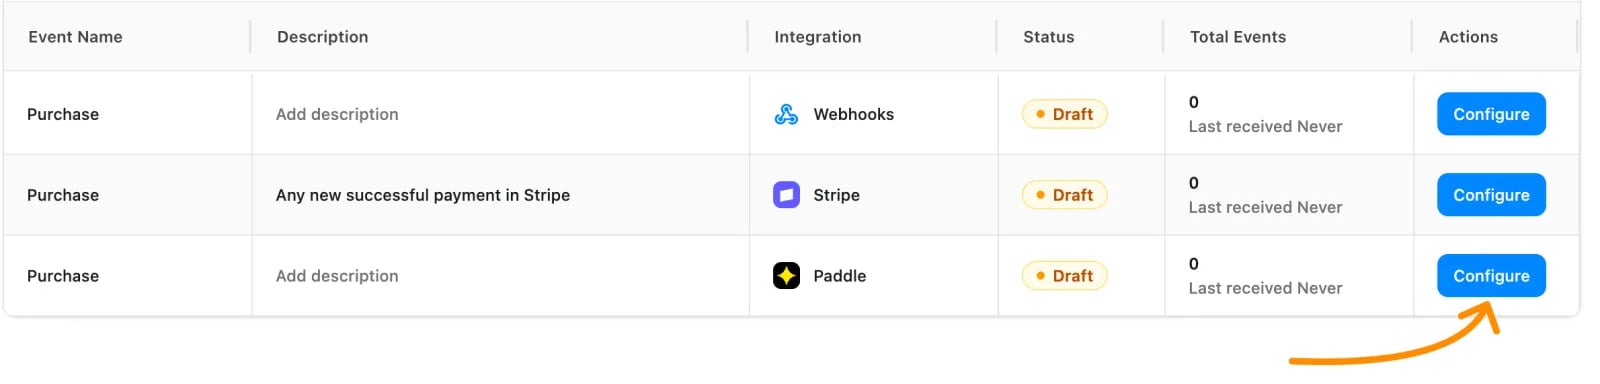
- Under Account, select the Paddle account you connected. (You can also add one here with + Connect new Paddle account.)
-
Under Trigger, choose what should send the event:
Once selected, the Account and Trigger cannot be modified. To change either one, create a new event.
- Click Continue.
Map your data
- Click Check for Data, then trigger the event from inside your Paddle account. If no data shows up yet, click Save & Return When Data is Ready and come back to map your data once events are sent.
- Select a record and click Continue With Selected Record.
-
Map your Paddle data fields to Cometly fields. This makes sure the event data you send (email addresses, event times and other data) lines up with Cometly’s reporting. Email and Event Time are required:
- Email: choose the email address field from your selected record (for example, the field that holds
email@example.com). - Event Time: choose the dynamic option The time we receive the event.
- Email: choose the email address field from your selected record (for example, the field that holds
-
Click Add Field to map more fields, such as:
- First Name
- Last Name
- Phone
- Amount
- Comet Token (
comet_token), if you use an embedded (iframe) Paddle checkout, covered in Track embedded Paddle checkouts
- Click Save & Continue.
Add filters and activate the event
Filters let you control when an event in Paddle should actually create an event in Cometly. This step is optional, but we recommend it if you only want to send the event under certain conditions.- Click Add Filters (the button reads Add Another Filter once you have one).
- Select the field you want to filter by.
- Choose your condition (for example
(text) is,(text) containsor(text) starts with). - Enter the value you want to match.
- Click Activate to finish. You can also click Activate without adding any filter.
Track embedded Paddle checkouts
If you use an embedded (iframe) Paddle checkout in your funnel or website, you need a few extra steps for accurate tracking. The steps below show you how to install an additional script on your page so thecomet_token (the visitor’s tracking token from the Cometly tracking script) is passed into every Paddle checkout.
Once this is in place, the comet_token is included with each checkout event. You can then map it in the mapping step above (Add Field > Comet Token) to complete your setup.
Step 1: Install the Cometly tracking script
Make sure the Cometly tracking script is installed in the<head> of every page of your website. See Install the Cometly pixel.
Step 2: Create a client-side token in Paddle
You need a client-side token from Paddle for thePaddle.Initialize part of the additional script.
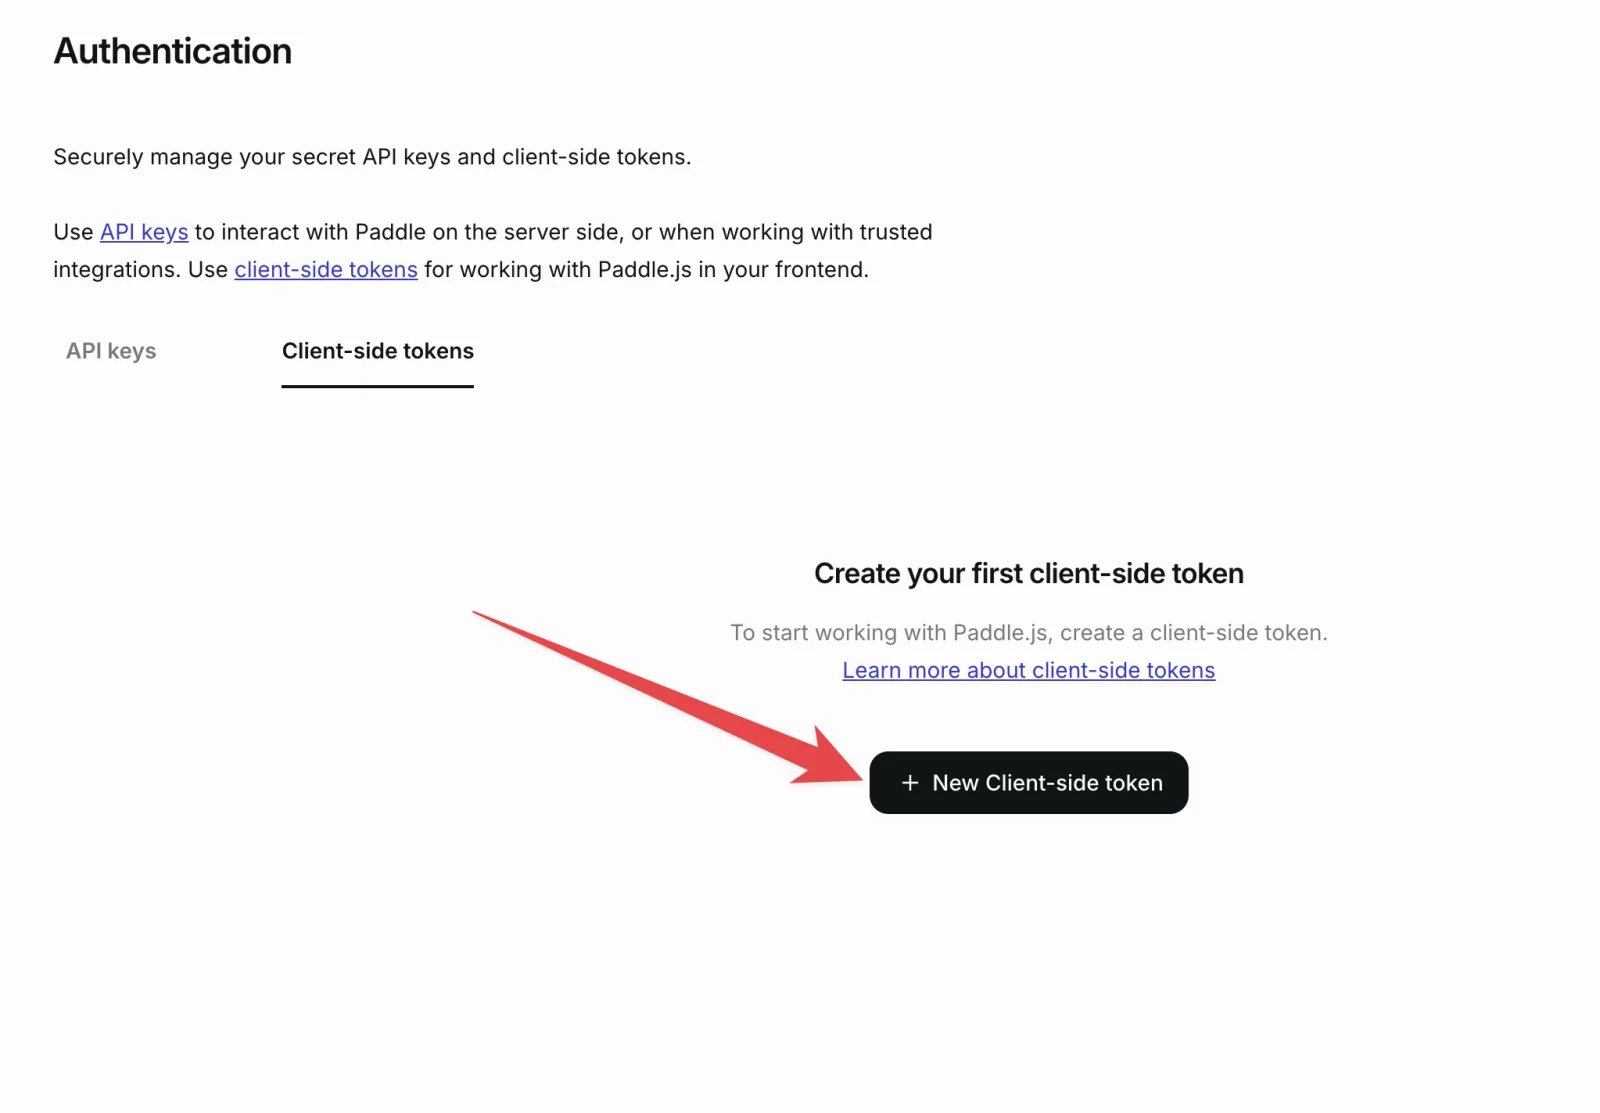
- In Paddle, go to Developer Tools > Authentication.
-
On the Authentication page, click Client-side tokens, then click + New Client-side token.
-
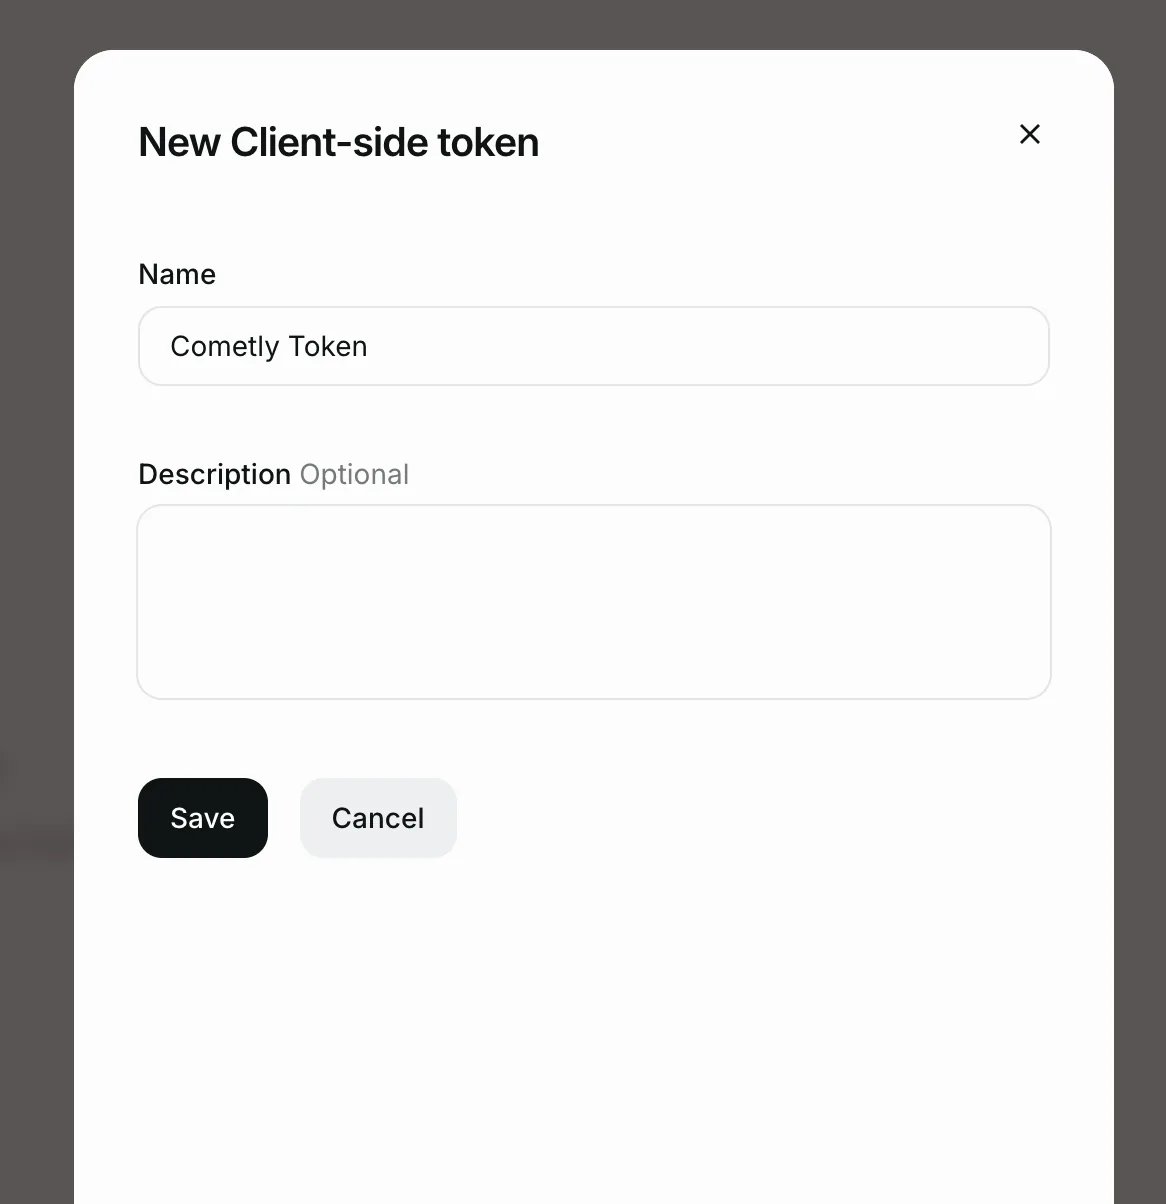
Name the token “Cometly Token”, then click Save.
-
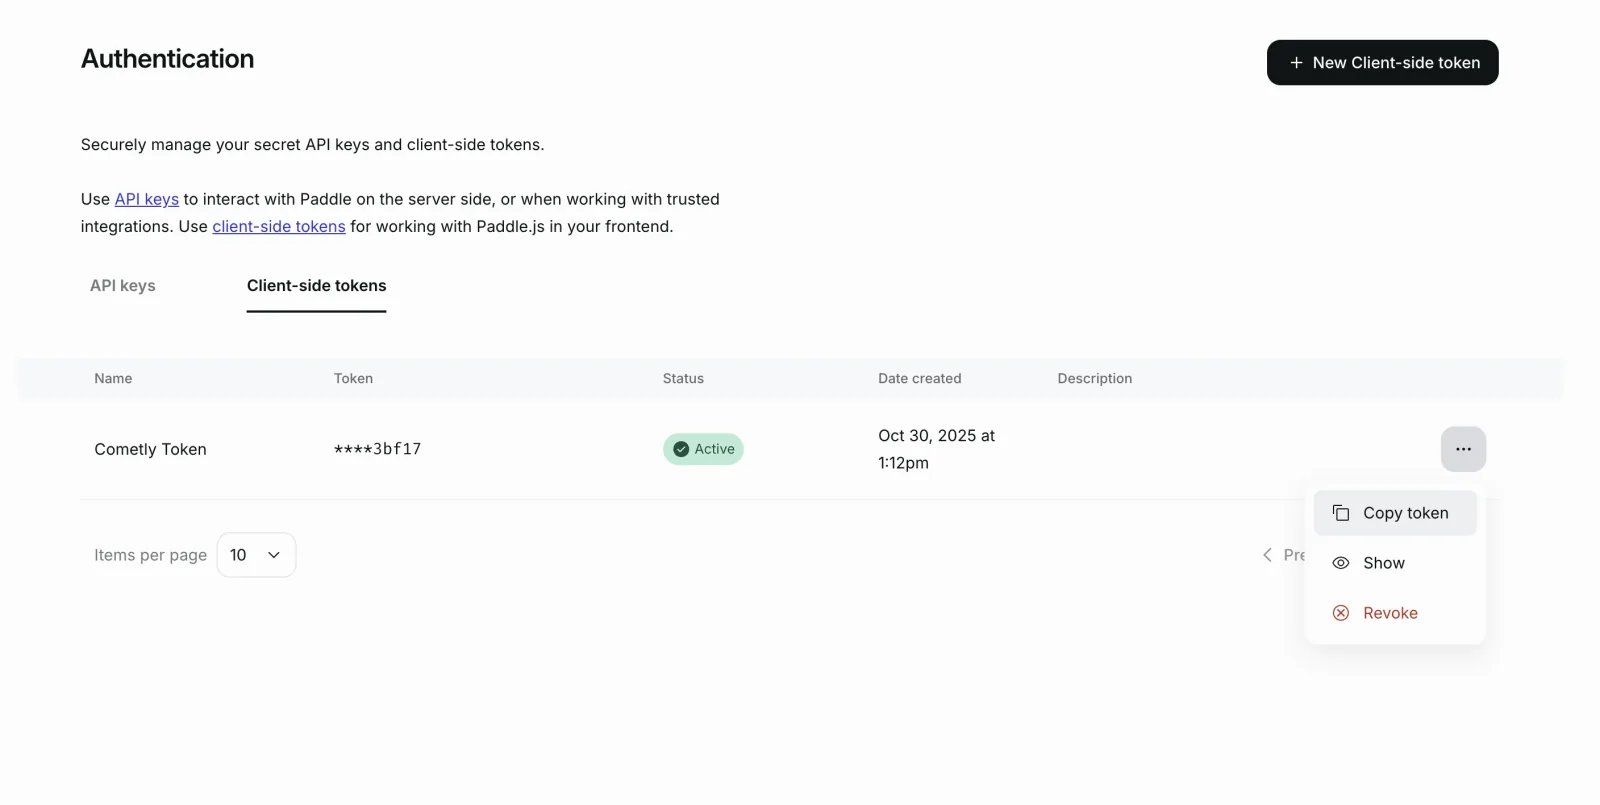
After the token is saved, open the three dots menu on its row and click Copy token.
Step 3: Add the Paddle script below the Cometly script
Add this script right below the Cometly script in the<head> of your landing page, so it loads before the visitor opens the embedded Paddle checkout. Replace INSERT_TOKEN_HERE with your actual client-side token.
Step 4: Assign a default payment link
- In the Paddle dashboard, go to Checkout > Checkout Settings.
- Scroll to the Default Payment Link section.
- Enter your website URL in the field.
- Click Save in the top right corner of the page.
Step 5: Pass the comet token into the Paddle checkout
For accurate attribution in Cometly, pass thecomet_token into every Paddle checkout session. There are two ways to do this, depending on how Paddle is implemented on your site: HTML data attributes or JavaScript properties. For more about the token itself, see Comet token.
- HTML data attributes
- JavaScript properties
If your Paddle checkout buttons are created directly in your HTML, add the Example:This includes the visitor’s tracking token from Cometly in the Paddle checkout session.
comet_token with the data-custom-data attribute.- Locate your Paddle checkout button in the HTML.
- Add the following snippet inside the
data-custom-dataproperty:
Step 6: Verify the token is passed
Run a test checkout and confirm that thecomet_token value appears in your Paddle event payload (for example, under custom_data). This confirms the token is being passed into the checkout for attribution.
In Cometly, the comet_token appears in the payload under the webhook_payload property. You can also check that Paddle received the comet_token from your landing page: in Paddle, click Transactions in the left side menu, then open the transaction.
Check it worked
Go to Events Manager > Events Log to see the events Cometly has received and their status. After your next Paddle transaction, customer or subscription that matches the trigger, it appears there.Frequently asked questions
Can I track both transactions and subscriptions from Paddle in Cometly?
Yes. Each event uses one trigger, and the trigger cannot be changed after you select it. Create one event for each trigger you want to track, for example one for Transaction Completed and one for Subscription Created, and select the same Paddle account in each.Do I need to add a webhook in Paddle myself?
No. When you set up the event, Cometly uses your API key to create the notification in your Paddle account for the trigger you chose. This is why the key needs Read, Write access to Notification settings.Why does Cometly say my Paddle API key is incorrectly formatted?
Cometly checks that the key matches the format of a Paddle API key before it saves it. Paste the full secret key, which starts withpdl_live_apikey_, with nothing cut off. A client-side token (the kind used for embedded checkouts) does not work in the API Key field.
Next steps
- Send these conversions back to your ad platforms with the Conversion API
- Use the Events Log to check what Cometly received
- Understand how events work in Cometly
- Learn what the comet token is and how it ties a sale to a visitor