

Before you start
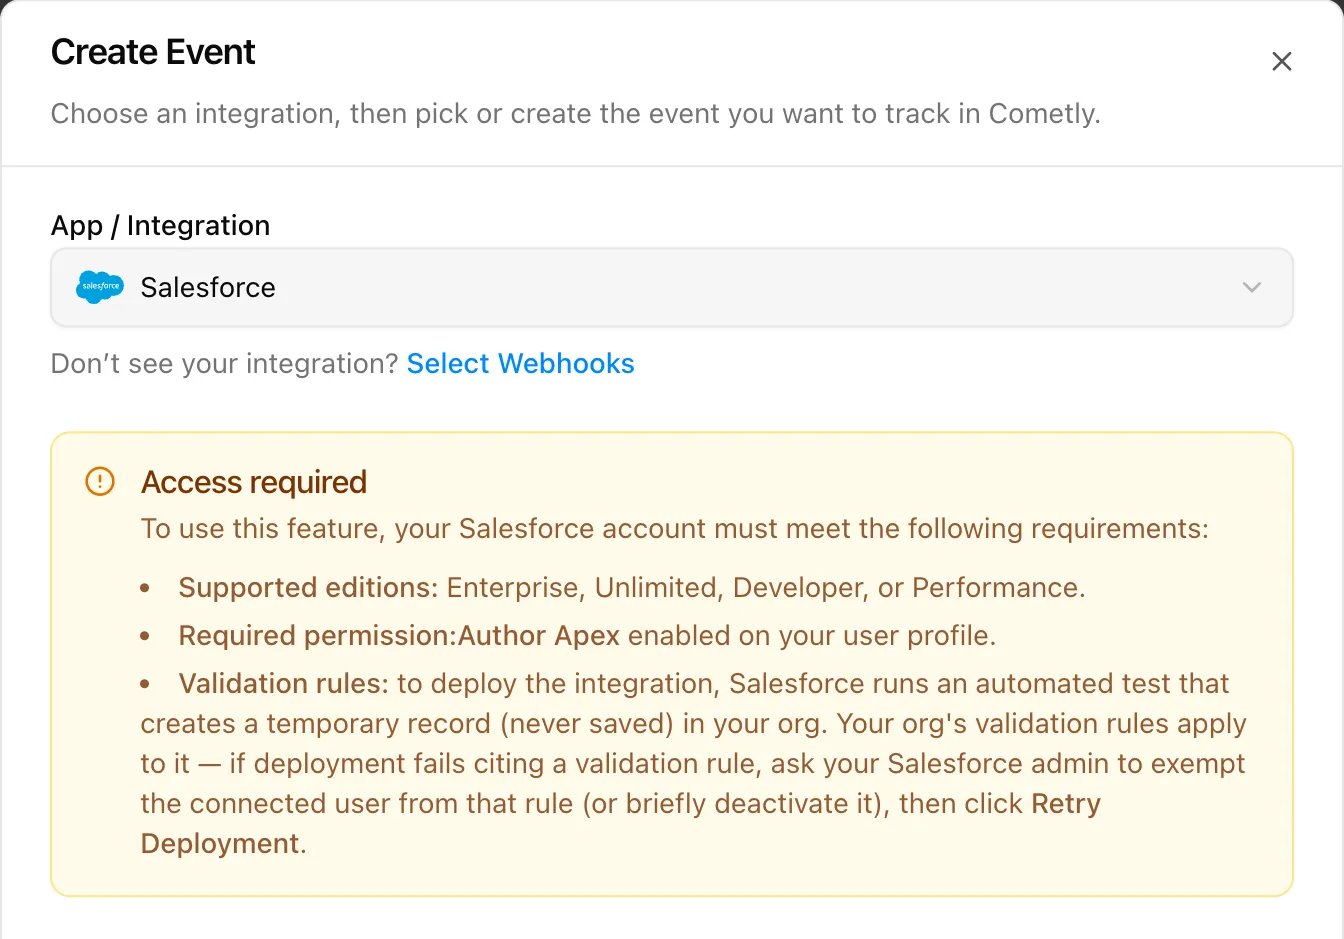
Check the following in Salesforce. The integration does not work without them.- Your Salesforce edition is one of Enterprise, Unlimited, Developer or Performance.
- Your Salesforce user profile has the Author Apex permission enabled.
- Your validation rules allow the deployment. To deploy the integration, Salesforce runs an automated test that creates a temporary record (never saved) in your org, and your org’s validation rules apply to it. If deployment fails citing a validation rule, ask your Salesforce admin to exempt the connected user from that rule (or briefly deactivate it), then click Retry Deployment in Cometly.
Set up the integration
1
Connect your Salesforce account
- In Cometly, click Integrations in the sidebar.
- Search for Salesforce and click Connect on the Salesforce card.
- Click Add connection in the top right. A Salesforce sign-in window opens.
- Log in to your Salesforce account if prompted, review the permissions and approve access.
2
Create a Salesforce event
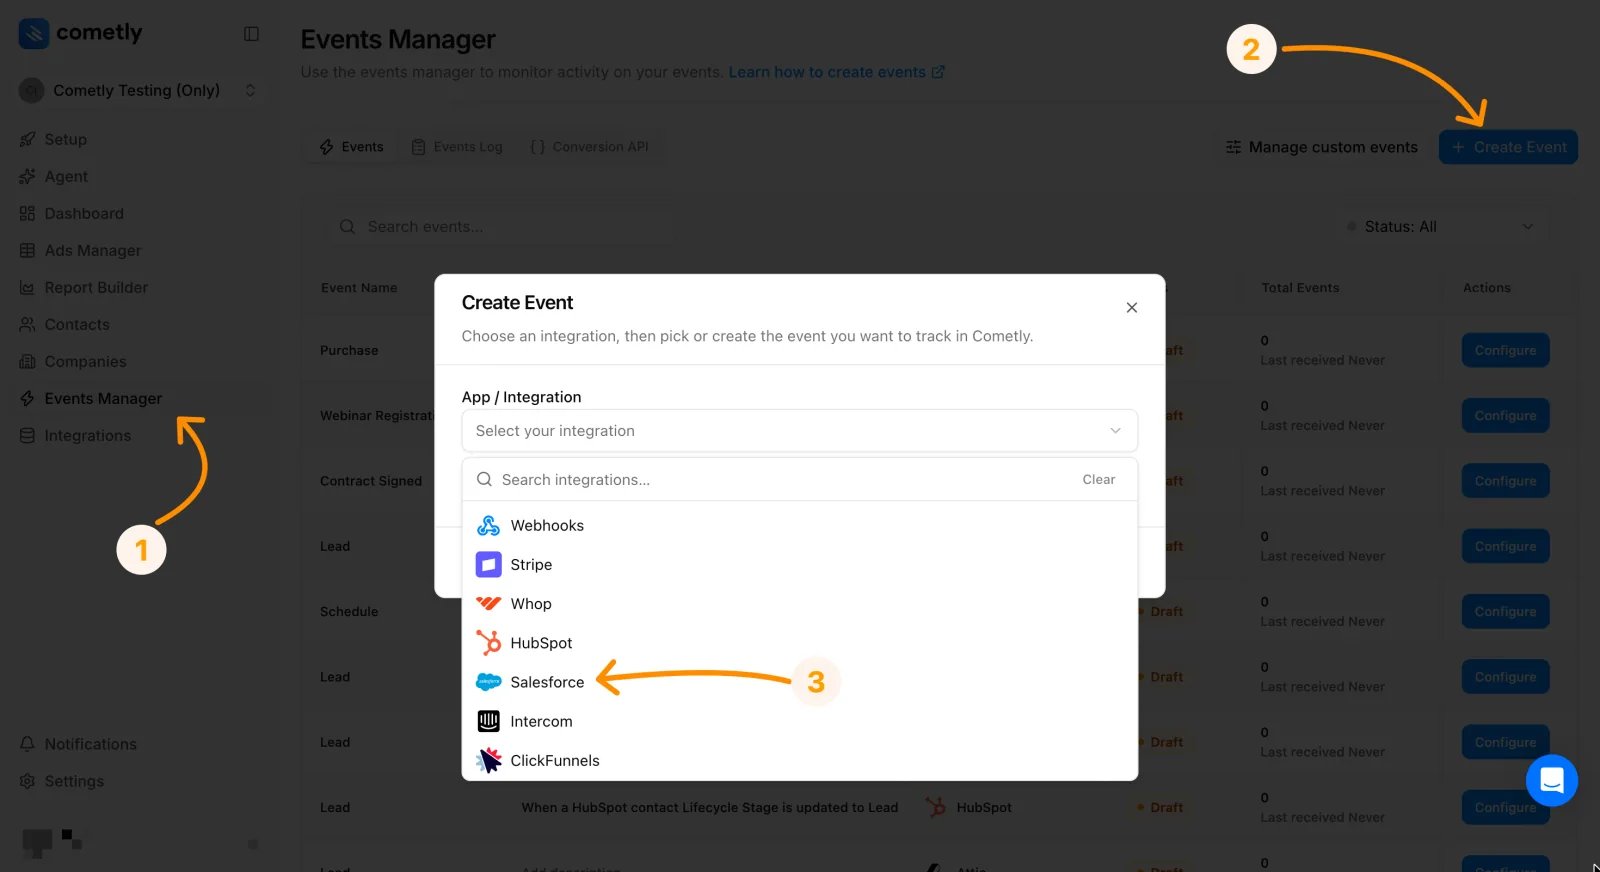
- Click Events Manager in the sidebar.
- Click Create Event.
-
Under App / Integration, select Salesforce.
-
Select an event name (for example Lead), or click Create New Event to name your own, for example:
NewContactNewLeadNewOpportunity
- (Optional) Add an Event description to define what the event represents.
- Click Create. The event appears in the Events Manager with the status Draft.
3
Configure the Salesforce trigger
- On the draft event’s row, click Configure.
- Under Account, select your Salesforce connection. If you have not connected one yet, click Connect new account.
-
Under Trigger, choose one of:
- New Contact
- Contact Update
- New Lead
- Lead Update
- New Opportunity
- Opportunity Update
- For an update trigger, review Fields to watch. The event fires when any of these fields changes. The most common standard fields are pre-selected, and you can add or remove fields, including custom fields.
-
(Optional) Under Filters (optional), add conditions so that only matching records are sent, for example Opportunity stage Equals
Closed Won. Use Add condition and Add filter group to build them. - (Optional) Under Fields to send (optional), select specific fields to include. Leave it empty to send all fields.
- Click Continue.
4
Trigger the event in Salesforce
- Open your Salesforce account.
-
Perform the action that matches your trigger:
- Create or update a contact
- Create or update a lead
- Create or update an opportunity
- Return to Cometly and click Check for Data. Recent records appear in a list.
- Select a record and click Continue With Selected Record.
5
Map fields
- On the Configure Mapping step, map the Email field to the email field from Salesforce. Email and Event Time are required.
- Click Add Field to map any other fields passed in the record, such as name, phone or amount.
- Click Save & Continue.
6
Filter and activate the event
-
(Optional) On the Filtering step, click Add Filters to process only some events, such as:
- Opportunity stage equals
Closed Won - Lead source equals a specific value
- Opportunity stage equals
- Click Activate.
Always map the Email field. Email is required for identity matching and attribution inside Cometly.
Check it worked
In Events Manager, the event no longer shows Draft. Its status is now a toggle that is switched on. Create or update a matching record in Salesforce, then open the Events Log tab in Events Manager to see the event arrive.Frequently asked questions
What does Cometly install in my Salesforce org?
Cometly deploys an Apex trigger on the object you chose (Contact, Lead or Opportunity), with the Apex classes that send the record to Cometly. This is why your Salesforce user needs the Author Apex permission.Does the Salesforce integration import existing leads and opportunities?
No. The trigger runs when a record is created or updated in Salesforce after the trigger is deployed, so Cometly receives records from that point on. Leads, contacts and opportunities that already existed are sent only if a later change matches an update trigger.How do I stop a Salesforce event from sending data to Cometly?
Switch off the event’s toggle in Events Manager. The data already received stays in Cometly, and Cometly removes the trigger from your Salesforce org. Switching the toggle back on deploys the trigger again, which can take a minute or two.Next steps
- Check incoming events in the Events Log
- Learn how events work in Cometly
- Send conversions back to your ad platforms
- Send Salesforce events through Zapier instead