

Before you start
- Install the Cometly pixel (the tracking script that records your visitors) in your ClickFunnels account. See the ClickFunnels pixel installation guide.
- Read the Cometly webhooks guide. It explains mapping and filters, which you use at the end of each setup below.
What you can send
Send lead events
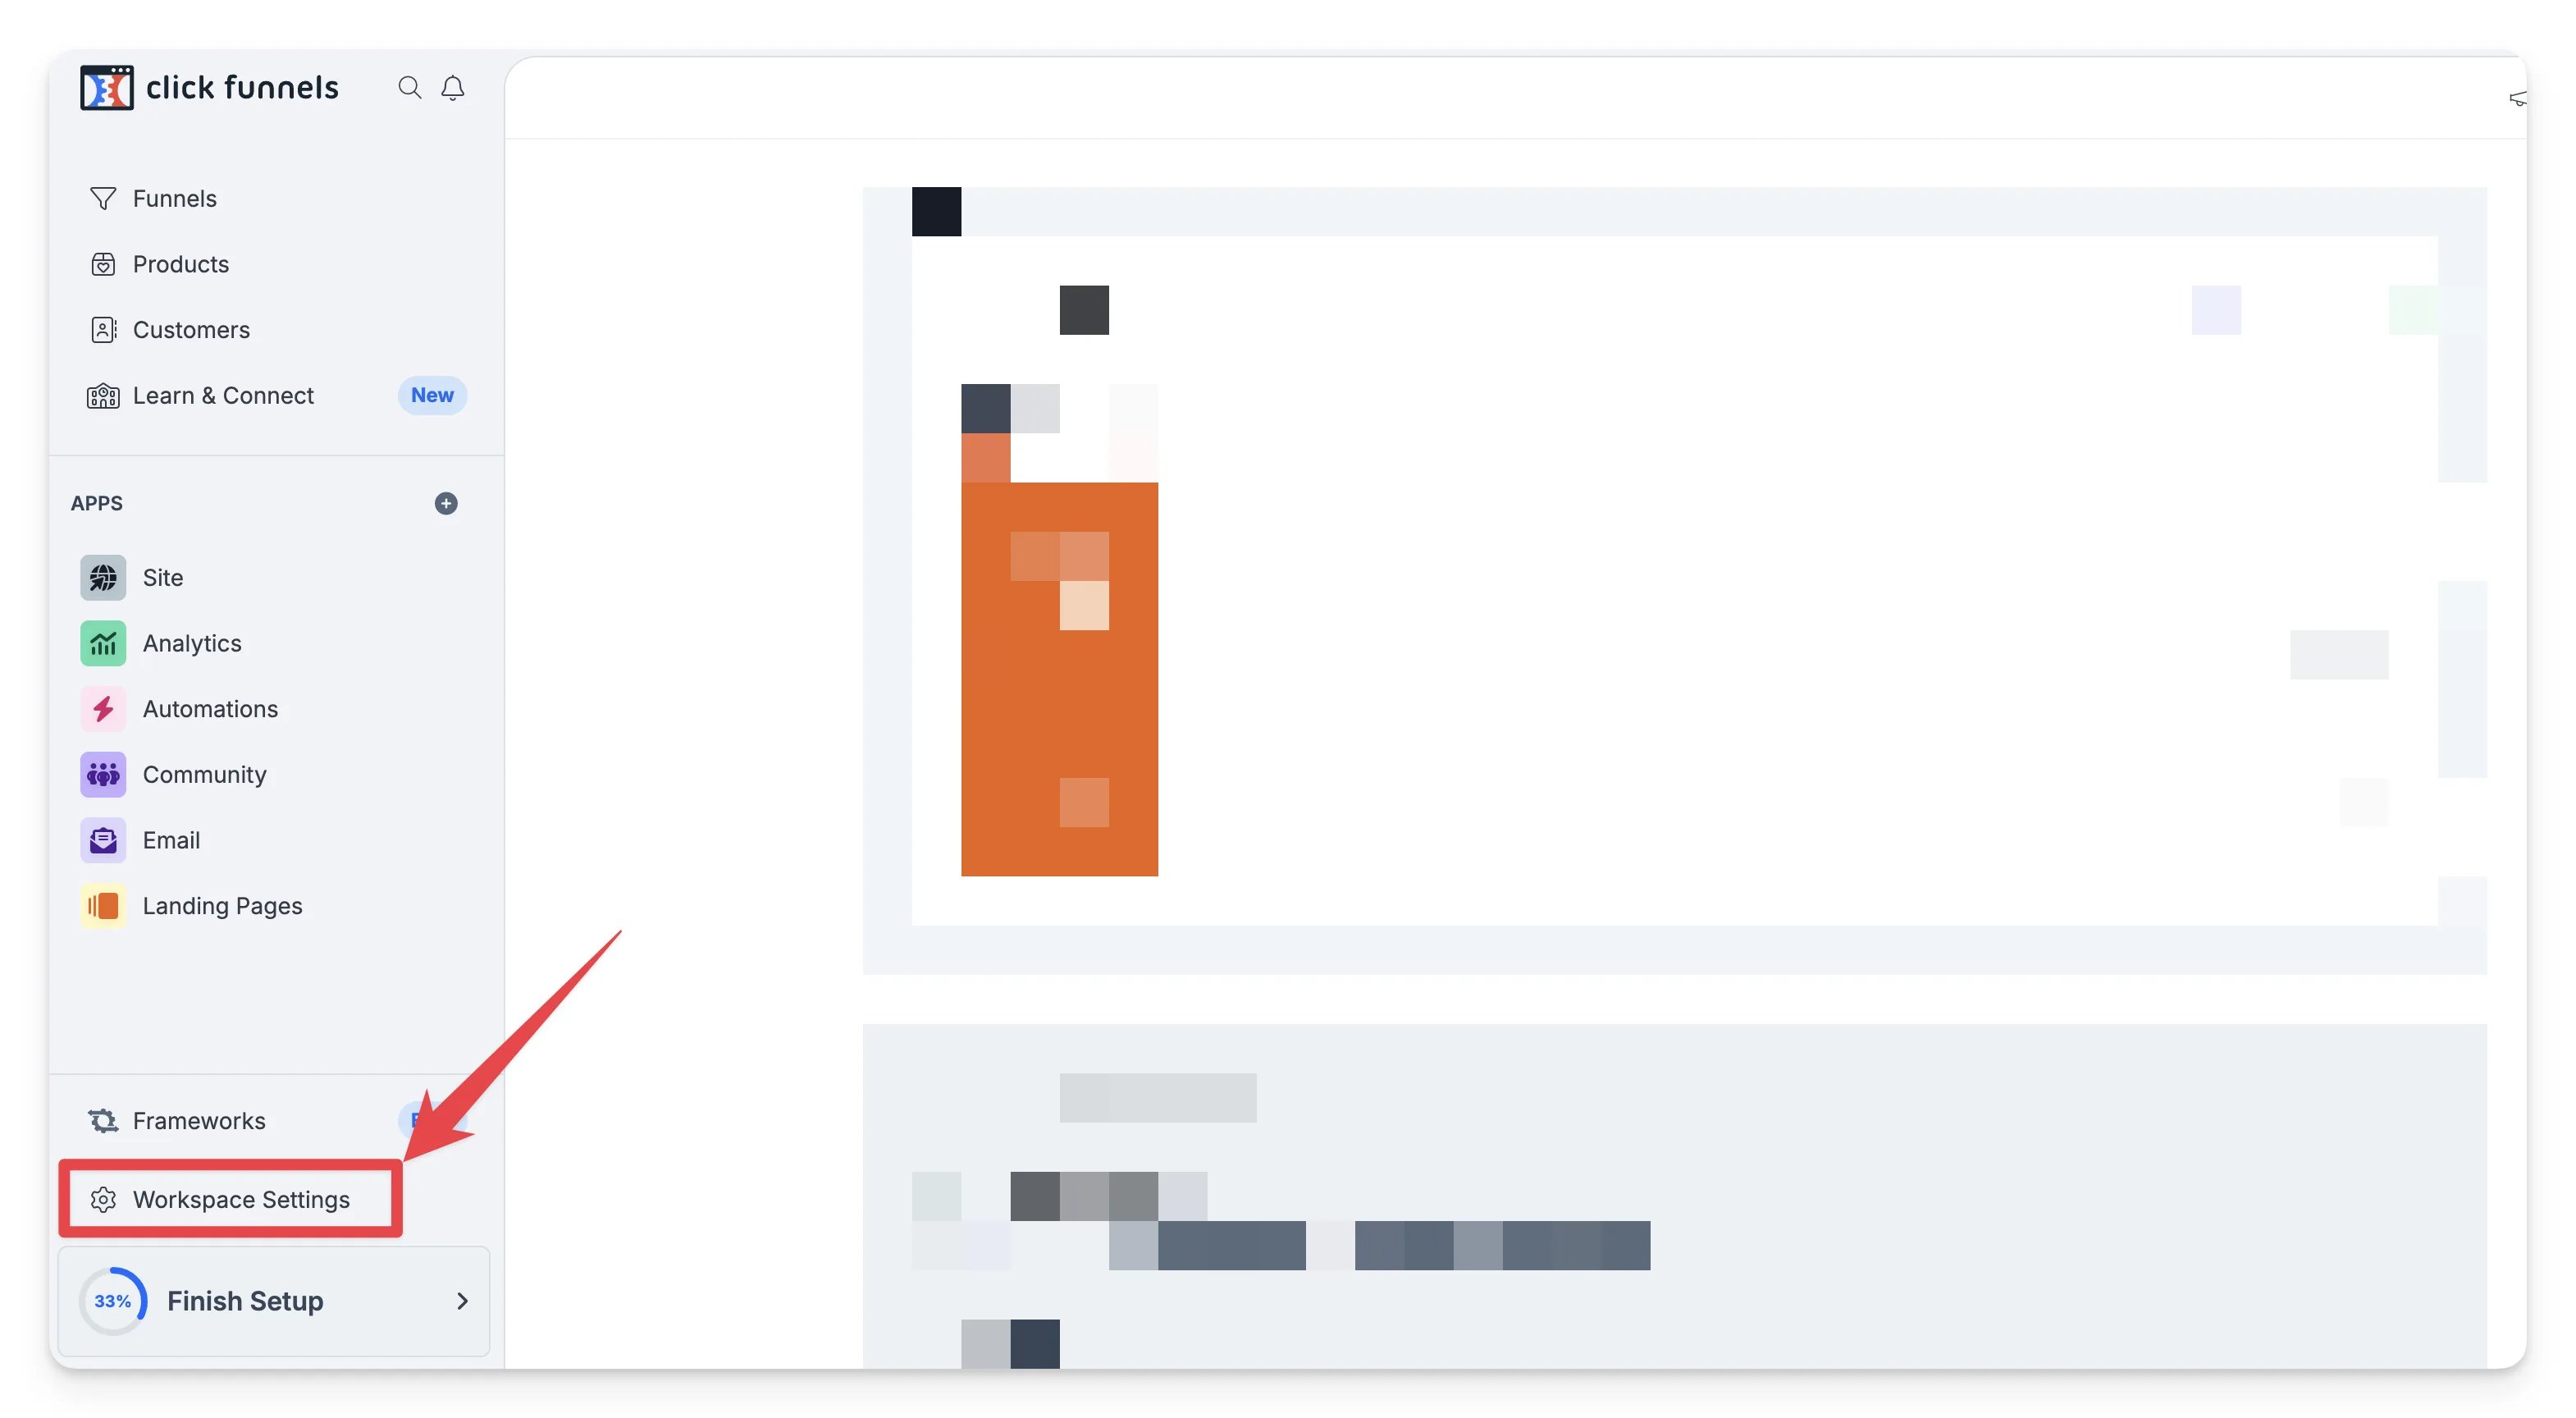
Open Workspace Settings in ClickFunnels
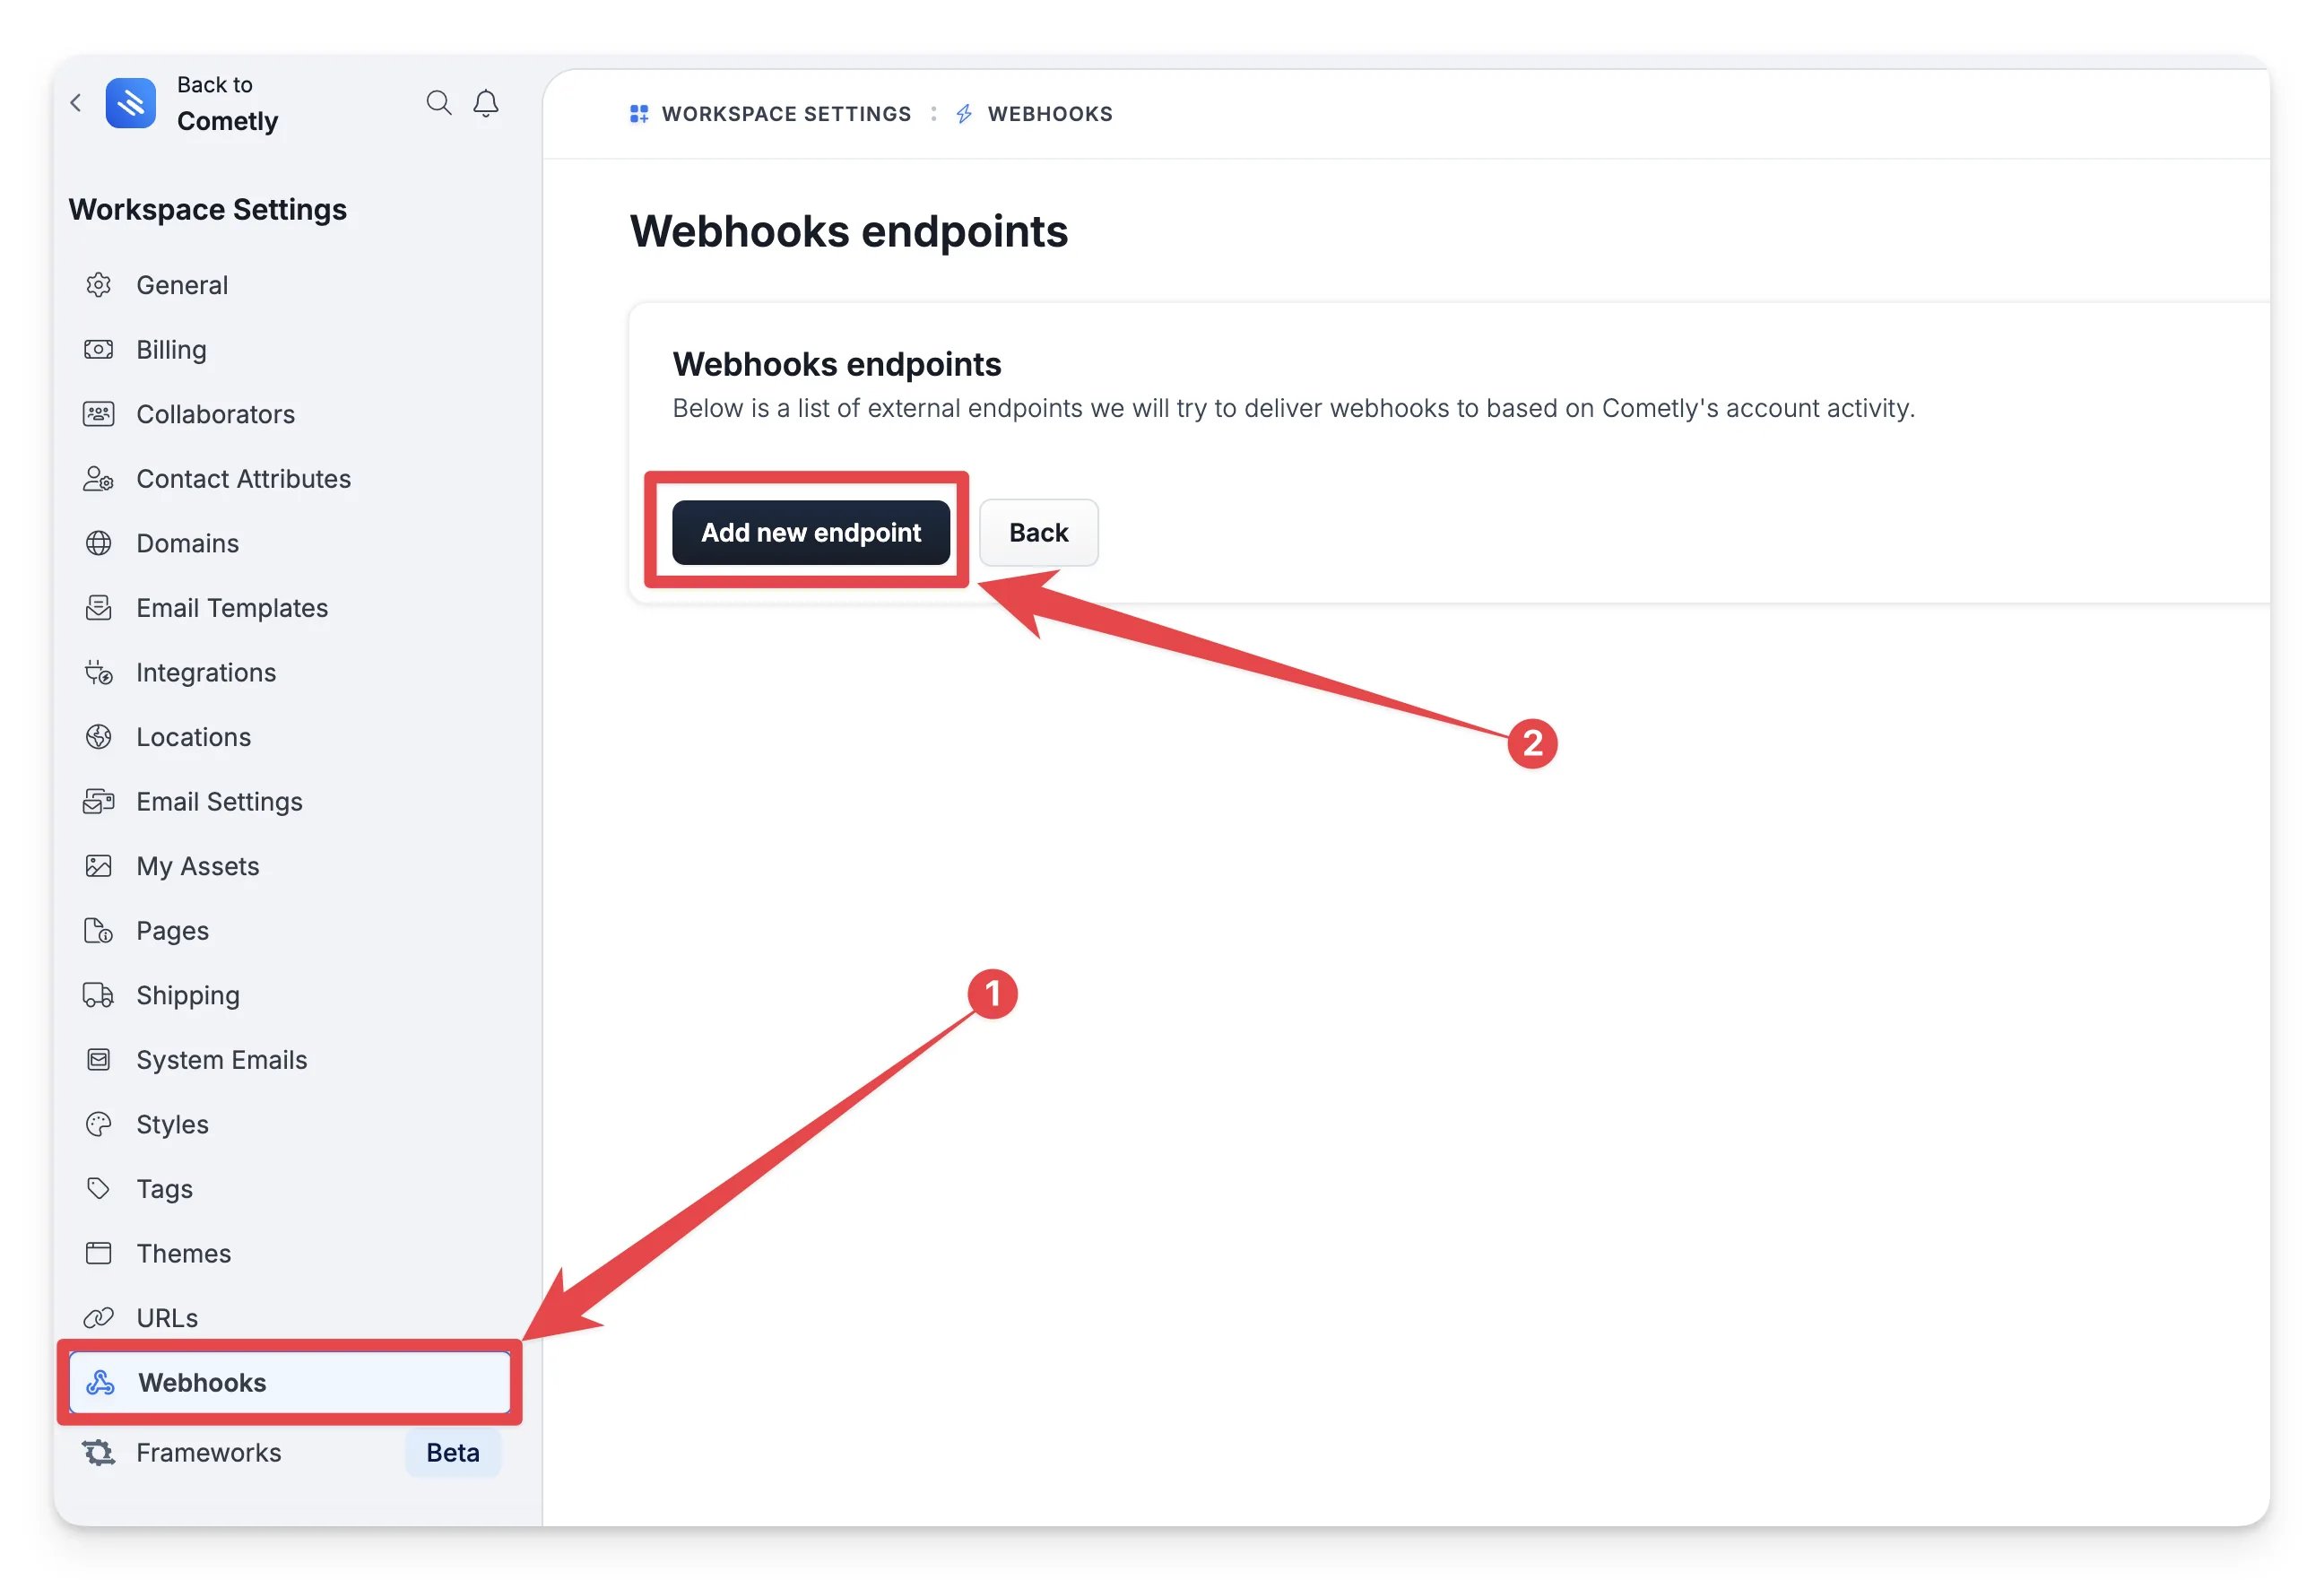
Add a webhook endpoint
Configure the endpoint
- Name: a name that clearly identifies the event, for example “New Form Submission - Cometly”.
- URL: leave empty for now. You get your Cometly webhook URL in the next step.
- Event types: select
form_submission.createdto trigger the webhook whenever a new form submission is created. - API Version: choose V2.
- Endpoint scopes (optional): leave blank to send events for all contacts. To limit the webhook to specific funnels or pages, select them here.
Create the event in Cometly and copy the webhook URL
- In Cometly, go to Events Manager and click Create Event.
- Under App / Integration, select Webhooks.
- Select the event name. We recommend the Lead event for this setup. Click Create.
- Under Your webhook URL, click Copy.
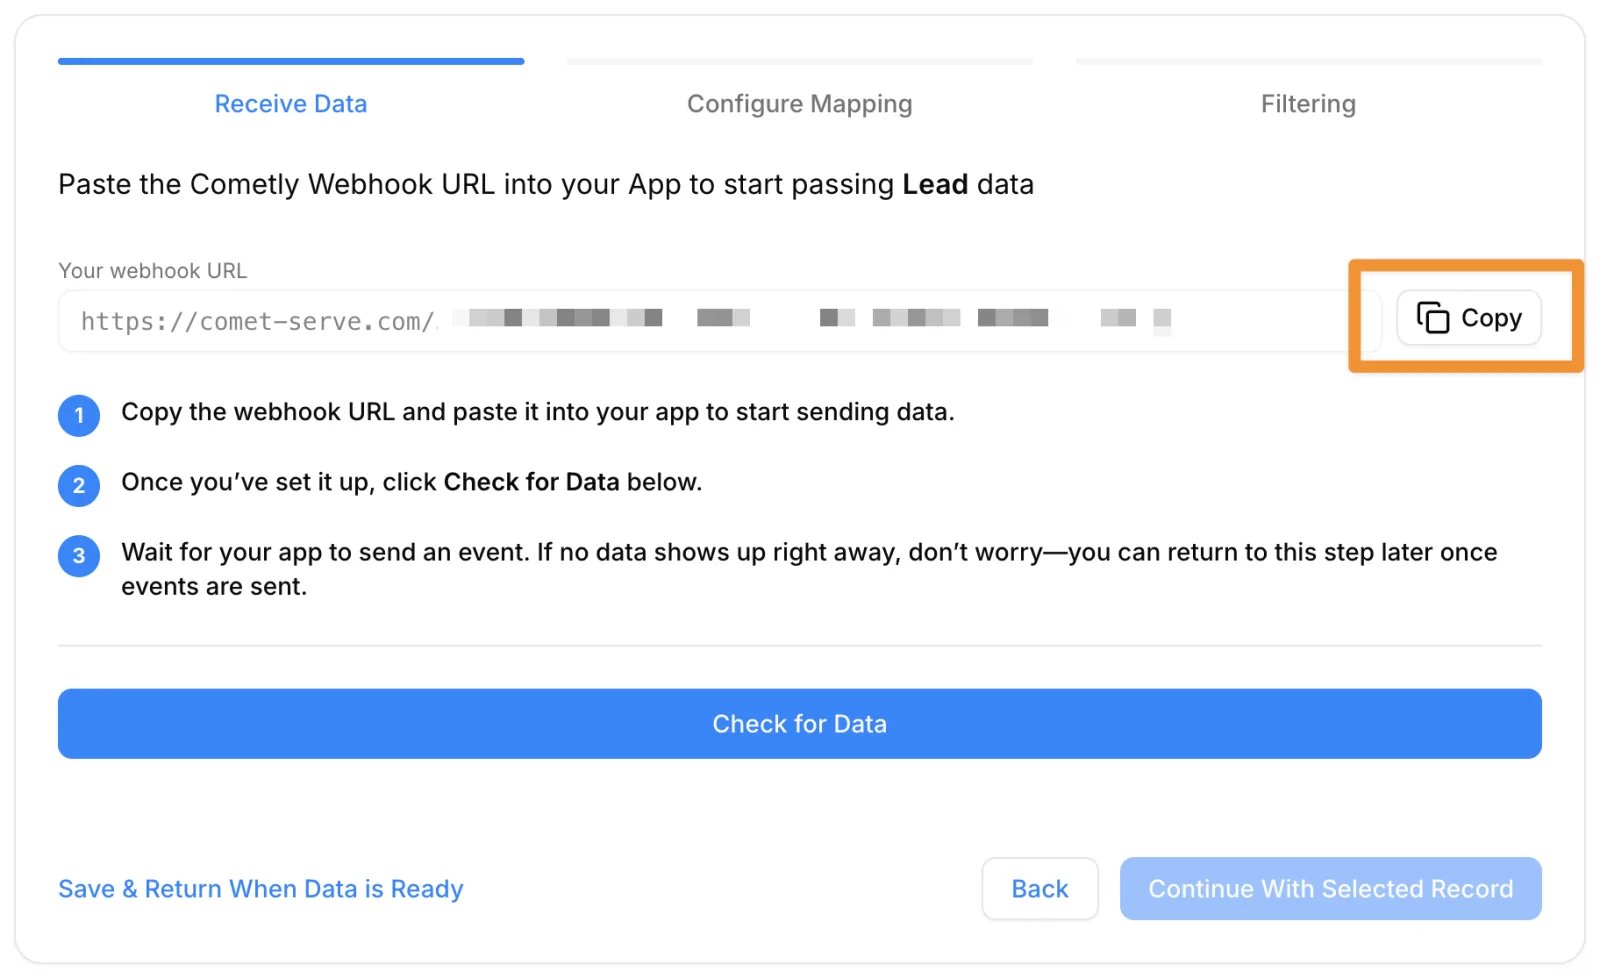
Save the endpoint in ClickFunnels
Finish the setup in Cometly
Send opportunity created events
Open Workspace Settings in ClickFunnels
Add a webhook endpoint
Configure the endpoint
- Name: a name that clearly identifies the event, for example “New Opportunity Created - Cometly”.
- URL: leave empty for now. You get your Cometly webhook URL in the next step.
- Event types: select
sales/opportunity.createdto trigger the webhook whenever a new opportunity is created in ClickFunnels. - API Version: choose V2.
- Endpoint scopes (optional): leave blank so all opportunities in your ClickFunnels account are sent, regardless of the funnel or page.
Create the event in Cometly and copy the webhook URL
- In Cometly, go to Events Manager and click Create Event.
- Under App / Integration, select Webhooks.
- For the event name, we recommend choosing Create New Event and naming it Opportunity Created. Click Create.
- Under Your webhook URL, click Copy.
Save the endpoint in ClickFunnels
Finish the setup in Cometly
Send opportunity closed won events
Open Workspace Settings in ClickFunnels
Add a webhook endpoint
Configure the endpoint
- Name: a name that clearly identifies the event, for example “New Opportunity Closed Won - Cometly”.
- URL: leave empty for now. You get your Cometly webhook URL in the next step.
- Event types: select
sales/opportunity.closedto trigger the webhook whenever an opportunity is marked as Closed Won in ClickFunnels. - API Version: choose V2.
- Endpoint scopes (optional): leave blank so all opportunities in your ClickFunnels account are sent, regardless of the funnel or page.
Create the event in Cometly and copy the webhook URL
- In Cometly, go to Events Manager and click Create Event.
- Under App / Integration, select Webhooks.
- For the event name, we recommend choosing Create New Event and naming it Opportunity Closed Won. Click Create.
- Under Your webhook URL, click Copy.
Save the endpoint in ClickFunnels
Finish the setup in Cometly
Send payment events
Open Workspace Settings in ClickFunnels
Add a webhook endpoint
Configure the endpoint
- Name: a name that clearly identifies the event, for example “New Payment - Cometly”.
- URL: leave empty for now. You get your Cometly webhook URL in the next step.
- Event types: select
order.completedto trigger the webhook whenever a new order is created. - API Version: choose V2.
- Endpoint scopes (optional): leave blank so all payments in your ClickFunnels 2.0 account are sent, regardless of the funnel or page.
Create the event in Cometly and copy the webhook URL
- In Cometly, go to Events Manager and click Create Event.
- Under App / Integration, select Webhooks.
- Select the event name. We recommend the Purchase event for this setup. Click Create.
- Under Your webhook URL, click Copy.
Save the endpoint in ClickFunnels
Finish the setup in Cometly
Check it worked
In Events Manager, each webhook event you activated shows a switch that is turned on in the Status column. Trigger a new event in ClickFunnels (for example, submit a form), then open the Events Log tab: the event appears there within 60 seconds, with SUCCESS in the Details column. Test data sent before you activated the event is not processed, so send a new one.Frequently asked questions
Should I use ClickFunnels webhooks or the direct ClickFunnels integration?
We recommend the direct integration: you authenticate your ClickFunnels account and events are sent to Cometly automatically. Use webhooks if you prefer to send the event data manually, one endpoint per event. See ClickFunnels for the direct setup.How long does it take for ClickFunnels webhook events to show up in Cometly?
The event shows in the Events Log within 60 seconds of being sent. It can take up to 15 minutes to appear in the reporting areas, such as the Report Builder or Ads Manager.Why are my ClickFunnels purchases paid with Stripe missing an ad source?
When Stripe takes the payment on your funnel, the Cometly pixel cannot capture the email address from the Stripe form, so Cometly cannot link the purchase to the visitor. Add a hidden comet_token field to your ClickFunnels form and map it to your purchase event. See Track ClickFunnels purchases paid with Stripe.Next steps
- Map fields, add filters and activate a webhook event
- Track ClickFunnels purchases paid with Stripe
- Use the Events Log to check incoming events
- Connect the direct ClickFunnels integration
- Learn how events work in Cometly