

Before you start
You need a Cometly API token. In Cometly, go to Integrations > Cometly API, click Activate Cometly API if it is not active yet, then create a token under API Tokens with Create Token. See Cometly API.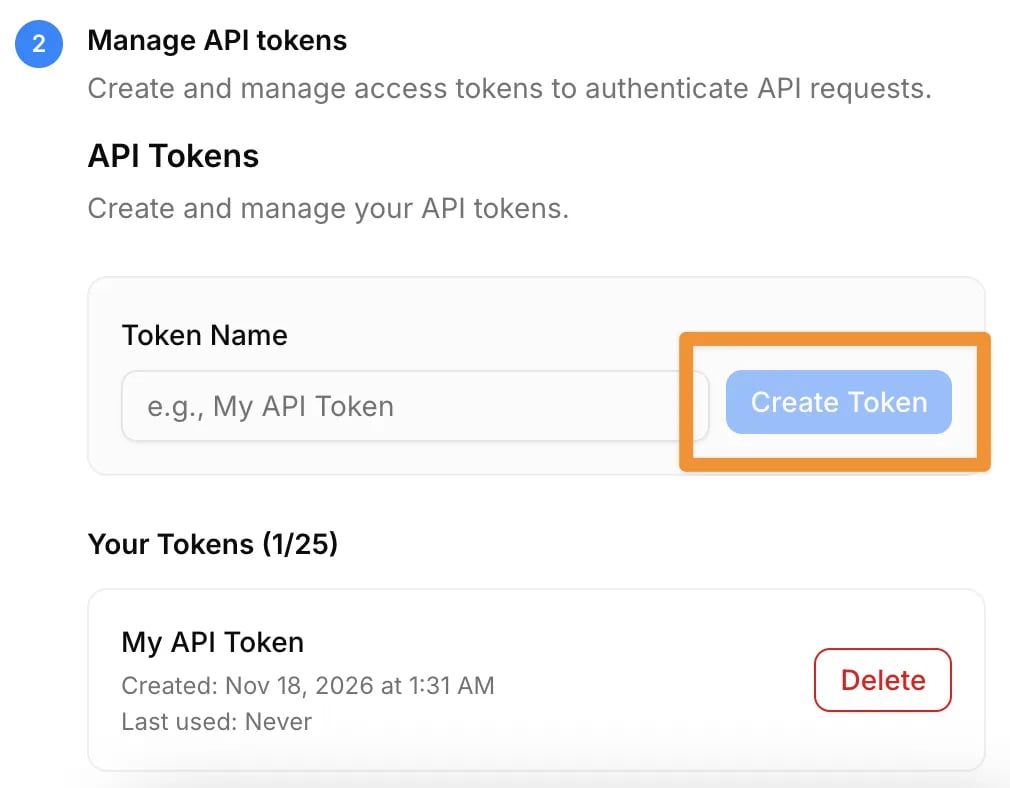
Send an event from a HubSpot workflow
1
Configure your HubSpot workflow trigger
Create a new HubSpot workflow and configure the trigger based on the event you want to send to Cometly.
2
Add the Send a webhook action
Create an action and choose Send a webhook.
3
Configure the webhook
-
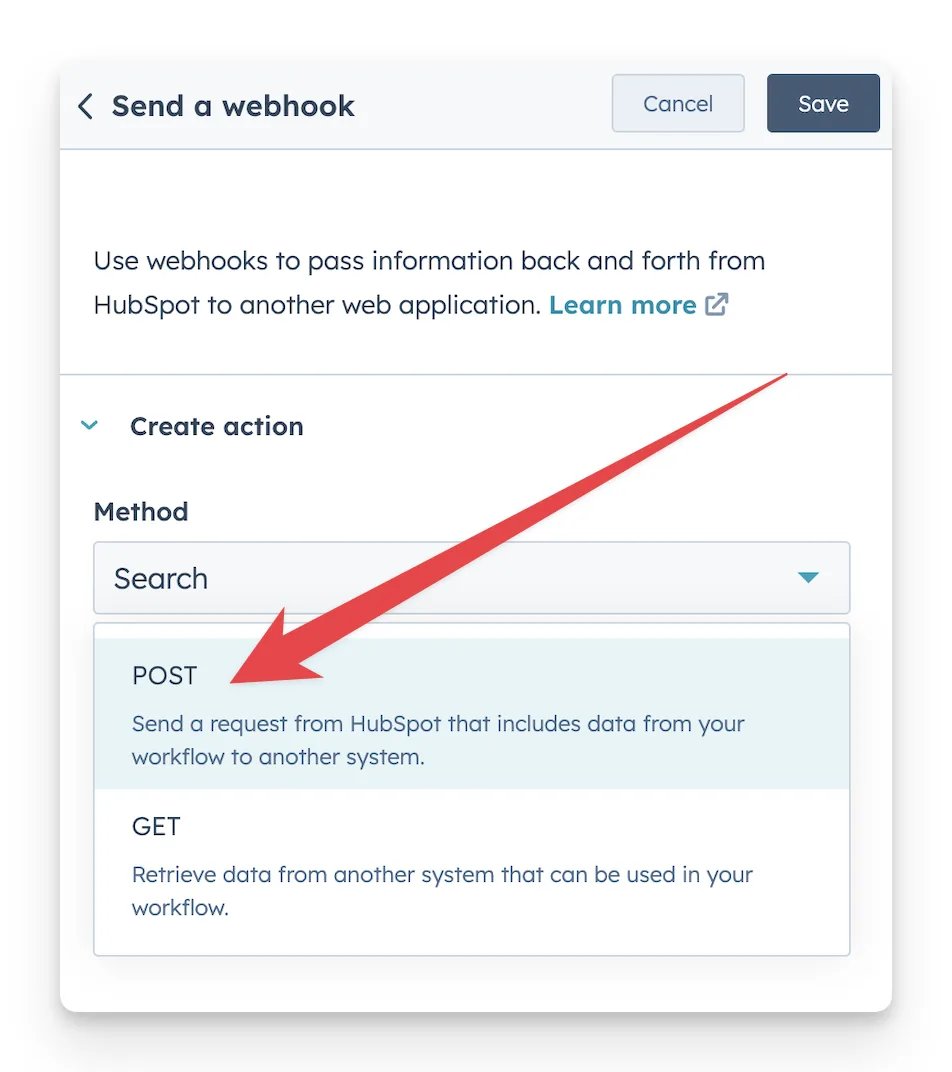
For Method, select POST.
-
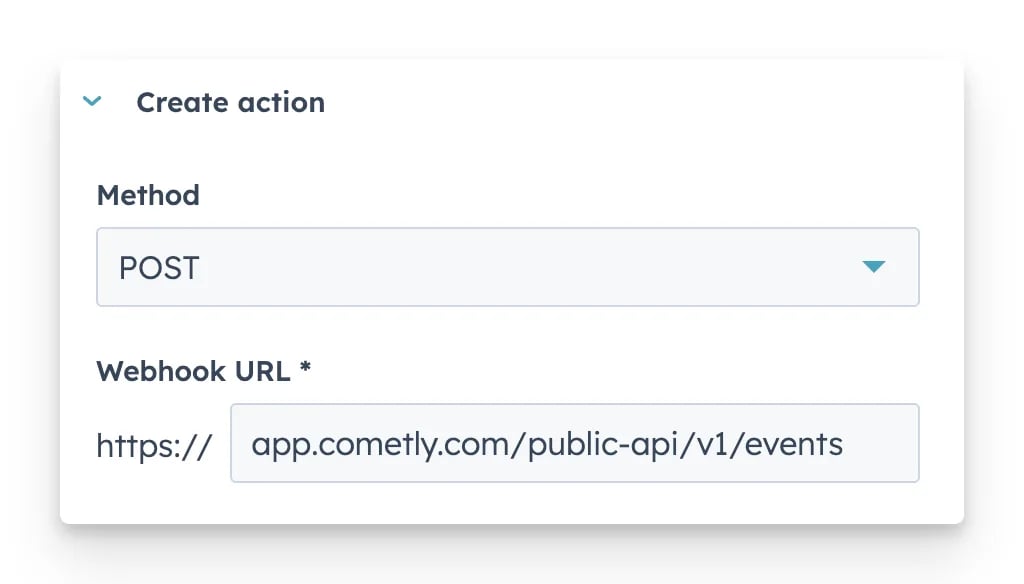
For Webhook URL, enter:
-
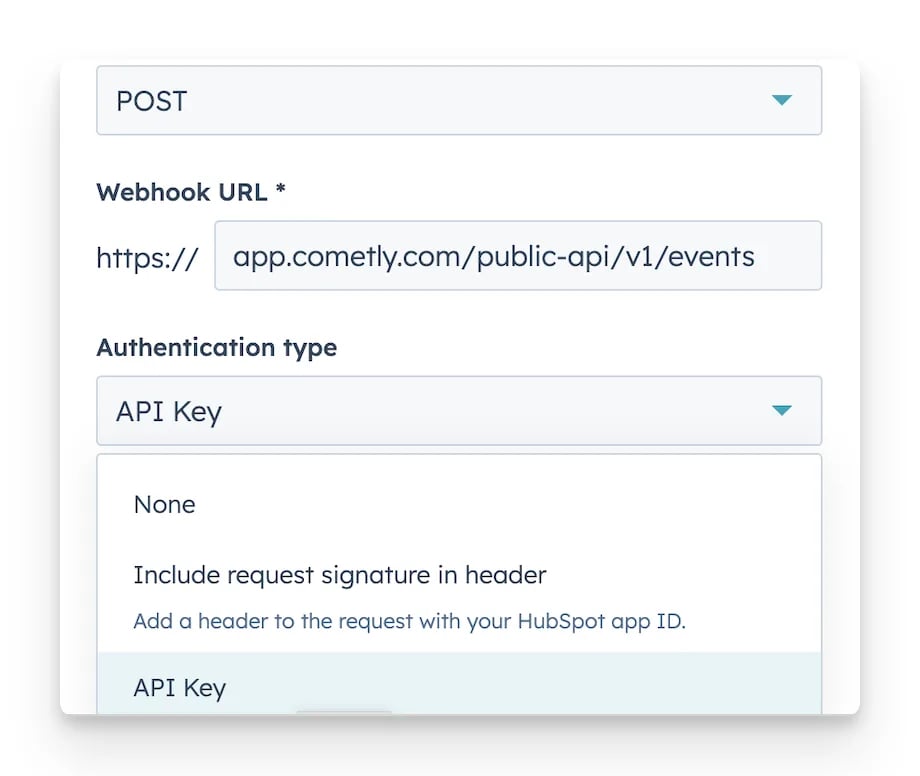
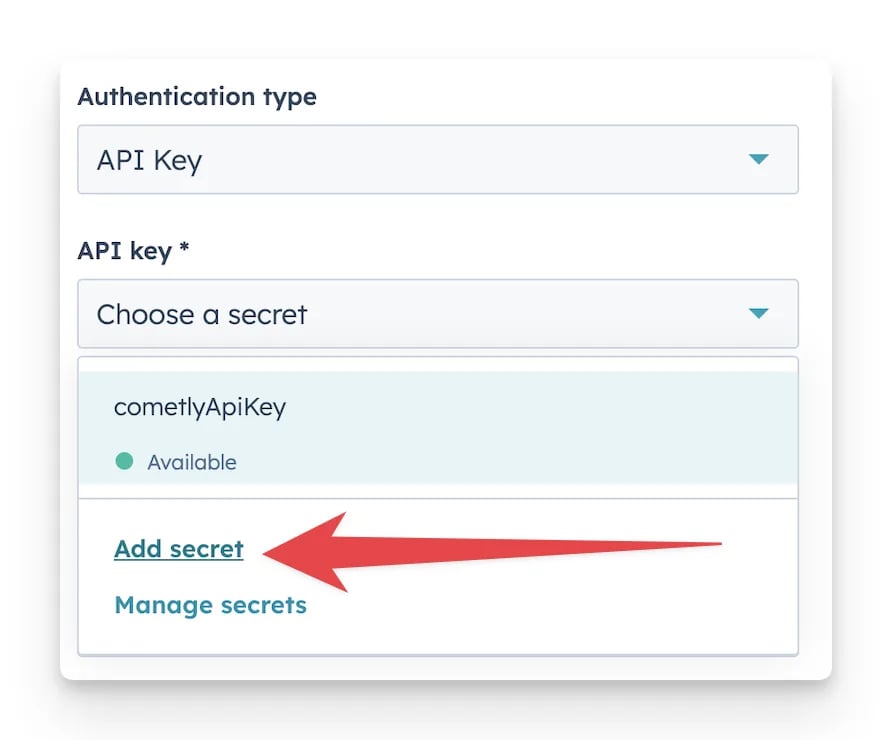
For Authentication type, select API Key.
-
For API key, click Add secret.
-
For Secret name, enter
cometlyor any other name that identifies the Cometly key. For Secret value, enterBearer XXXXXXXXXXXXXXXX, with your Cometly API token in place ofXXXXXXXXXXXXXXXX.Example secret value: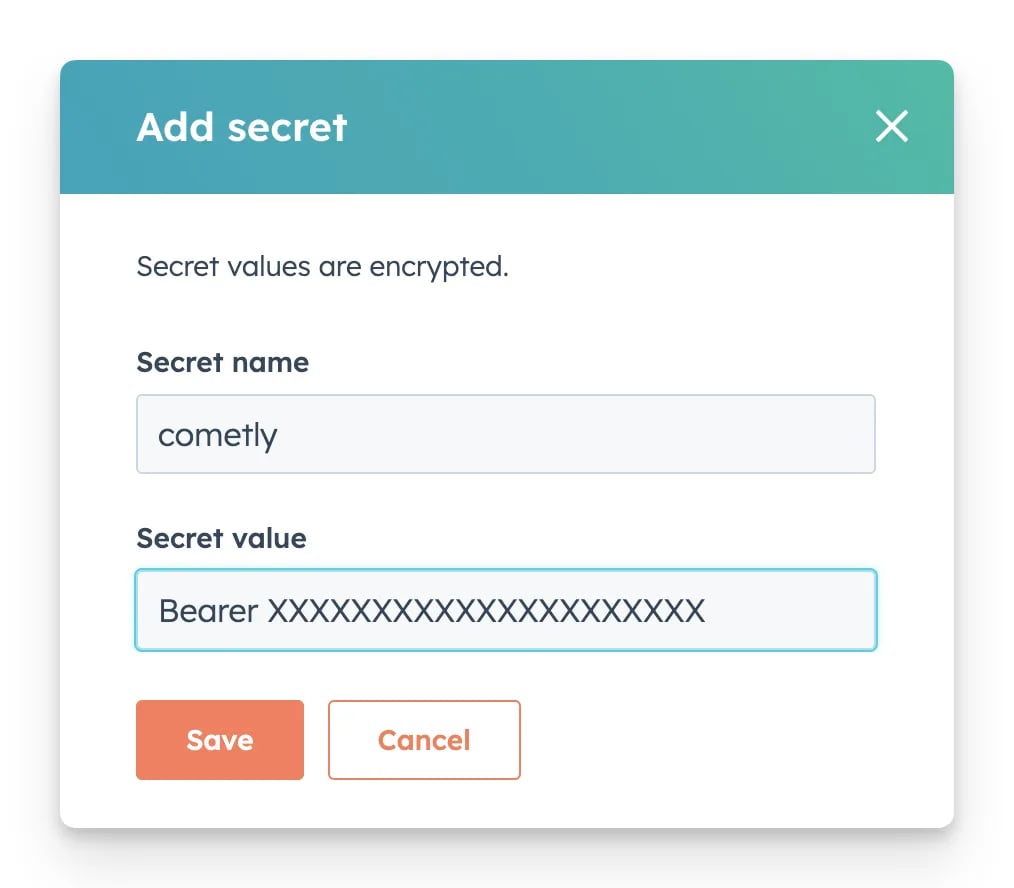
-
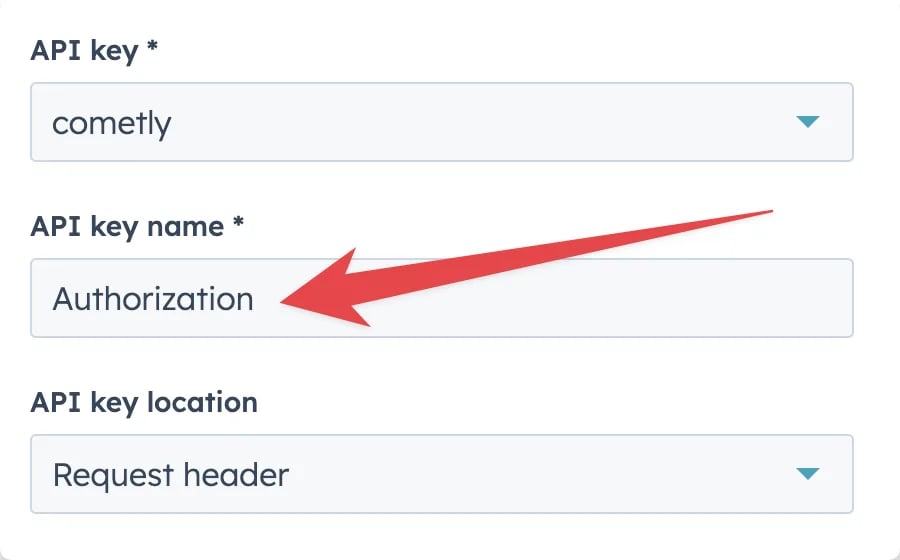
Make sure API key name is Authorization and API key location is Request header.
4
Build the request body
The request body has property values and static values. A property value is filled in from a HubSpot property, so it changes with each contact. A static value is fixed.Static valueThe only static value should be the key 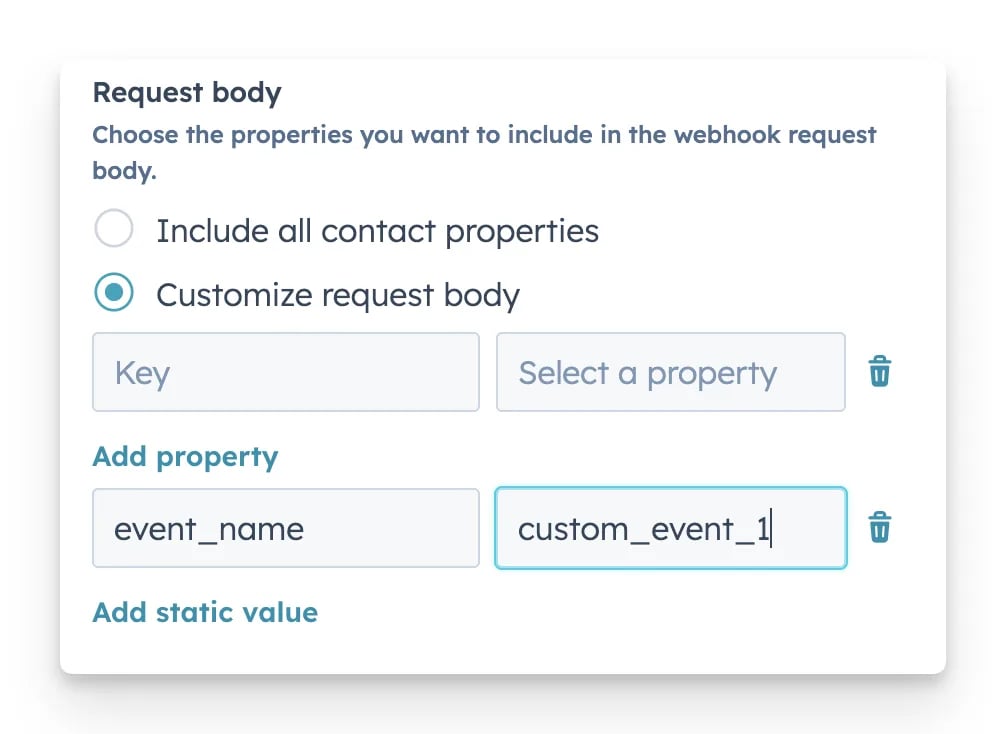
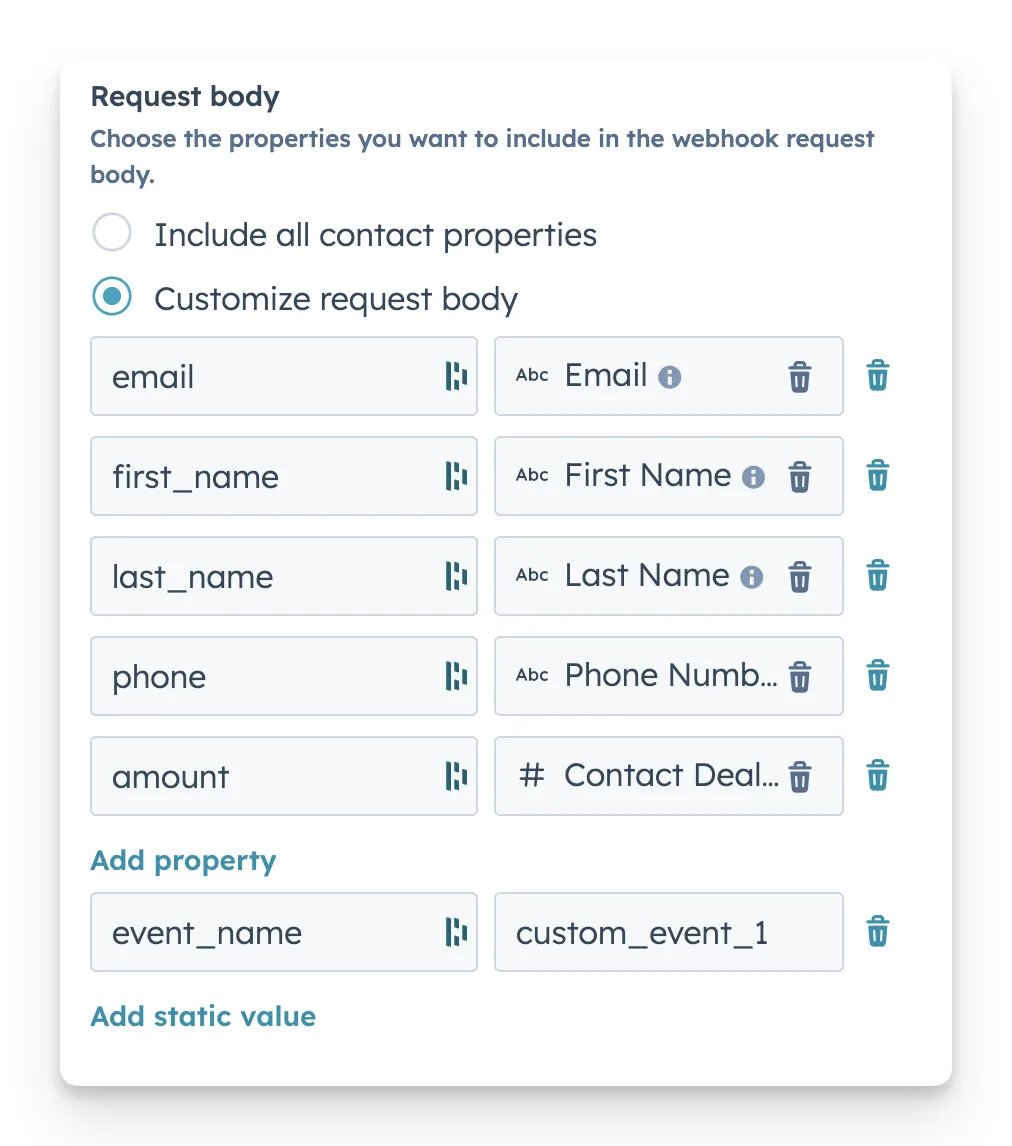
event_name, with the name of the event as its value. You can find the event names (standard events and custom_event_1 to custom_event_50) in the Create Event reference.5
Save and test
- Save the webhook configuration.
- Enroll a contact to test the workflow.
- In Cometly, go to Events Manager and open the Events Log tab to check that the server event was received.
Configure a HubSpot trigger for a booked meeting
This section shows you how to set up a HubSpot workflow trigger that fires when a new meeting is booked.Open the workflow builder
- Log in to your HubSpot account.
- Go to Automation > Workflows in the main menu.
- Open the workflow where you want to set up the trigger.
Configure the enrollment trigger
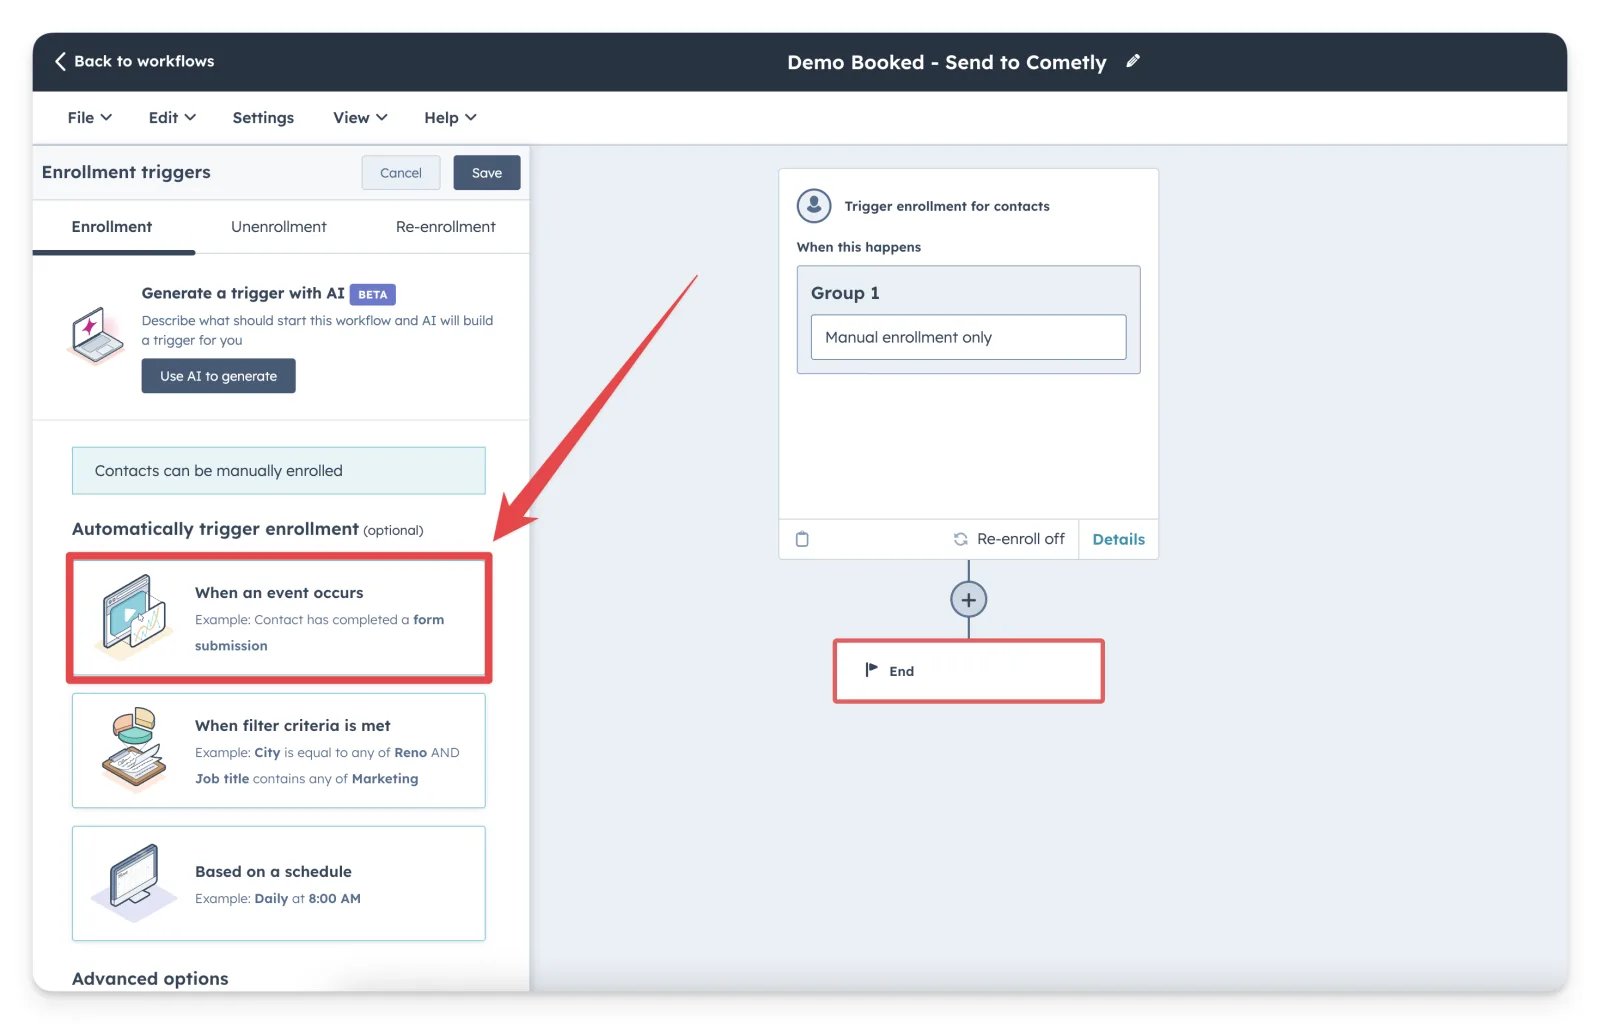
- In the workflow editor, click Enrollment Triggers in the left-hand panel.
-
Under “Automatically trigger enrollment”, select When an event occurs.
-
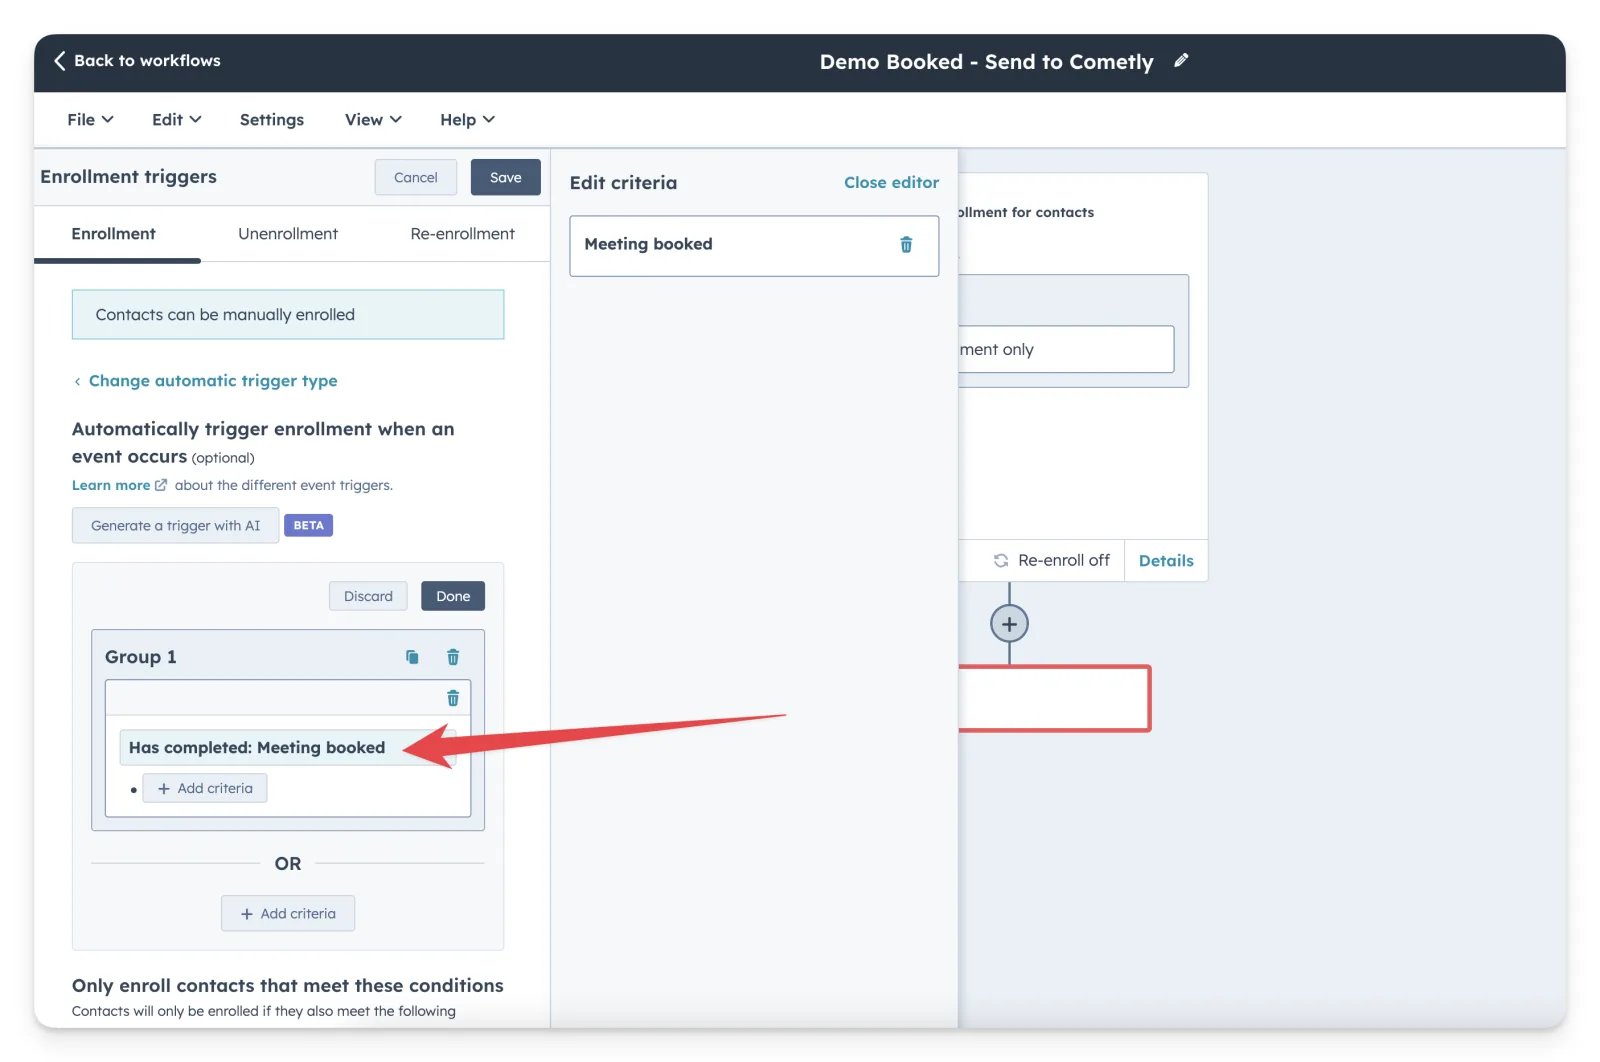
Choose the event type Meeting booked. It shows as Has completed: Meeting booked.
-
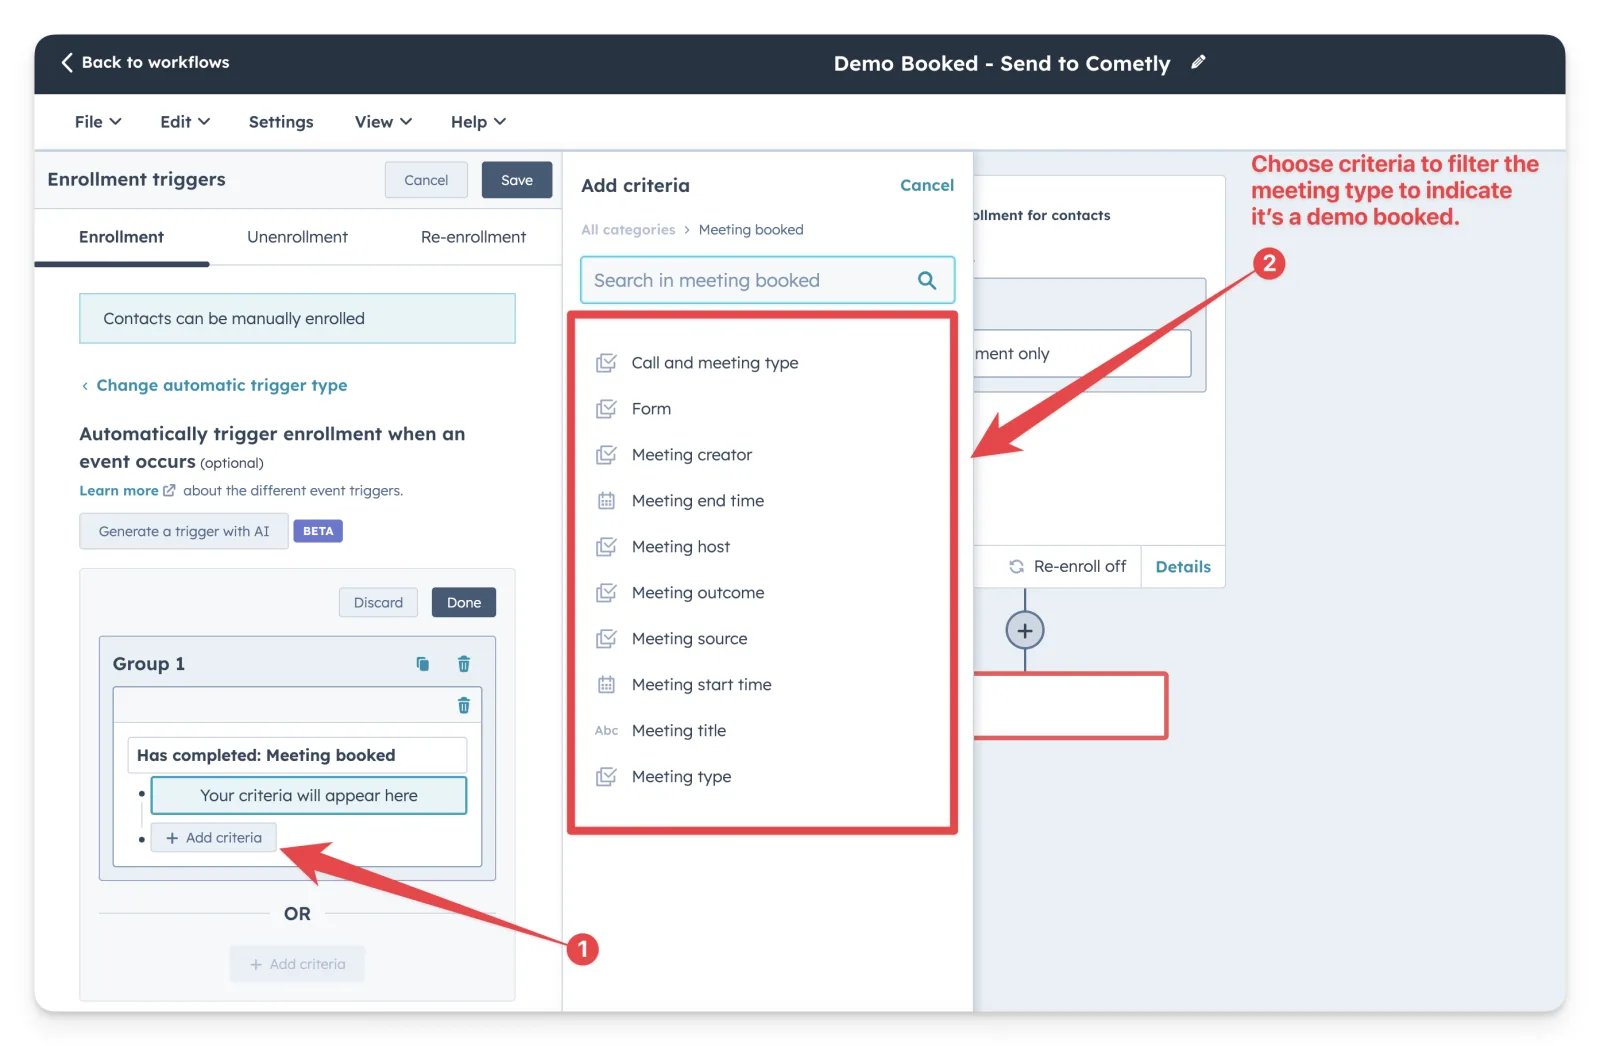
Add criteria to filter the meeting type, for example meeting type equals Product Demo. You can use any criteria, so that the workflow only triggers when that specific meeting is booked.
- Click Done to confirm the setup.
Re-enrollment settings
Leave re-enrollment OFF to prevent duplicate enrollments, so Cometly tracks the first time a new meeting is booked. If you want to track every meeting, you can turn re-enrollment on, but we recommend keeping it off for better data.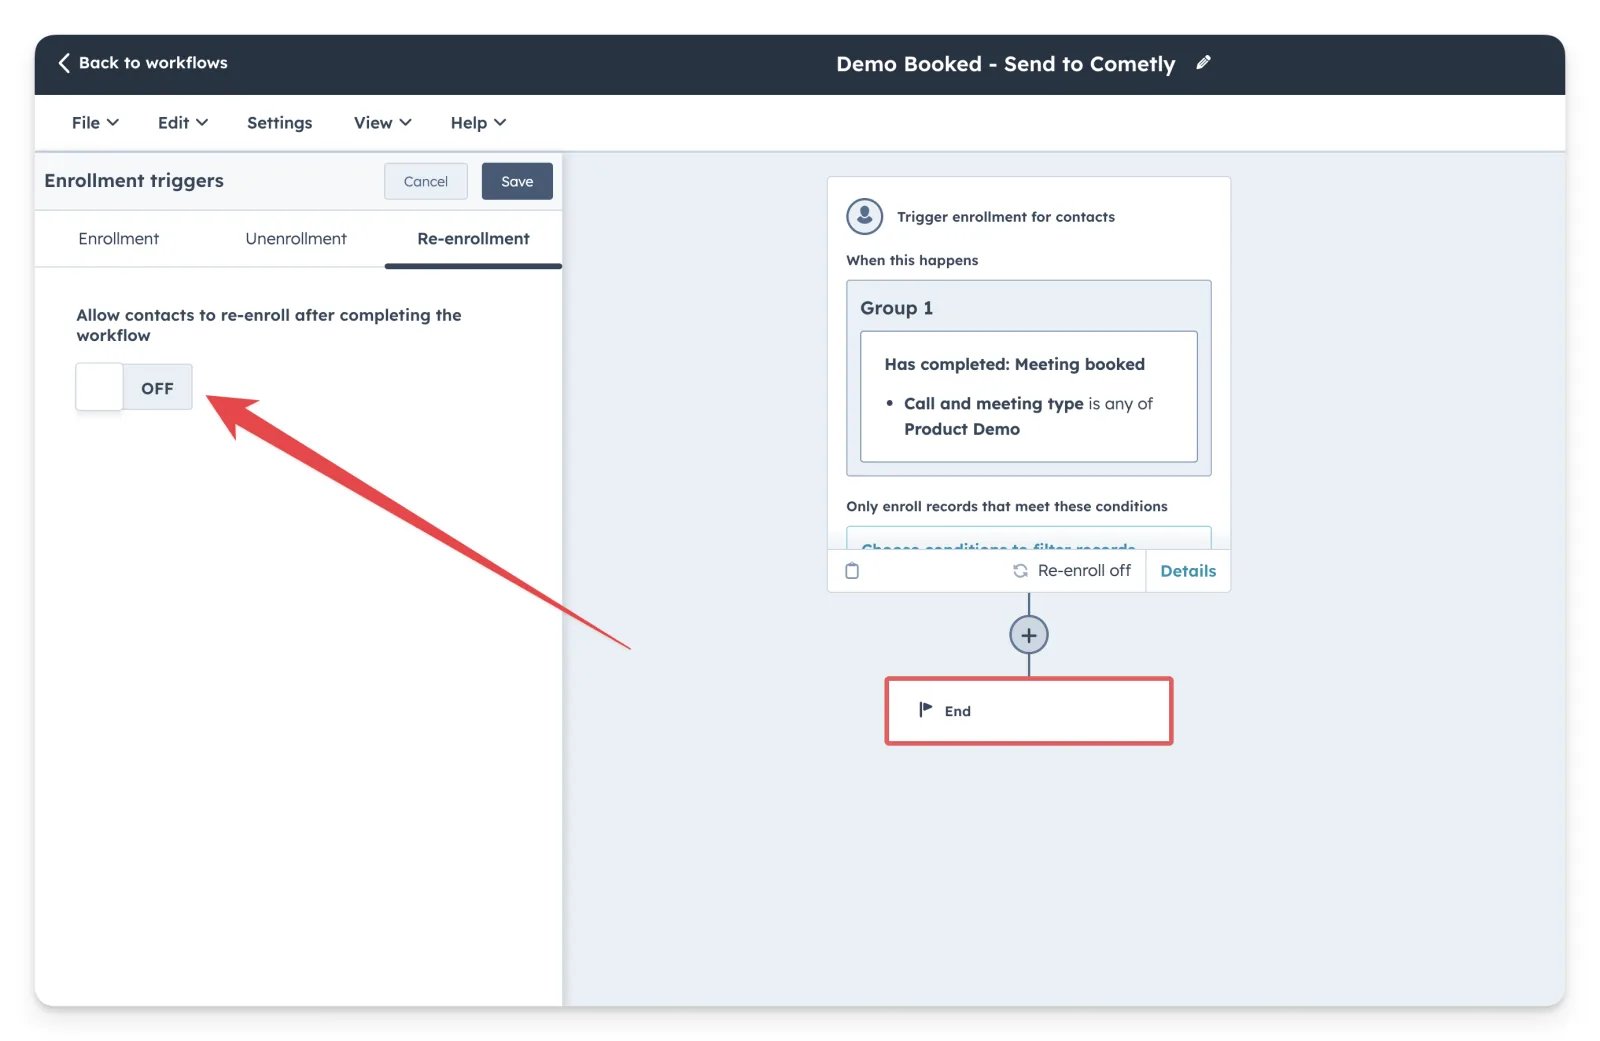
Add the action that sends the webhook to Cometly
- Add the action that runs when the trigger fires: select Send a webhook under Data ops.
- Configure the webhook settings (URL, authentication and payload) in one of two ways:
- As described in Send an event from a HubSpot workflow above.
- With a Cometly webhook URL. Add the URL to the action, and HubSpot sends the data to Cometly. The Cometly webhooks guide explains how to create the webhook in Cometly, select or create its event, map the webhook data to the Cometly fields, and set up filters so only the data you want is tracked.
Review and publish the workflow in HubSpot
- Review your workflow to make sure all conditions and actions are configured correctly.
- Click Save to finalize the trigger and Publish to activate the workflow.
Send Deal Won to Cometly with Zapier
You can also send HubSpot deal events with Zapier. The video below shows how to send a closed won deal to Cometly.Check it worked
Enroll a test contact in the workflow, then open Events Manager in Cometly and click the Events Log tab. With Source set to Server, the event you sent is listed, and its Details column shows SUCCESS.Frequently asked questions
Should I use HubSpot workflow webhooks or the Cometly HubSpot integration?
Use the direct HubSpot integration if its triggers cover what you need: a contact created, a contact or deal property change, or a deal created, moved or won. Use workflow webhooks when you want full control over which events are sent and when, such as a booked meeting of one specific type.Why is my HubSpot webhook event not showing up in Cometly?
Check the request first. Cometly rejects it when the API token is missing or invalid, or when the body has noevent_name or no email, so confirm the secret value starts with Bearer followed by your token and that both keys are in the request body. Then open the Events Log: an event with a problem has a red badge, and its Details column shows the error message.
Can I send the deal or sale amount from HubSpot to Cometly?
Yes. Add the keyamount to the request body and choose the HubSpot property that holds the value. The value must be a number.
Next steps
- Connect HubSpot with the direct HubSpot integration
- Create a Cometly webhook and map its data
- Check incoming events in the Events Log
- Send HubSpot deals to Cometly with Zapier
- See every field you can send in the Create Event reference