

Prerequisites
- The Cometly pixel (the tracking script you add to your site) is installed on the website where the chat widget runs. The script in step 2 calls
cometToken(), which only exists when the pixel is on the page. See Install the Cometly pixel. - The Zendesk Chat widget is installed on the same website.
Step 1: Create a custom field for the Cometly tracking token
- Log in to your Zendesk account.
- In the Admin Center, click Objects and rules.
- Select Fields from the menu.
-
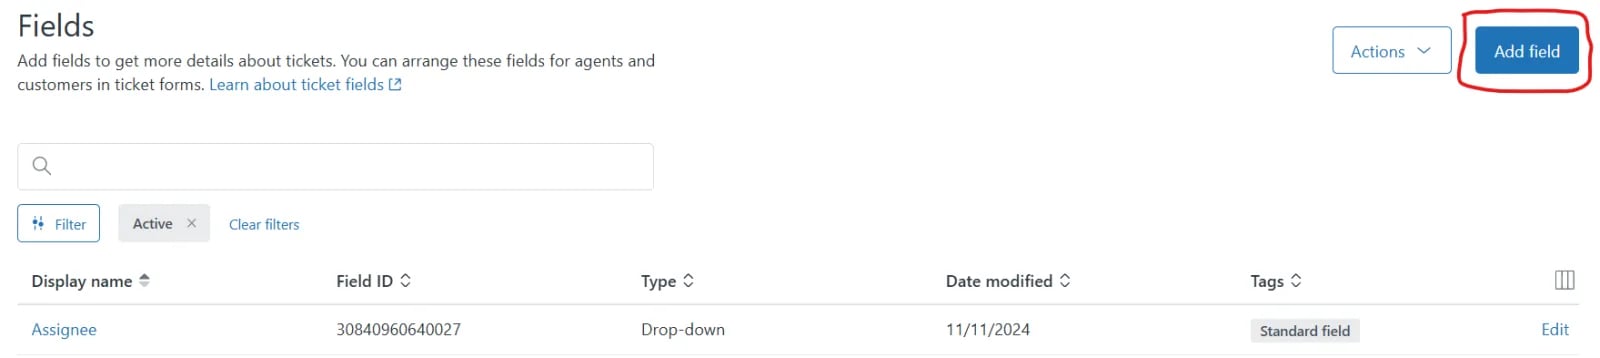
On the Fields page, click Add field.
-
Configure the new field:
-
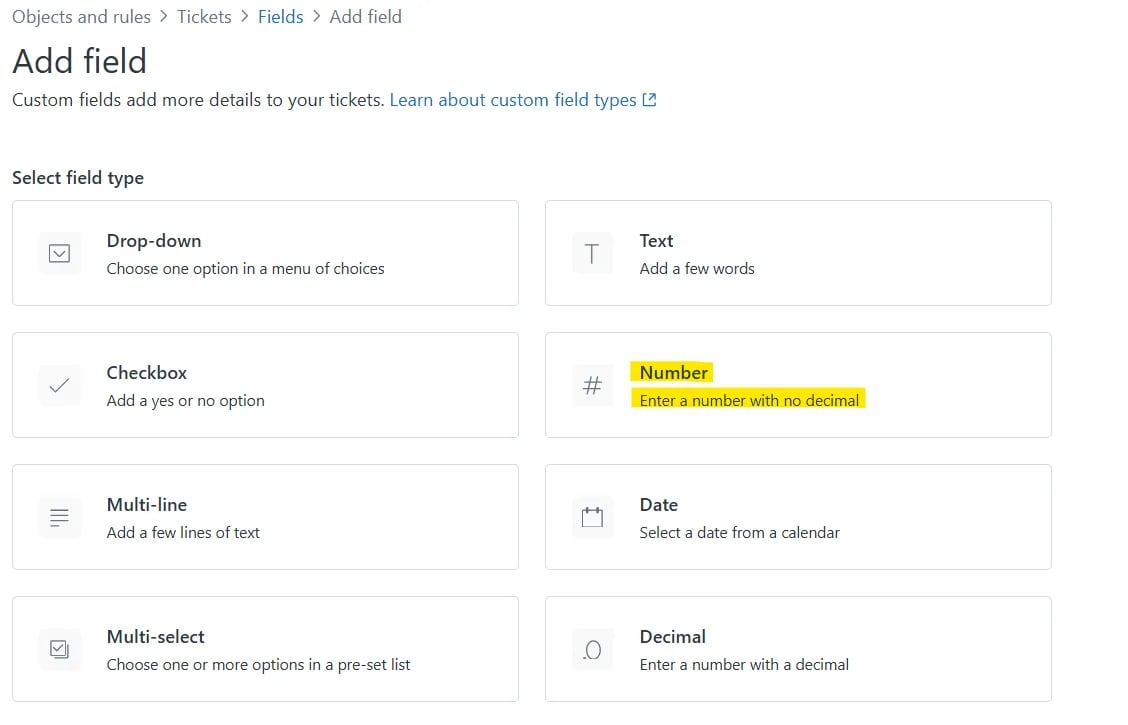
Field type: Select Number.
-
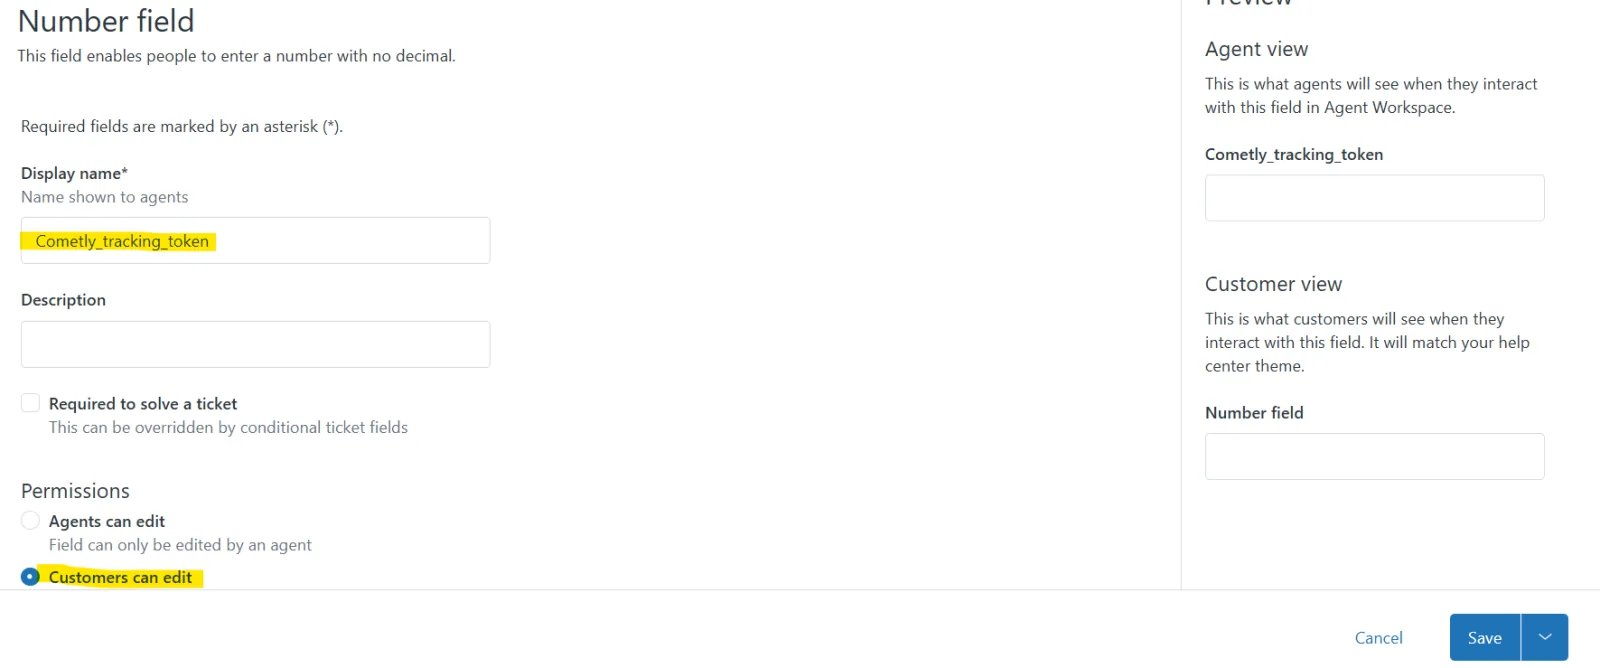
Display name: Enter
Cometly_tracking_token. -
Permissions: Select Customers can edit.
-
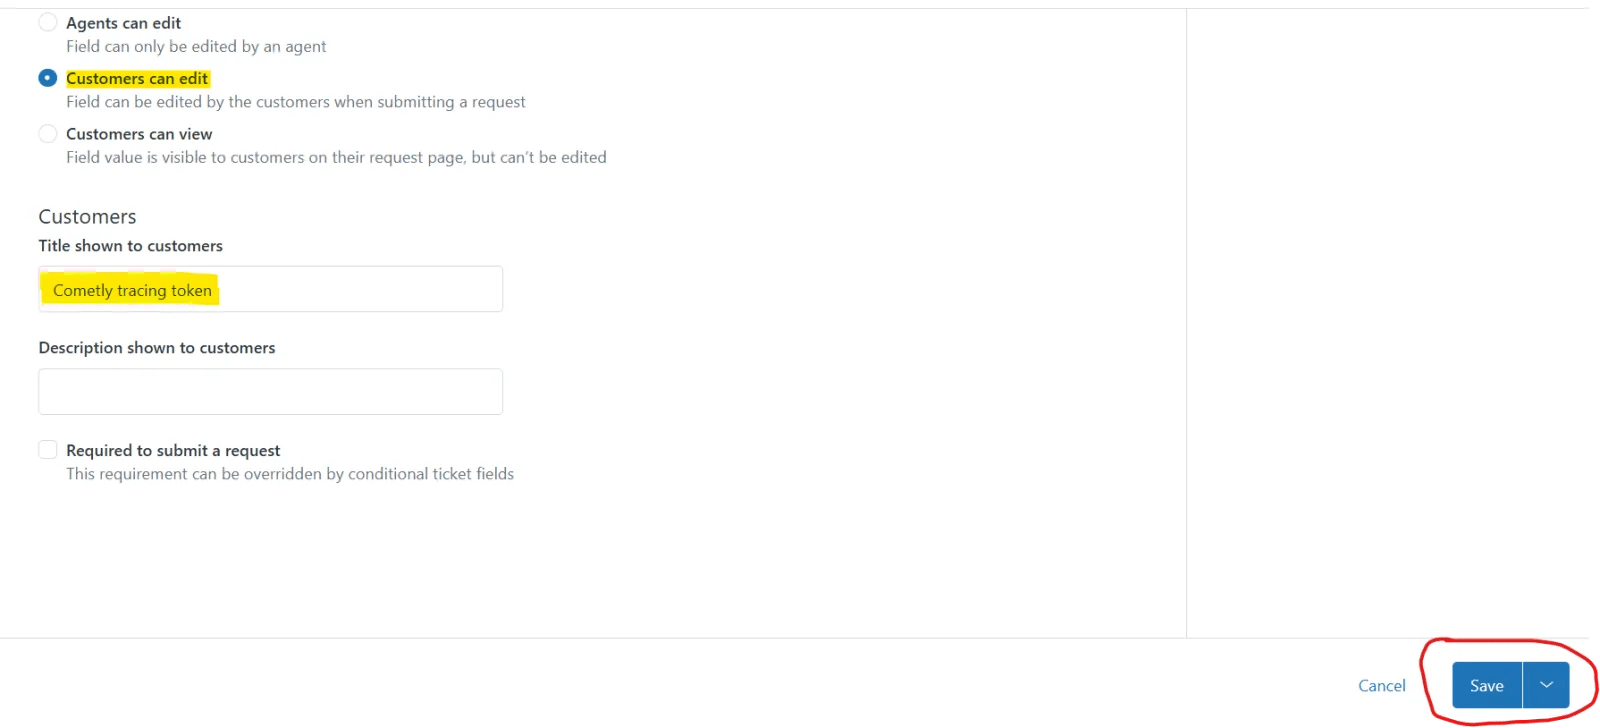
Title shown to customers: Enter Cometly tracking token.
-
Field type: Select Number.
- Click Save.
Step 2: Copy the custom field ID and add the script to your website
- Return to the Fields page.
- Find the new Cometly_tracking_token field.
-
Copy its Field ID.
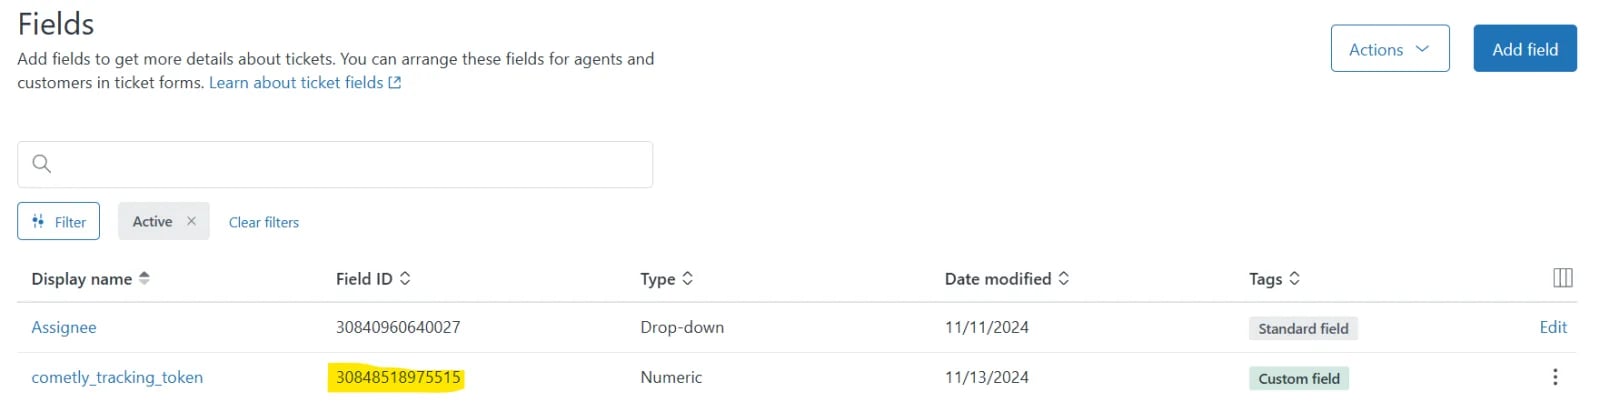
-
In the script below, replace
UPDATE_WITH_FIELD_IDwith the Field ID of yourCometly_tracking_tokenfield. -
Copy the script and add it to the
<body>of your website, below your Zendesk Chat widget code.
Step 3: For testing, add the custom field to the default ticket form
- Go back to Objects and rules in the Admin Center.
- Select Forms.
- On the Forms page, click Default Ticket Form.
- From the Available ticket fields, find Cometly_tracking_token and move it to the left column to include it in the form.
- Click Save.
Cometly_tracking_token field is then filled with the token value. Cometly uses this token to track the lead back to the correct source when it receives an event.
Step 4: Send events to Cometly from Zendesk
To send events for new leads, deals created and closed won deals, follow the Zendesk Sell integration guide. It shows where to pass theCometly_tracking_token field as the Comet Token.
Check it worked
Start a chat through the widget in an incognito or private browser window, then open the ticket in Zendesk: theCometly_tracking_token field holds a token value. Once you send events from Zendesk as described in step 4, they appear in Cometly under Events Manager, on the Events Log tab.
Frequently asked questions
Does Zendesk Chat send leads to Cometly automatically?
No. The steps on this page only save the Cometly tracking token on the chat lead in Zendesk. To record the lead in Cometly, send an event that includes the token as the Comet Token, for example with Zapier as shown in the Zendesk Sell integration guide.Why is the Cometly tracking token field empty in Zendesk?
The script can only fill the field when the Cometly pixel is on the same page as the chat widget and the script sits below the Zendesk widget code. Check both, and check that you replacedUPDATE_WITH_FIELD_ID with your Field ID. The script sets the value when the visitor opens the widget, so test with a new chat in a private browser window.
Next steps
- Send lead and deal events from Zendesk Sell
- Connect Cometly to Zapier
- Create and manage events in Cometly
- Check incoming events in the Events Log