

Before you start
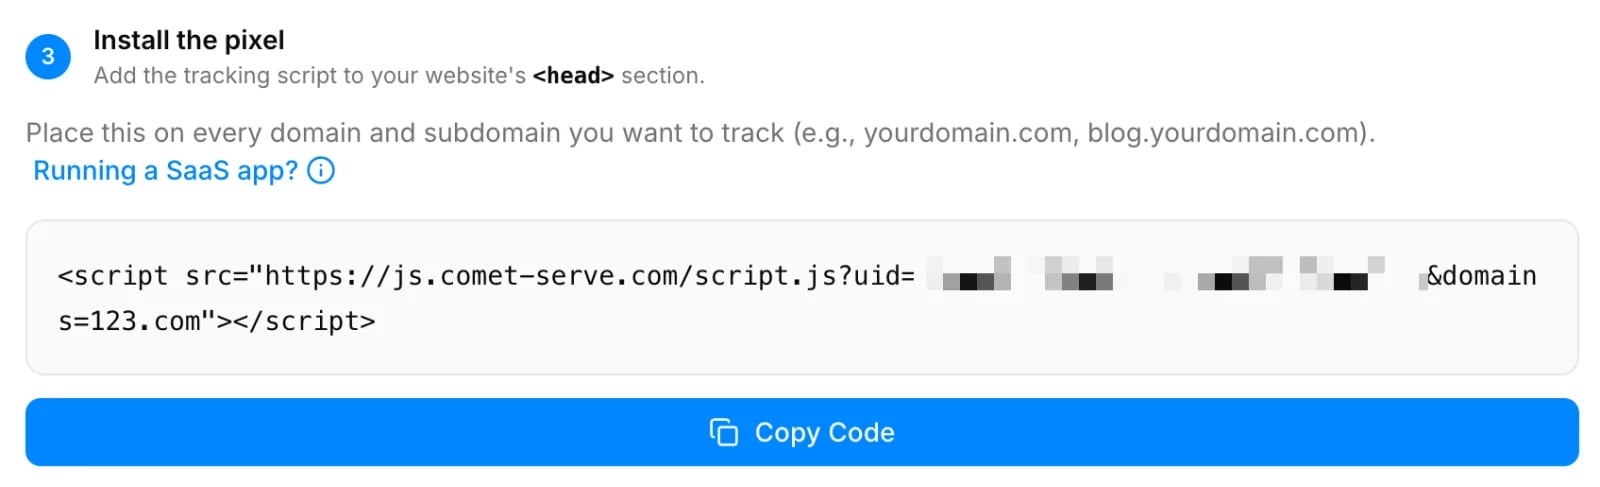
- Have your Cometly pixel snippet ready. You can copy it in Cometly from Setup > Install the Cometly pixel > Install the pixel. See Install the pixel.
- Connect Cometly to Zapier. See the Zapier integration guide.
Step 1: Add the Cometly pixel to your pages
For tracking to work, the Cometly pixel must be on both your scheduling page and your thank-you page.On your scheduling page
Add the Cometly pixel to the<head> tag of the page where your iClosed booking form is embedded.
On your thank-you page
Add the Cometly pixel to the<head> tag of the thank-you page as well.
Step 2: Go to your iClosed events
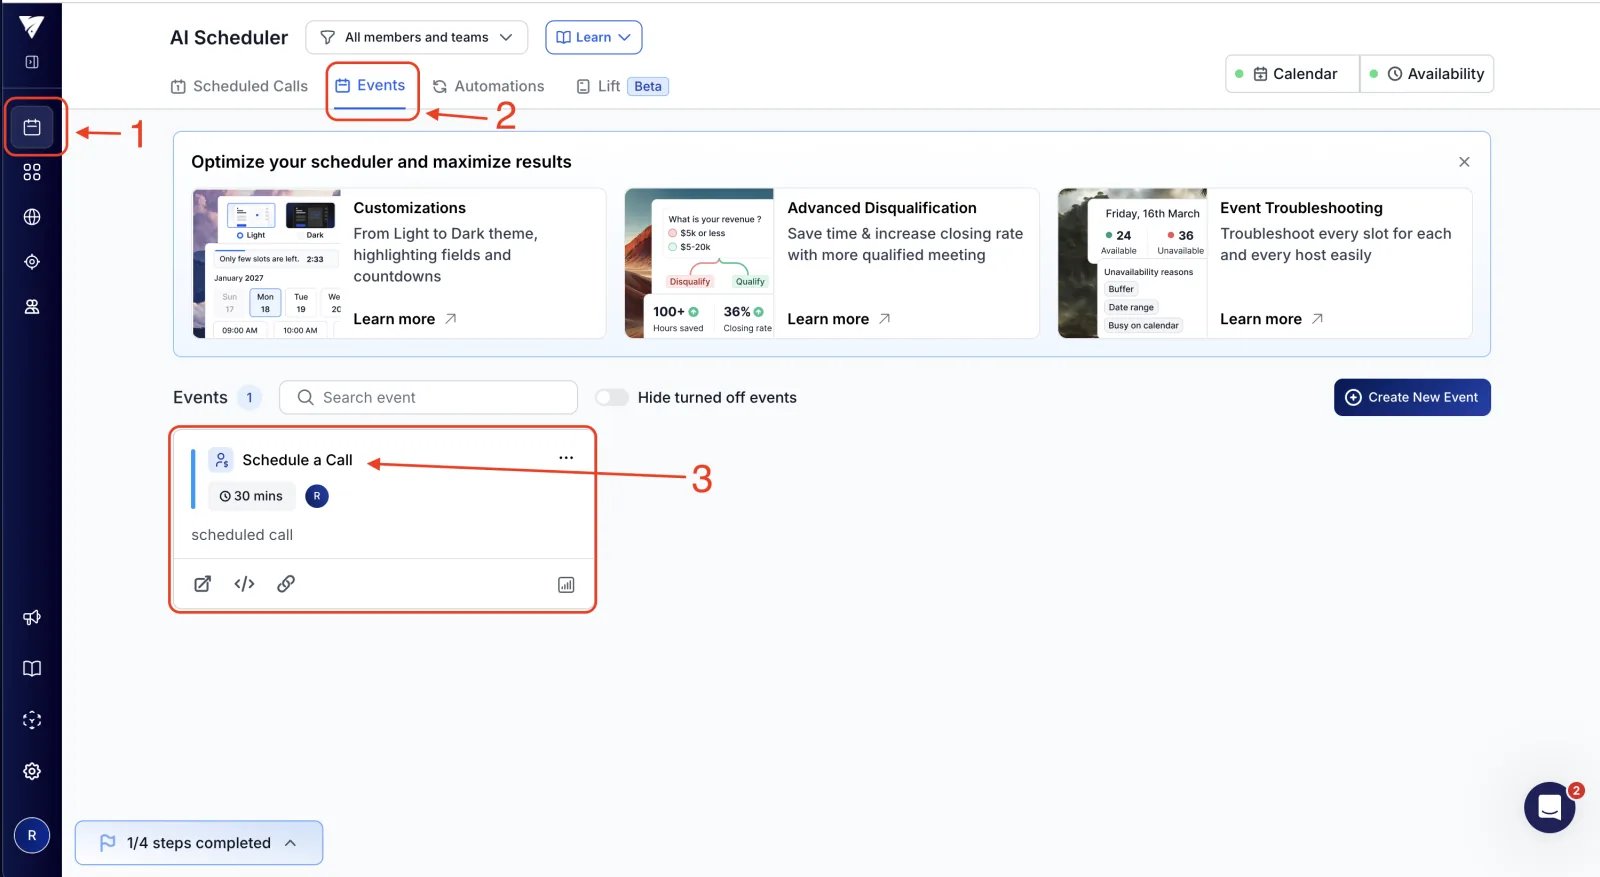
- Log in to your iClosed account.
- Go to your AI Scheduler and open the Events section.
- You may have one or several events. Follow the next steps for each event you want tracked in Cometly.
Step 3: Set the primary question to “Email Address”
Cometly uses the email address to connect offline events (like appointments) to online ad interactions.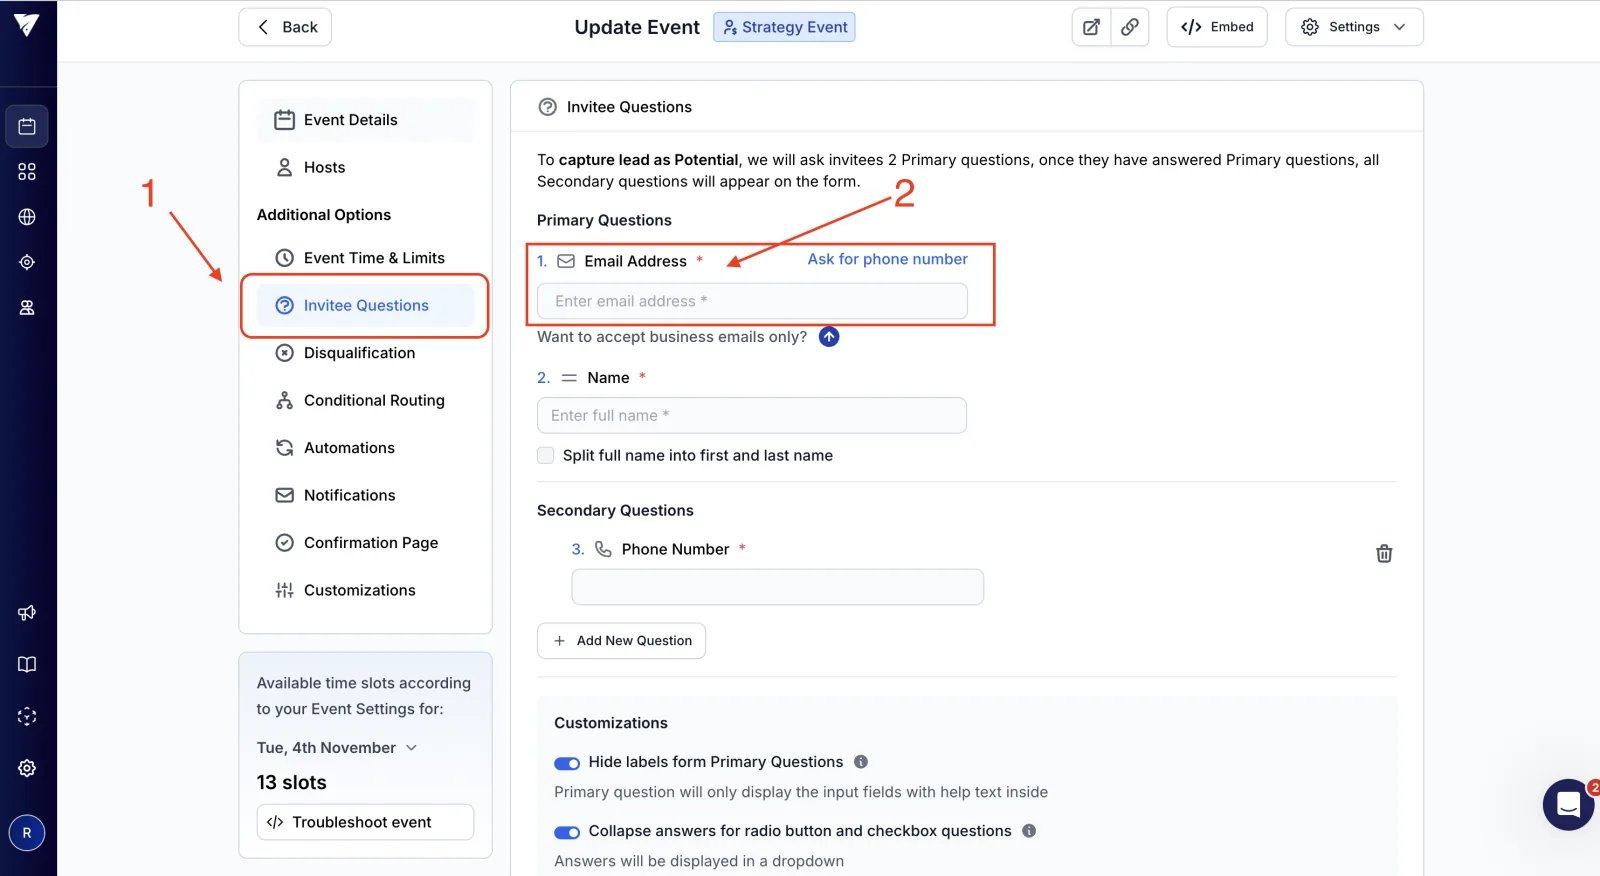
- Click Edit on the event.
- Make sure the first primary question is Email Address. By default, iClosed may use Phone Number as the primary question. Change this so Email Address is listed as the primary question.
- Click Save to confirm your changes.
Step 4: Configure the confirmation page
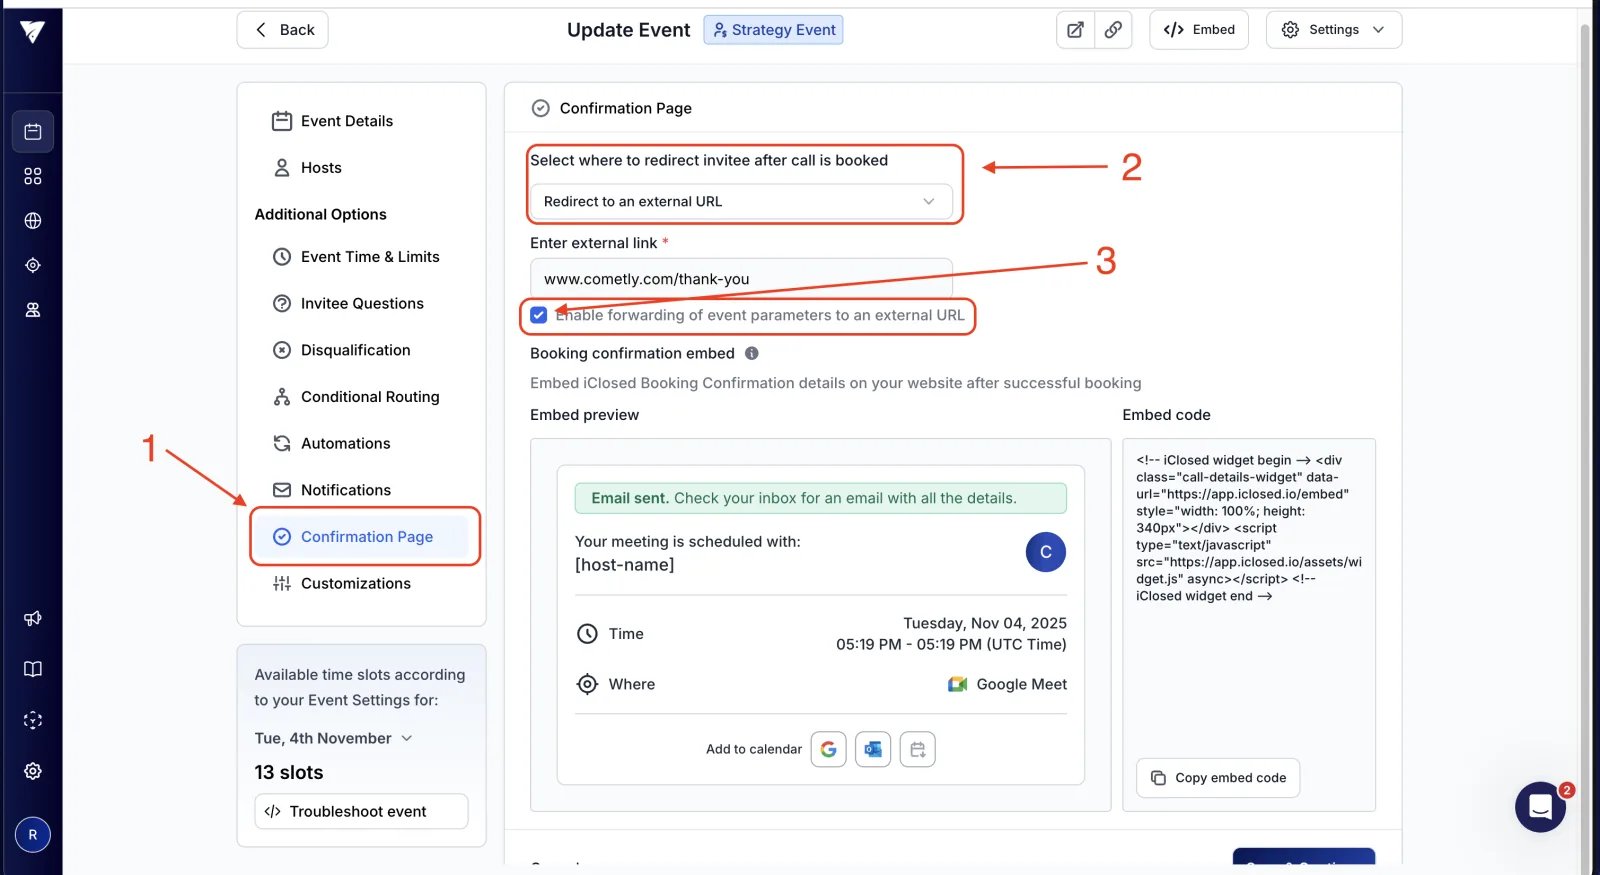
- In the event editor, scroll down to the Confirmation Page section.
- Change the setting from the default iClosed confirmation page to an External URL (your custom thank-you page).
- Enable Forward Parameters to External URL. This passes the invitee’s email address and tracking parameters to your thank-you page so Cometly can capture them.
Step 5: Send booked calls from iClosed to Cometly
- In Zapier, make sure both your iClosed and Cometly accounts are connected.
- Create a new Zap:
- Trigger: iClosed, Call Booked
- Action: Cometly, Send Event
- Choose the event name in Cometly (for example, Schedule) and set the Event Time to Now.
- Map the contact’s email (required) and, optionally, the full name and phone number.
- Test the Zap and publish it.
Once this is done, every appointment booked in iClosed is sent to Cometly as a server event, so you can track it accurately.
Step 6: Test your configuration
- Go through your scheduling form as a test user.
- Complete the booking using an email address you can access.
- Verify that:
- The thank-you page loads correctly with your Cometly pixel installed.
- The email address is captured and appears on the Schedule event in your Cometly account.
Check it worked
In Cometly, click Events Manager in the sidebar and open the Events Log tab, with Source set to Server. Your test booking appears there as a Schedule event (or the event you chose in your Zap), with the email address you booked with.Frequently asked questions
Why do my iClosed bookings show up in Cometly without an ad source?
Cometly can only connect a booking to an ad when the Cometly pixel has seen the visitor and captured their email address. Check that the pixel is on both your scheduling page and your thank-you page, that Email Address is the first primary question, and that Forward Parameters to External URL is enabled. For other causes, see Understanding No Source in reports.Can I send iClosed bookings to Cometly as an event other than Schedule?
Yes. In the Send Event action of your Zap, you choose which Cometly event the booking is sent as. Schedule is the usual choice for a booked call, but you can select another pre-configured event or an event you created in Cometly.Do I need a separate Zap for each Cometly space?
Yes, if you track iClosed bookings in more than one space (a workspace in your Cometly account). Each Zapier connection uses an API token created in one space, so create a token and a connection for each space and use the matching connection in each Zap.Next steps
- Use the Events Log to confirm iClosed bookings arrive
- Send conversions back to your ad platforms
- Learn how standard and custom events work
- Pass the email as a URL parameter to your thank-you page
- Send events from other apps with Zapier