

- Adds the Cometly pixel to the
<head>of your WooCommerce site. - Fires Add to Cart and Initiate Checkout events.
- Creates a webhook in WooCommerce that sends a Purchase event to Cometly whenever an order is completed.
Before you install
- Do not install the pixel by hand. Do not paste the Cometly pixel into your WooCommerce store yourself. The plugin adds it for you.
- The plugin tracks three events. It tracks Add to Cart, Initiate Checkout and Purchase.
- Pages outside WordPress need the pixel installed by hand. The plugin does not add the pixel to landing pages that are not part of your WordPress site. Install the pixel on those pages yourself. See Install the Cometly pixel.
- The plugin is specific to one space. Each Cometly space has its own WooCommerce plugin, which carries that space’s pixel and purchase webhook. If you have more than one store or space, download the plugin from the space that belongs to each store.
Step 1: Download and install the Cometly WooCommerce plugin
1
Open the WooCommerce integration
In Cometly, go to Integrations, find the WooCommerce card (category Ecommerce) and click Connect.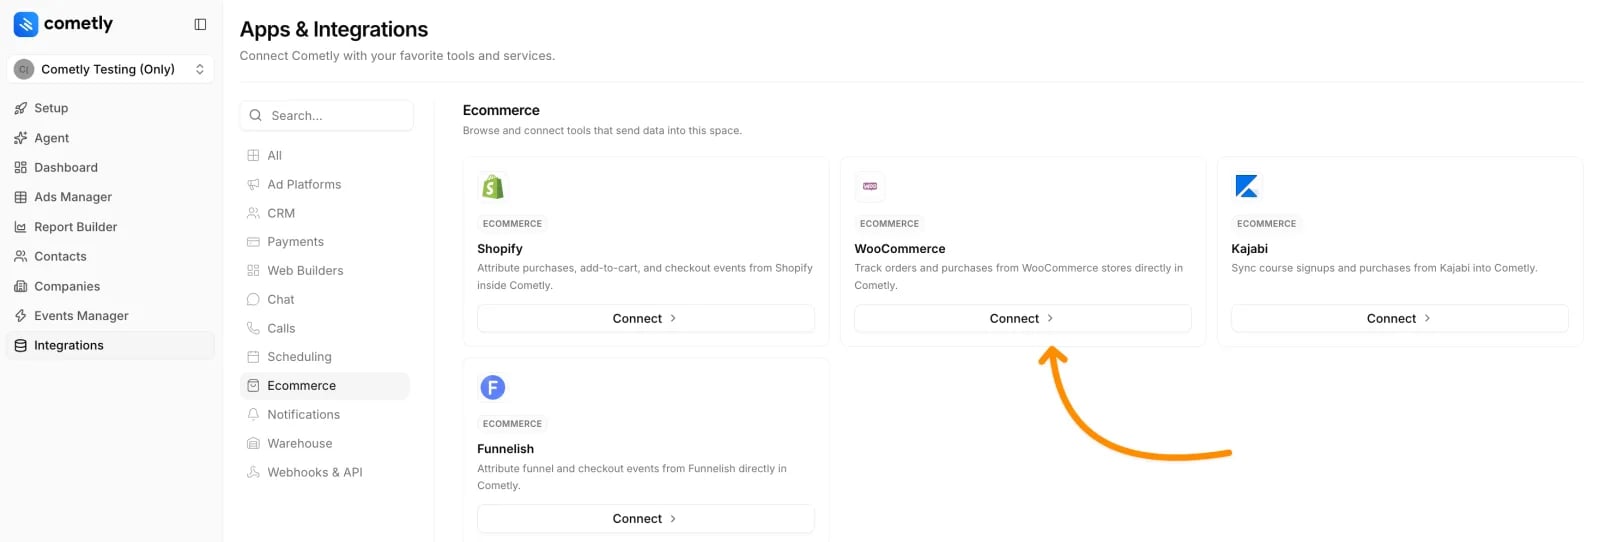
2
Activate WooCommerce
Click Activate WooCommerce.
3
Download the plugin
Under Download the WordPress plugin, click Download plugin. Your browser saves a file named
cometly-woocommerce-tracking-plugin.zip.4
Open Plugins in WordPress
In the WordPress admin of your WooCommerce store, go to Plugins.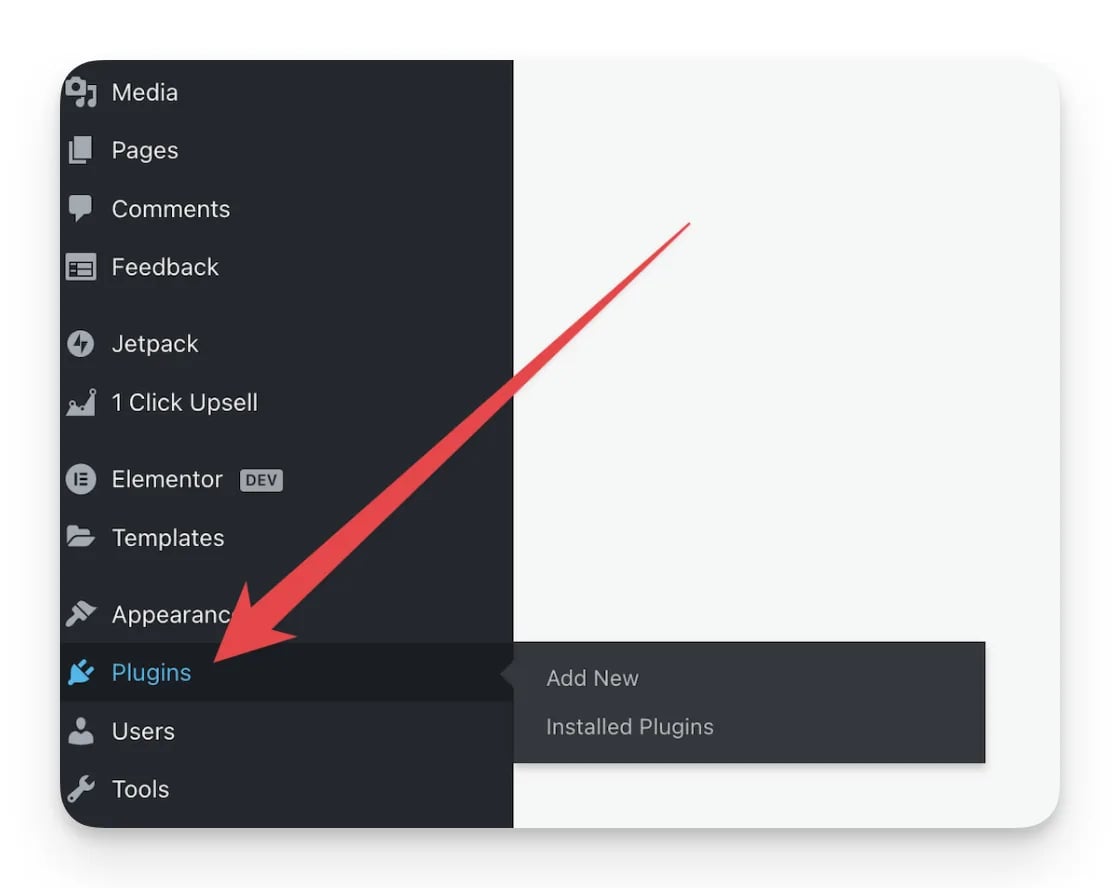
5
Add a new plugin
Click Add New.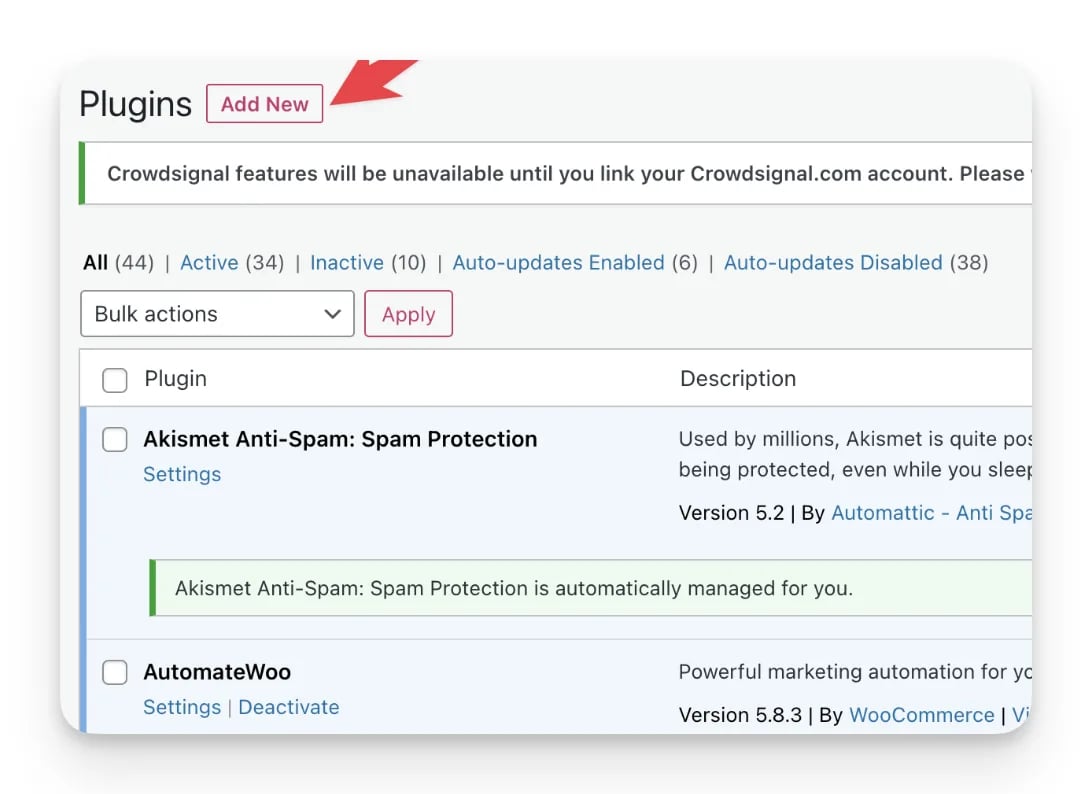
6
Upload and activate the plugin
Upload the Cometly WooCommerce plugin 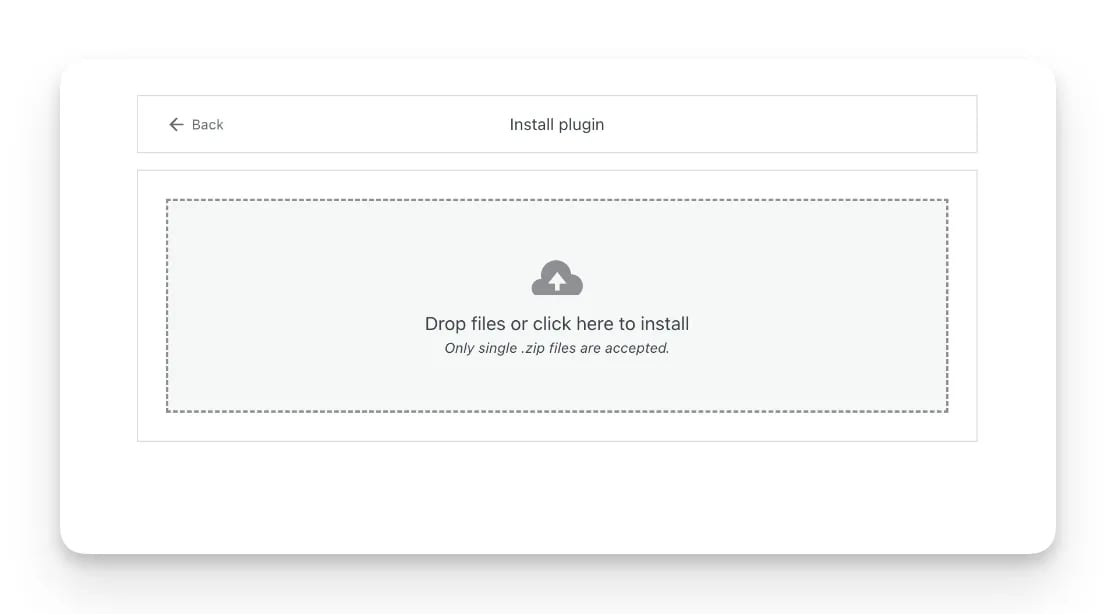
.zip file, then activate the plugin. The plugin creates its purchase webhook when it is activated, and WooCommerce must be installed and active first.7
Map the WooCommerce event
Back on the WooCommerce integration page in Cometly, Map WooCommerce events to Cometly lists the WooCommerce Purchase event next to a Cometly event (Purchase by default). To record WooCommerce purchases as a different Cometly event, choose it, then click Save.
The plugin installs the pixel for you, but the Install the Cometly pixel step in Setup is only marked complete once a domain is verified. Add your store’s domain under Add domains in that step, then click Verify under Verify your pixel.
Step 2: Clear the cache on your WooCommerce store
WordPress sites often serve cached pages. Clear your cache after you install the plugin so the pixel loads on every page.WP Rocket instructions
If you use WP Rocket, check that specific settings are unchecked. In your WP Rocket settings, go to FILE OPTIMIZATION.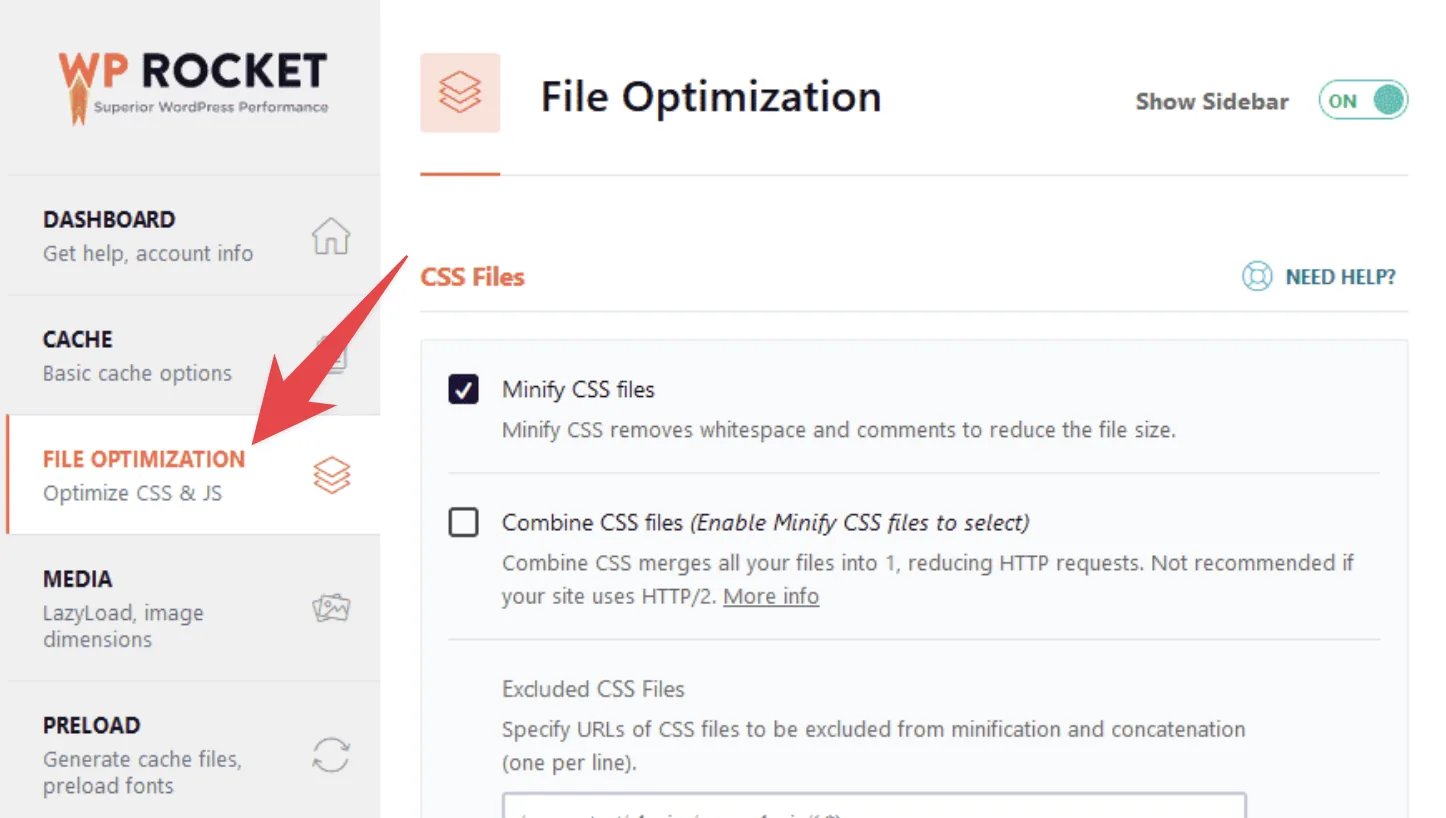
Check it worked
Place a test order on your store and pay for it. The order appears as a Purchase event in Events Manager, on the Events Log tab. On the WooCommerce integration page in Cometly, the first card reads WooCommerce activated.Troubleshooting for WooCommerce stores
Purchases have stopped sending to Cometly
If purchases have stopped sending to Cometly from your WooCommerce store, the WooCommerce webhook may no longer be set to Active. See Make sure your WooCommerce webhook is active to reactivate it.The pixel is not loading or verifying in Cometly
If the Cometly pixel does not load or verify after you install the plugin, check for site performance plugins that defer or delay JavaScript. They can stop the pixel from loading, which leads to inaccurate or missed attribution data. Make sure JavaScript loading is not delayed.The plugin is not compatible with your store
In the rare case that the Cometly WooCommerce plugin is not compatible with your store (for example, it causes issues on a custom-built store), you cannot use the plugin and need to set up tracking by hand:- Uninstall the Cometly plugin.
-
Install the Cometly pixel in the
<head>of your WooCommerce store.- In Cometly, go to Setup and open the Install the Cometly pixel step to copy your pixel code. See Install the Cometly pixel.
- You can use Google Tag Manager to install the pixel if needed.
-
Use Cometly webhooks and add the webhook to your WooCommerce store by hand.
- In the WordPress admin menu, hover over WooCommerce and click Settings.
- Click the Advanced tab at the top of the page.
- In the sub-menu of the Advanced settings, click Webhooks.
- Generate a webhook URL in Cometly. Follow the Cometly webhooks guide for this step.
- Add the Cometly webhook in your WooCommerce store:
- Webhook name: Cometly
- Webhook topic: order.updated
- Set the webhook status to Active
- Click Save
-
Use Google Tag Manager to fire the Add to Cart and Initiate Checkout events when a button is clicked. Follow the guide to setting up Add to Cart and Initiate Checkout events.
The Cometly pixel does not need to be in Google Tag Manager for these events to fire. They still fire properly if the pixel is hard coded on your WooCommerce store.
Frequently asked questions
Why is a WooCommerce order missing from Cometly?
Cometly records a WooCommerce purchase once the order is paid, so an order that is still unpaid does not appear yet. If a paid order is missing, go to Events Manager, open the Events Log tab and look for an error on that order. Then check that the webhook is still active, as described in Make sure your WooCommerce webhook is active.Does Cometly convert WooCommerce orders placed in another currency?
Yes. When an order’s currency is different from the currency of your Cometly space, Cometly converts the order total to the space’s currency before it records the purchase.Will Cometly count the same WooCommerce order twice?
No. WooCommerce notifies Cometly each time an order is updated, and the plugin sends the WooCommerce order key as the Order ID with every purchase. Cometly ignores a repeat of the same event with the same Order ID. See how Order ID works.Next steps
- Send purchases to Meta with the Meta Conversion API
- Configure the Google Conversion API
- Install the Cometly pixel on pages outside WordPress
- Set up Add to Cart and Initiate Checkout events by hand
- Learn how webhook mapping, filters and activation work