

Before you start
- A MarketCall account with access to pay per call offers.
- A landing page where you can add custom scripts to the
<head>. - Access to Setup and Integrations in your Cometly space.
Step 1: Configure a campaign in MarketCall
-
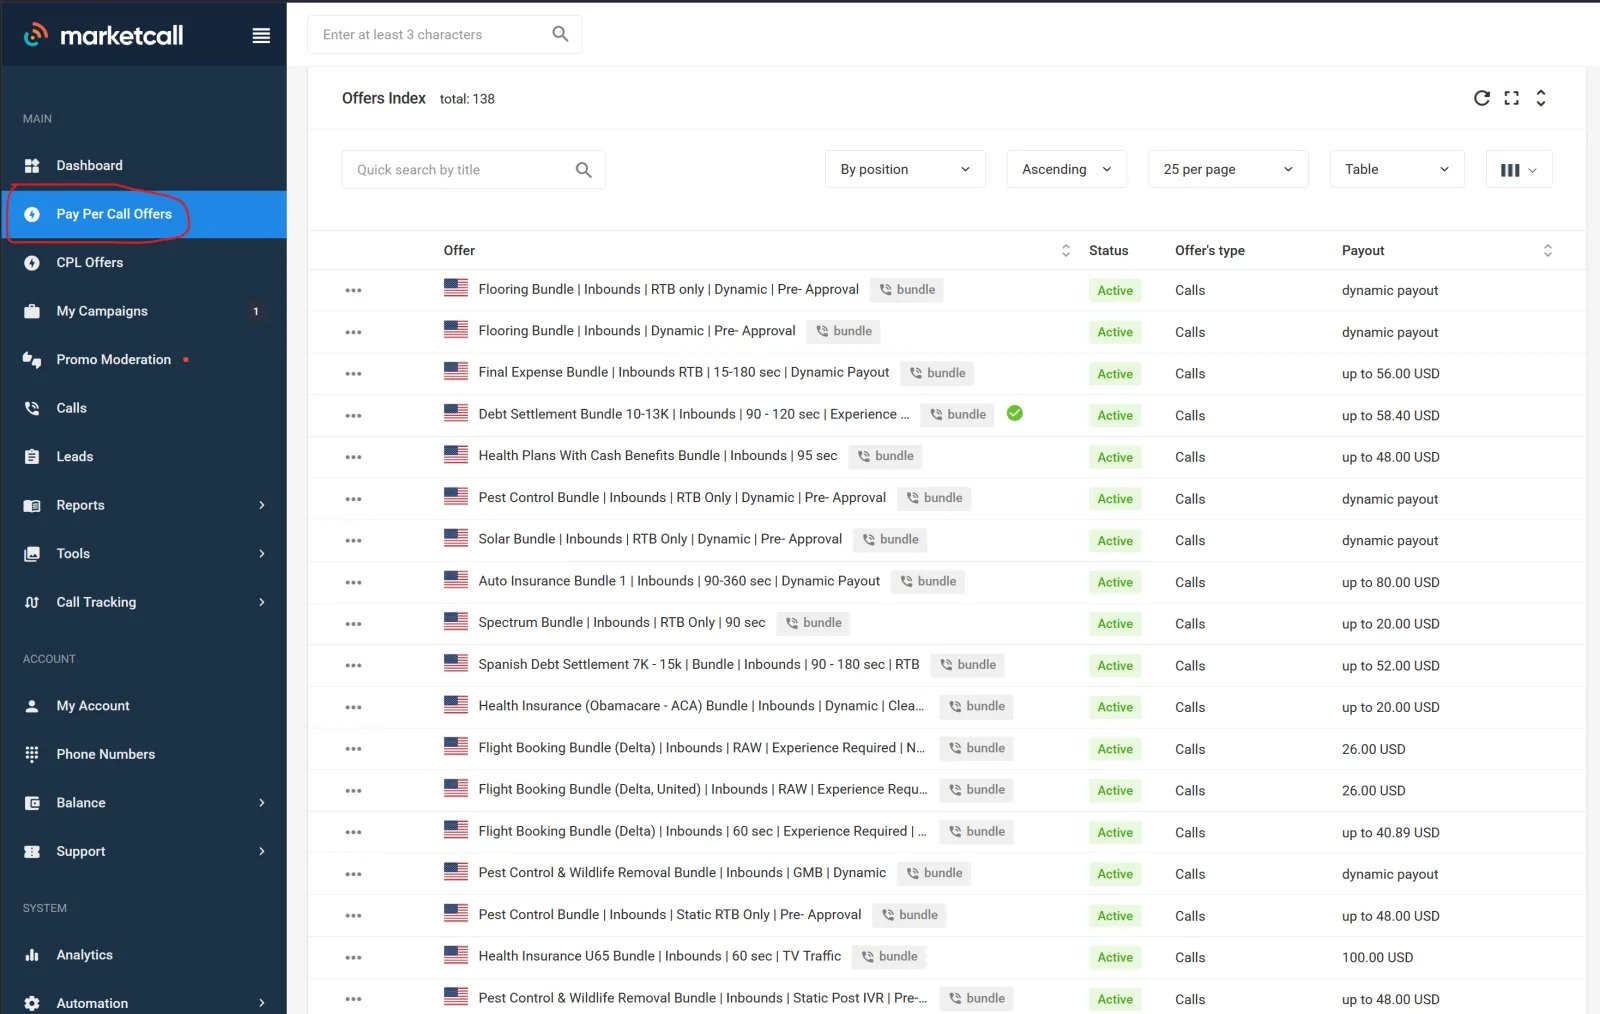
Log in to your MarketCall account and click Pay Per Call Offers.
-
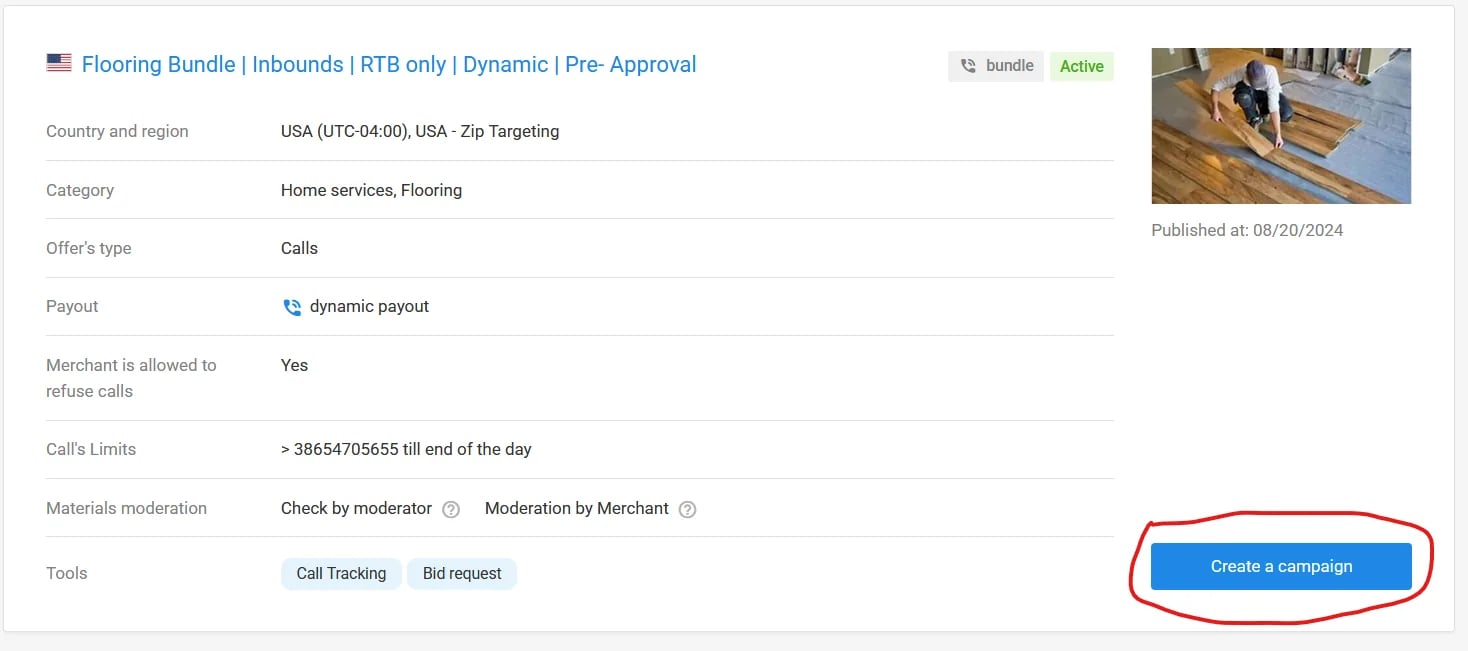
Click the offer you want to use. When the offer opens, click Create a campaign.
-
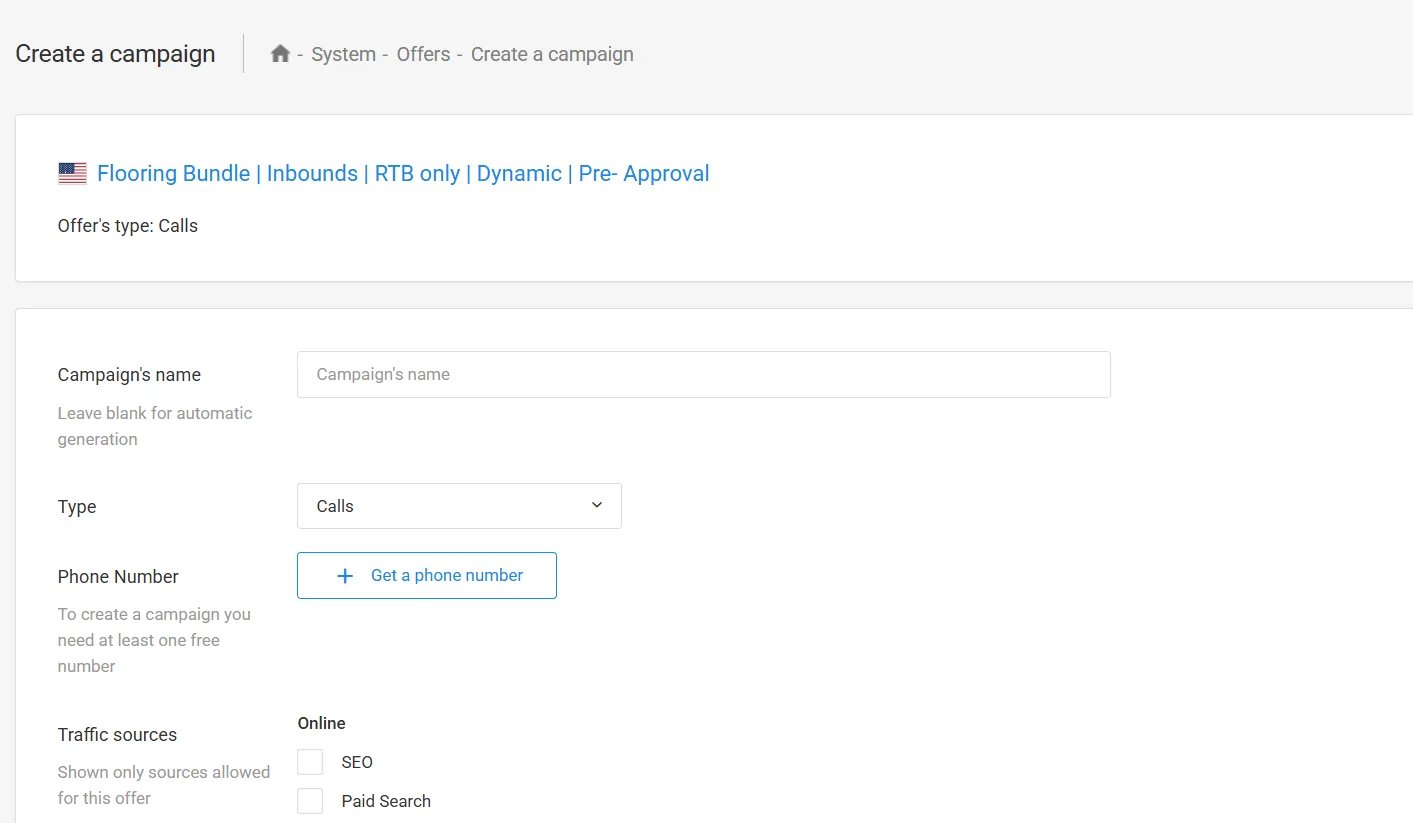
On the Create a campaign page:
- Enter the campaign’s name.
- Click Get a phone number.
- Select your traffic sources.
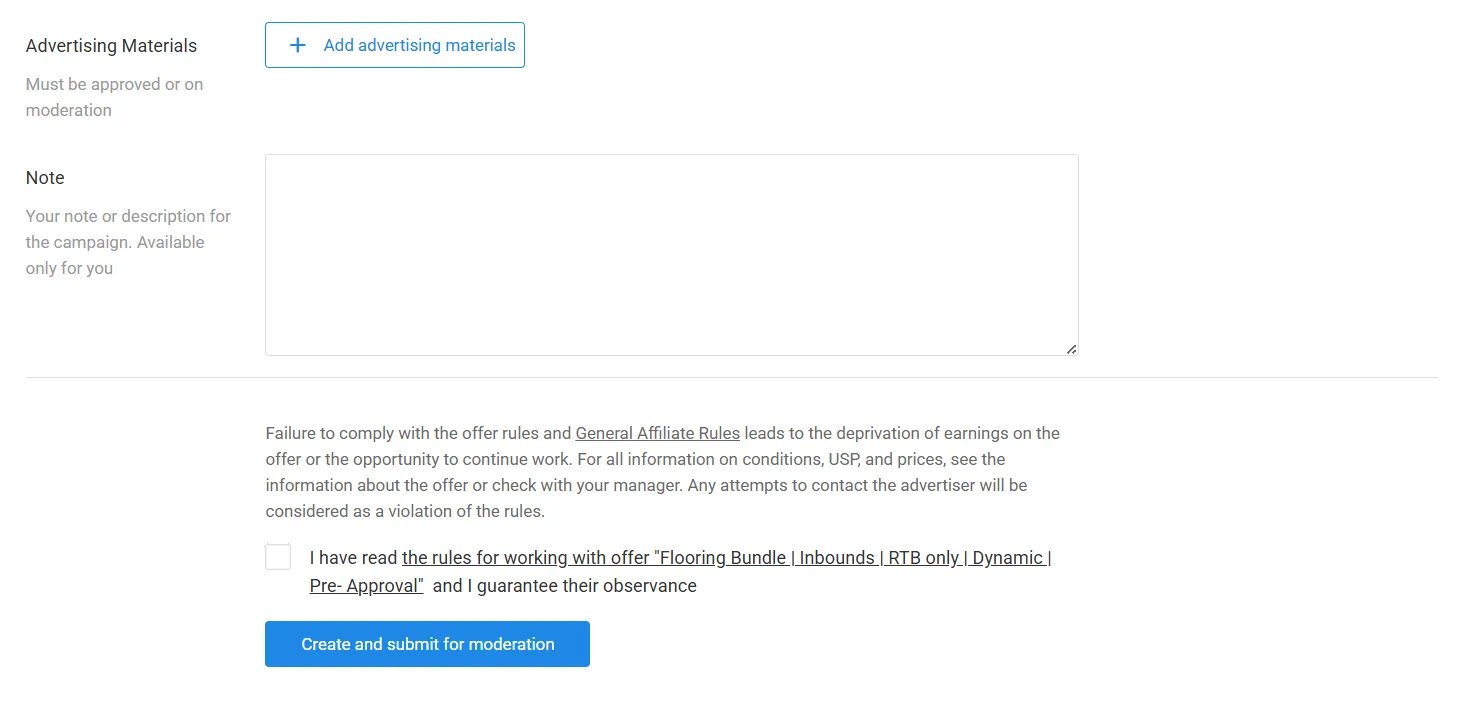
- Add advertising materials.
- Agree to the terms and conditions.
- Click Create and submit for moderation to send the campaign to MarketCall for approval.
-
In the left menu, click Call Tracking, then Sites.
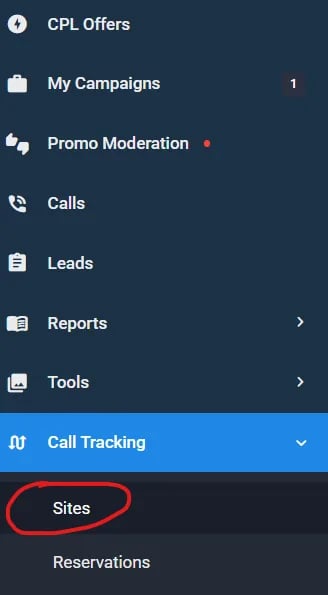
- On the Sites page, click Add a Site.
-
Fill in the Add a Site form:
- Enter your site or landing page URL.
- Enter the Max Tracking Numbers.
- Select the session duration.
- For Number Substitution, select DOM Selector.
- For Phone Number Format, use
(xxx) xxx-xxxx.
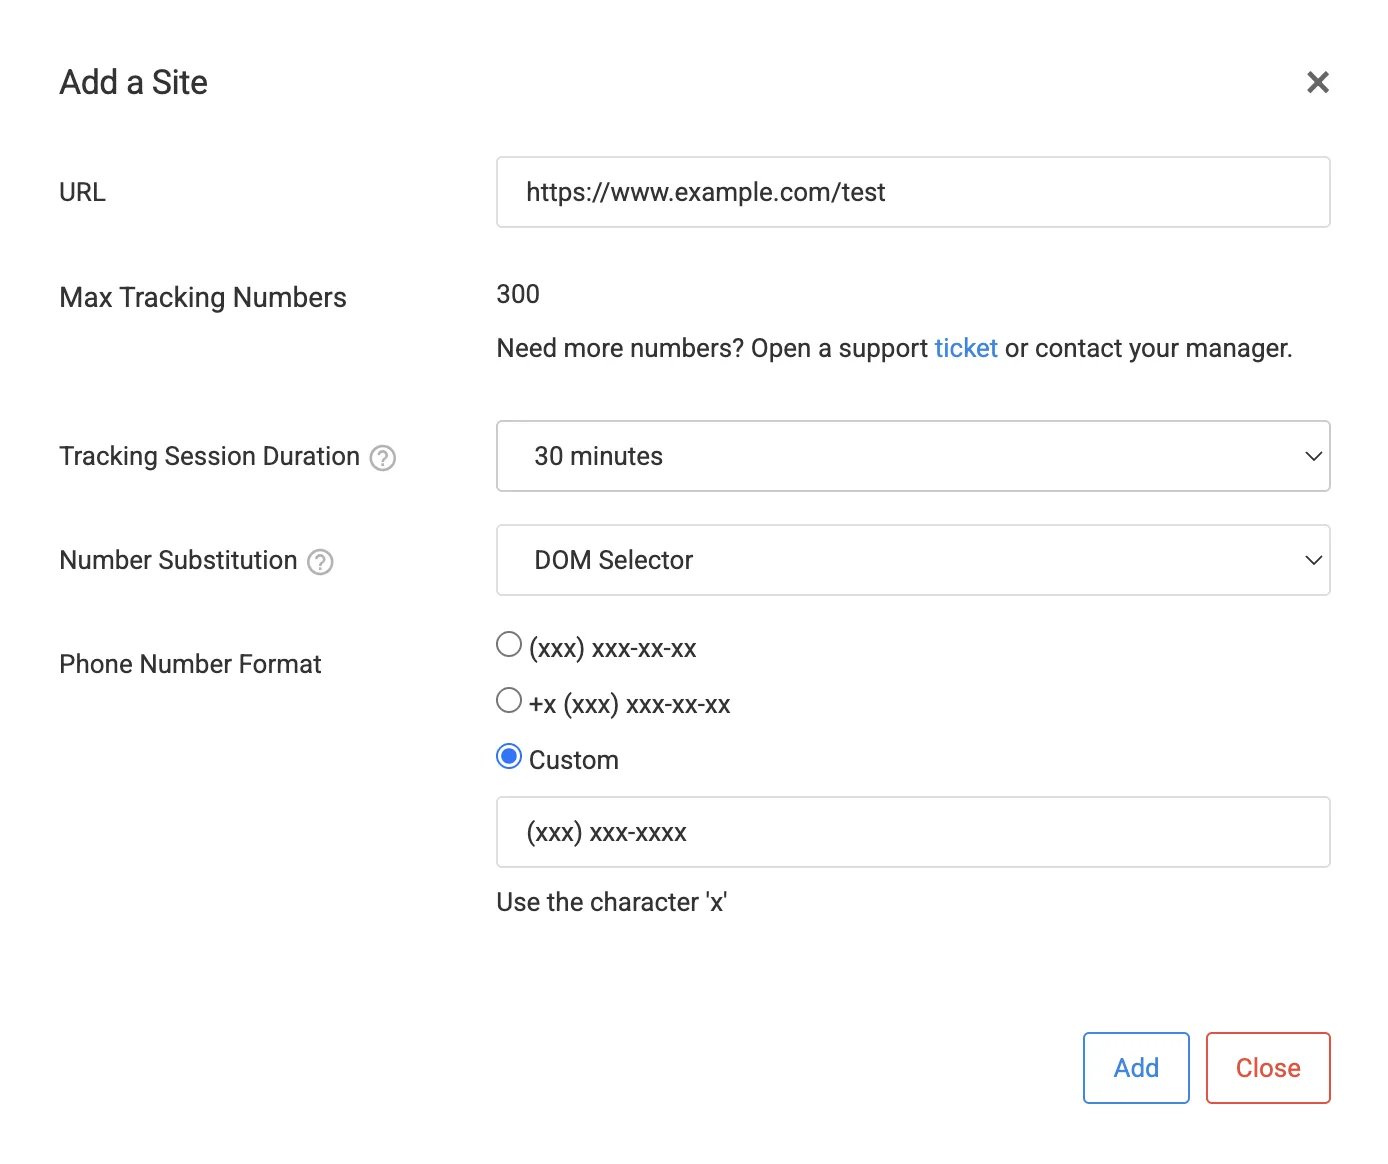
- After the site is added, click its code icon. (To get back to this list, click Call Tracking, then Sites.)
-
In the popup, select your campaign in the Campaign field. MarketCall generates the tracking script. Make sure the Phone Number Format is exactly
(xxx) xxx-xxxx.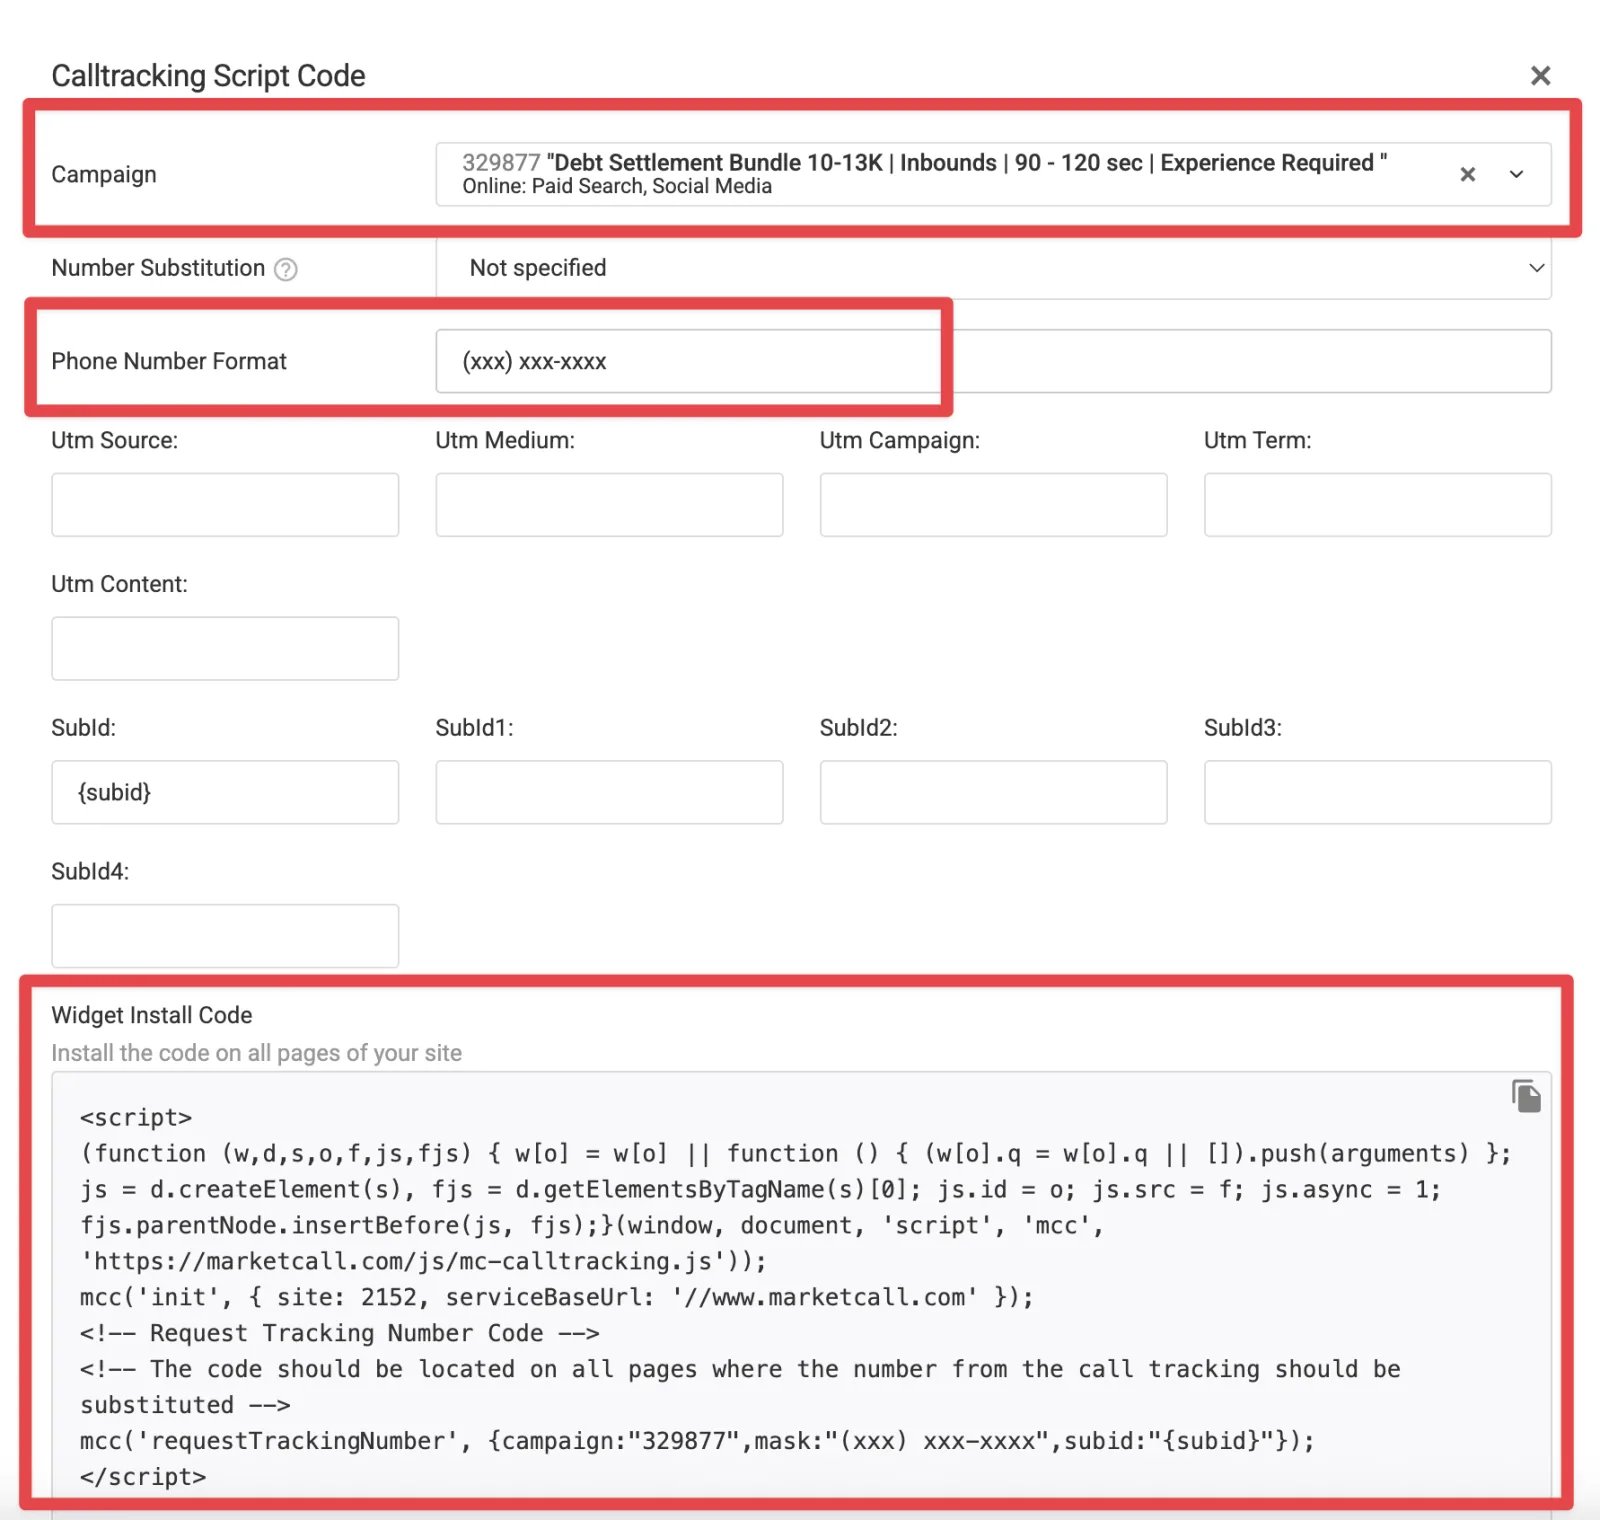
Build the script for your landing page
From the script MarketCall generated, take the site number and the campaign number and put them into the script below, replacing:REPLACE_WITH_SITE_NUMBERREPLACE_WITH_CAMPAIGN_NUMBER
cometToken() and passes the result to MarketCall as the subid (see Comet Token).
Here's an example of what the script should look like
Here's an example of what the script should look like
Do not add this script to your landing page. It is only an example.
Step 2: Add the scripts to your landing page
-
Once the script has your campaign number and site number, open your page builder and add the script to the
<head>of the page. Almost every page builder lets you add custom scripts to a landing page. Check your page builder’s documentation if you cannot find where to add them. -
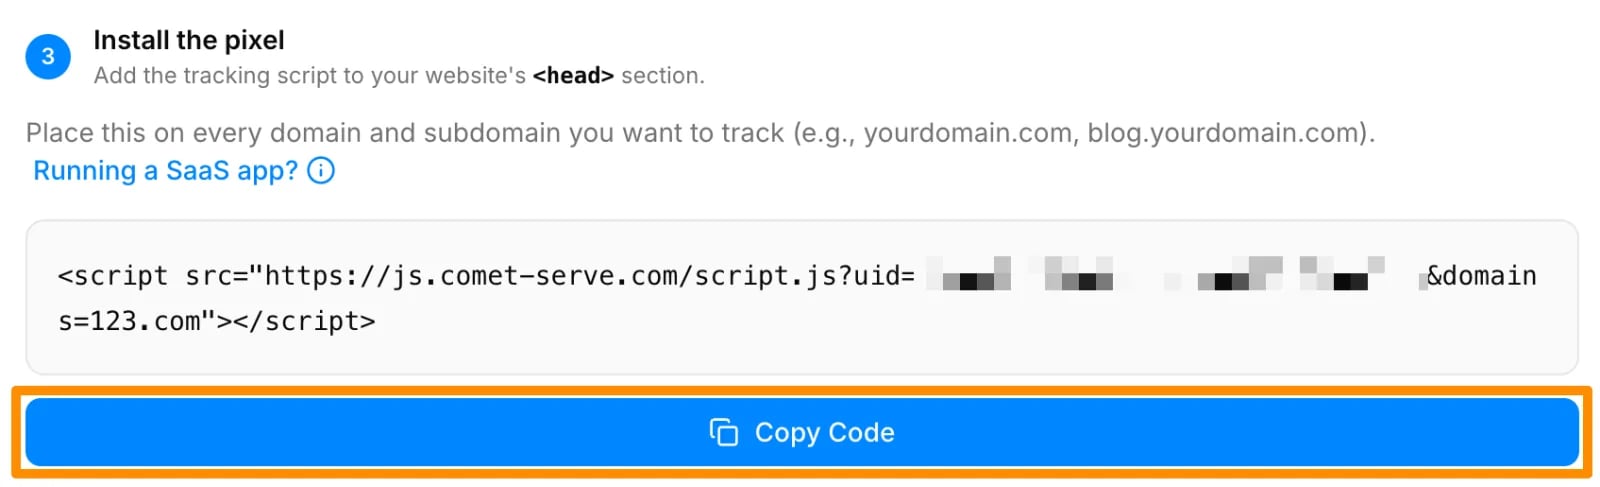
Now add a second script to the page: the Cometly pixel. In Cometly, click Setup in the sidebar and open the step Install the Cometly pixel. Under Install the pixel, click Copy Code. For the full walkthrough, see Install the pixel.
-
Paste the Cometly script above the MarketCall script you just added. The Cometly script should be at the very top of the
<head>code section.
Step 3: Configure your landing page button
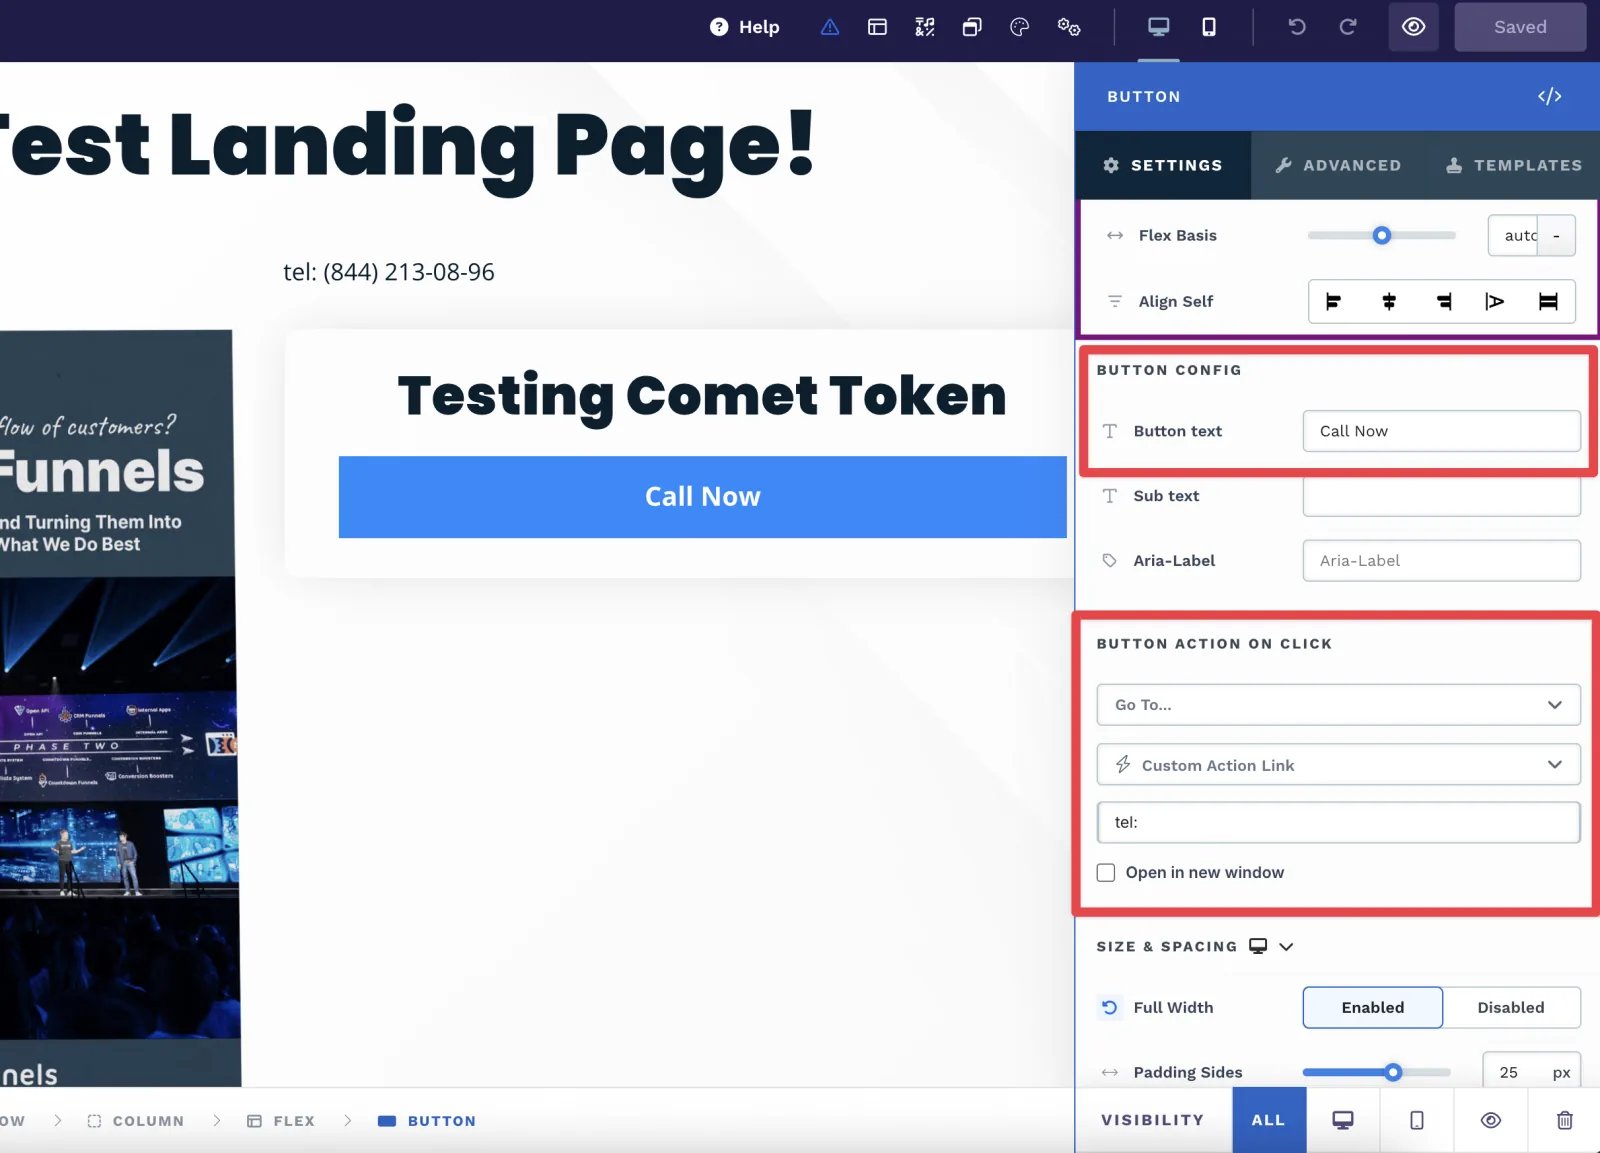
This example uses the ClickFunnels editor. Other page builders have equivalent settings.- In the BUTTON CONFIG section, add your Button text. Use any call to action you like.
- In the BUTTON ACTION ON CLICK section, set the link to
tel:
Fix a dynamic call number that looks unstyled on the button
In ClickFunnels and other website builders, the dynamic call number sometimes inherits default styles that do not match your button. To fix this, overwrite the styling with CSS.-
In ClickFunnels, go to Settings > Show Code > CSS (or the equivalent custom CSS section in your builder).
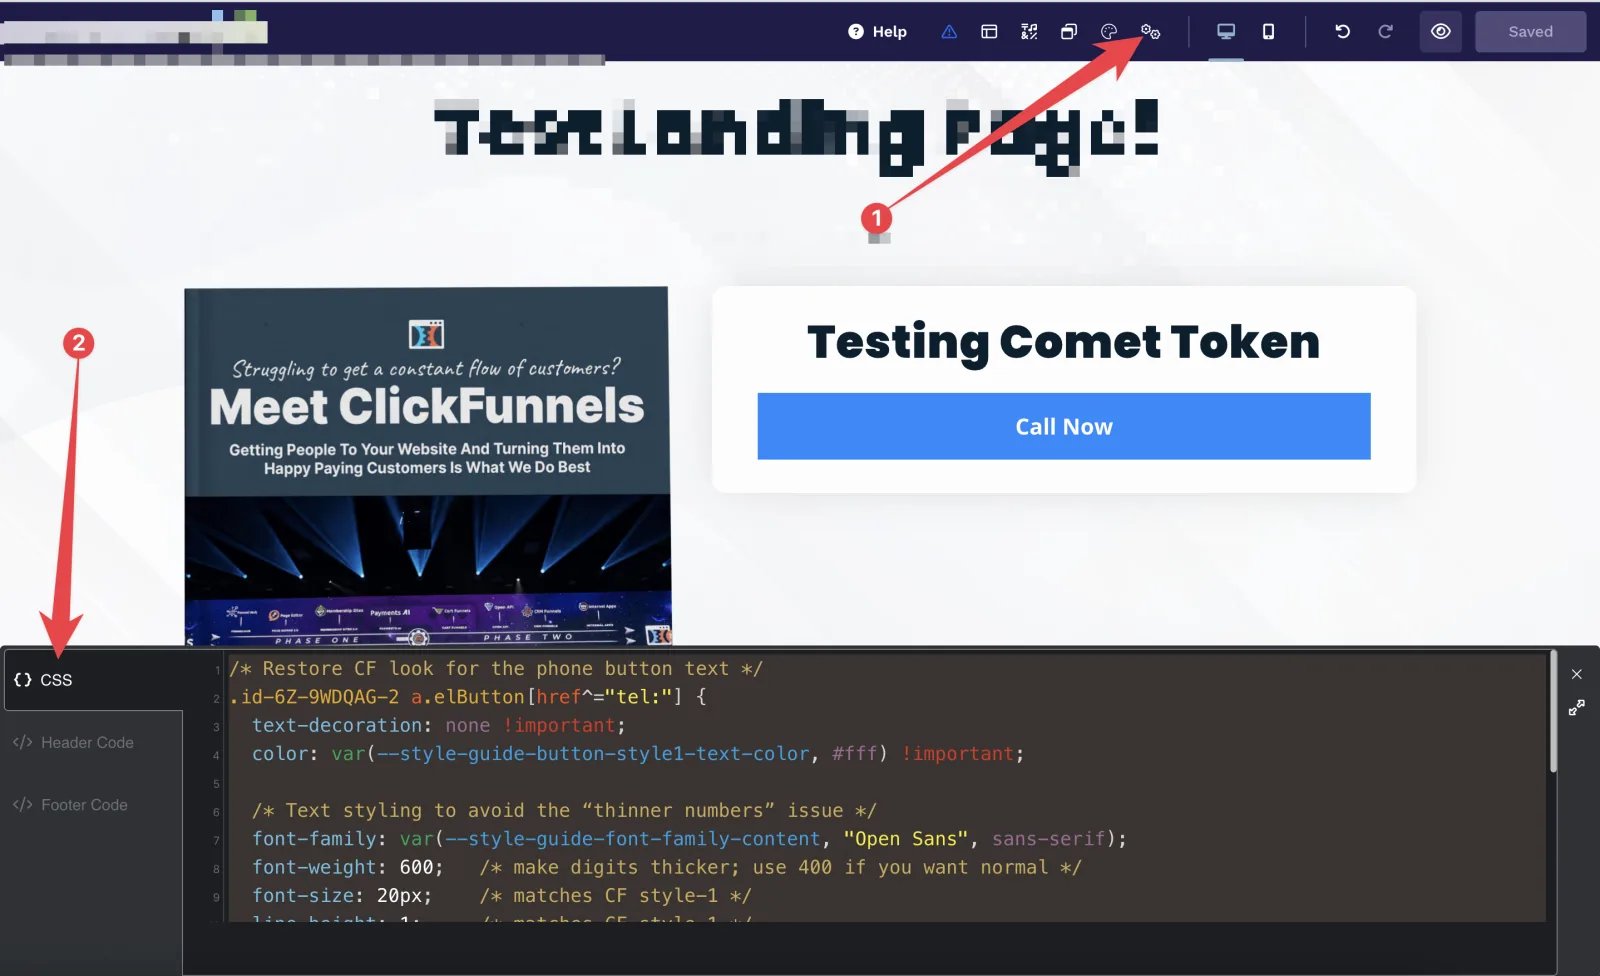
- Add custom CSS that targets your button and the dynamic call number text. You can change any of the button styling by editing the CSS below.
Step 4: Set up the postback URL that sends calls to Cometly
- In Cometly, click Integrations in the sidebar and open the MarketCall card (category Calls).
- On the MarketCall page, click Activate MarketCall.
- Under Copy the webhook URL, click Copy. This is the postback URL you will paste into MarketCall.
- Under Map MarketCall events to Cometly, choose which Cometly event a MarketCall call should create, then click Save. By default, Call is mapped to the Contact event. To map it to an event of your own, create a custom event first.
-
Go back to your MarketCall account. In the left menu, click Automation, then Postbacks.
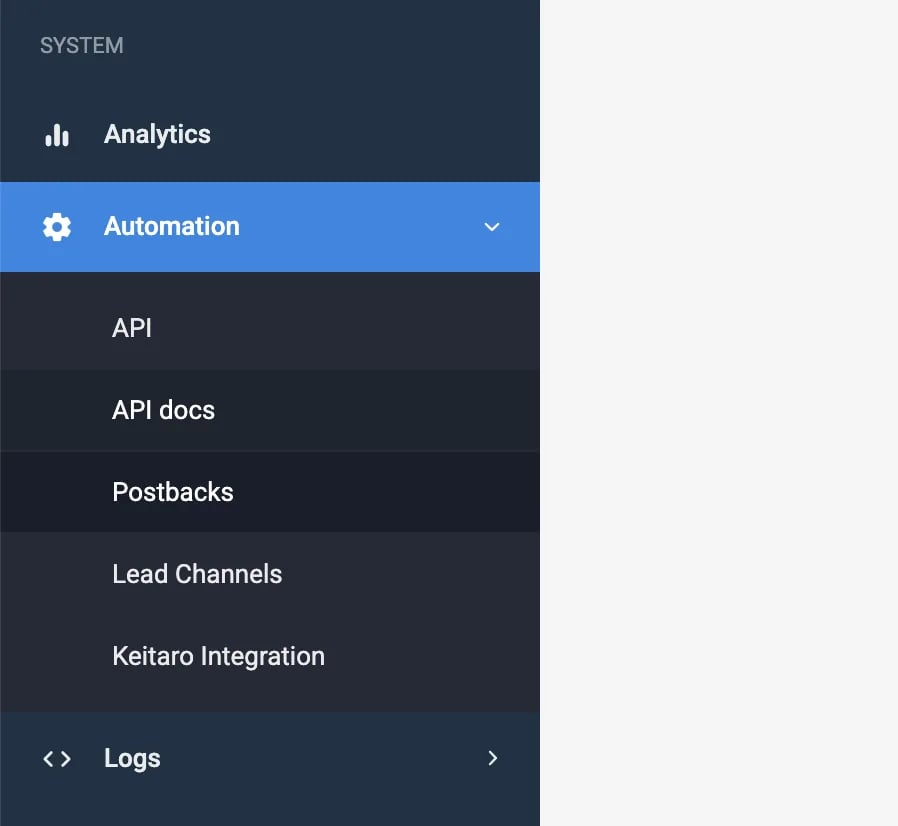
- On the Postbacks page, click Add a Postback.
-
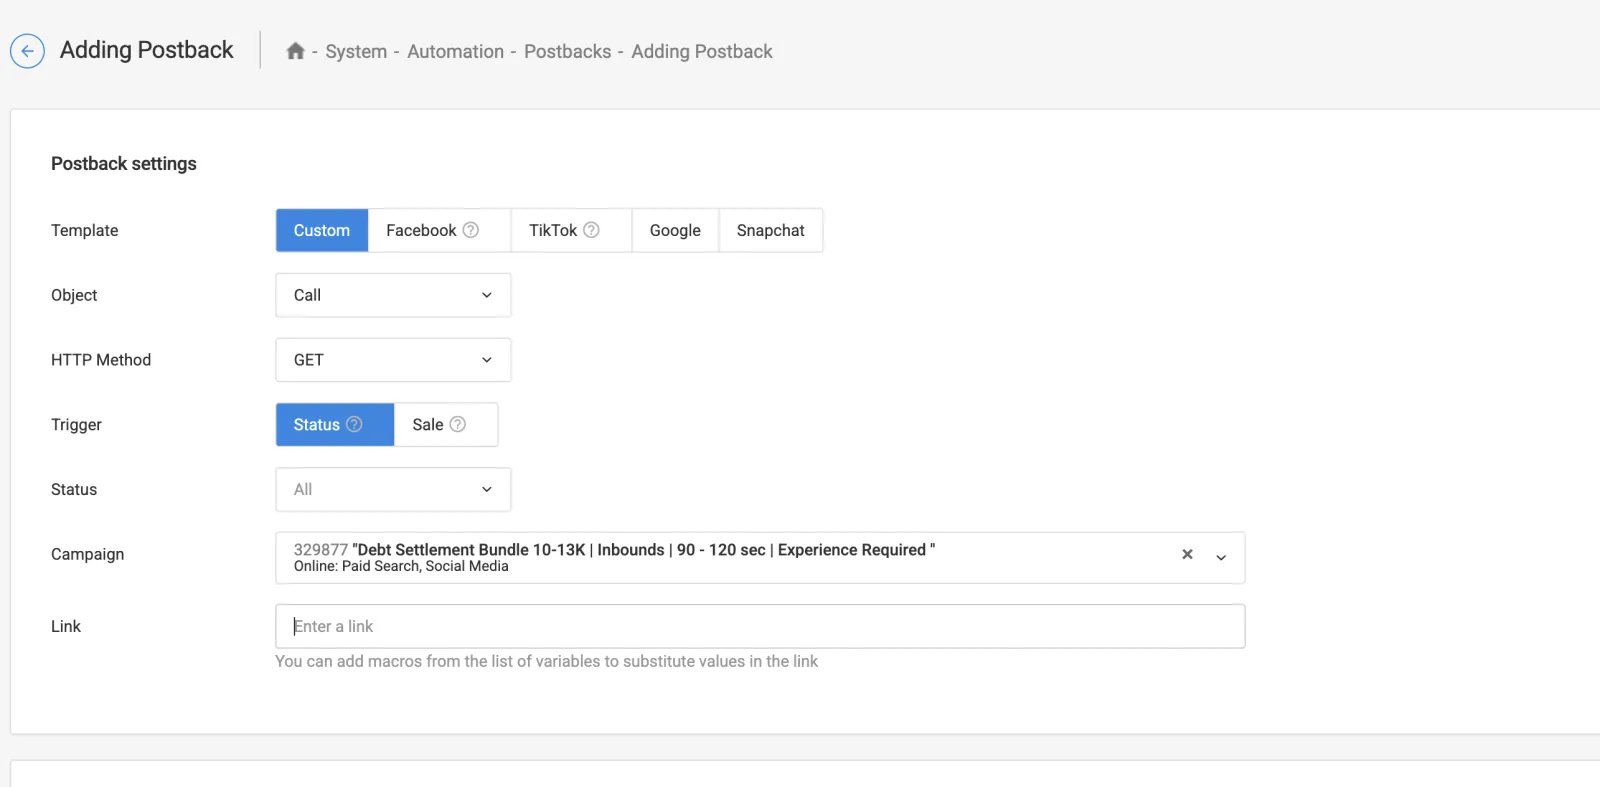
Configure the postback:
- Template: select Custom
- Object: select Call
- HTTP Method: select GET
- Trigger: select Status
- Status: select All
- Campaign: select the campaign you configured
- Link: paste the webhook URL you copied from Cometly
-
Scroll down the page and add these parameters:
They should look like this:
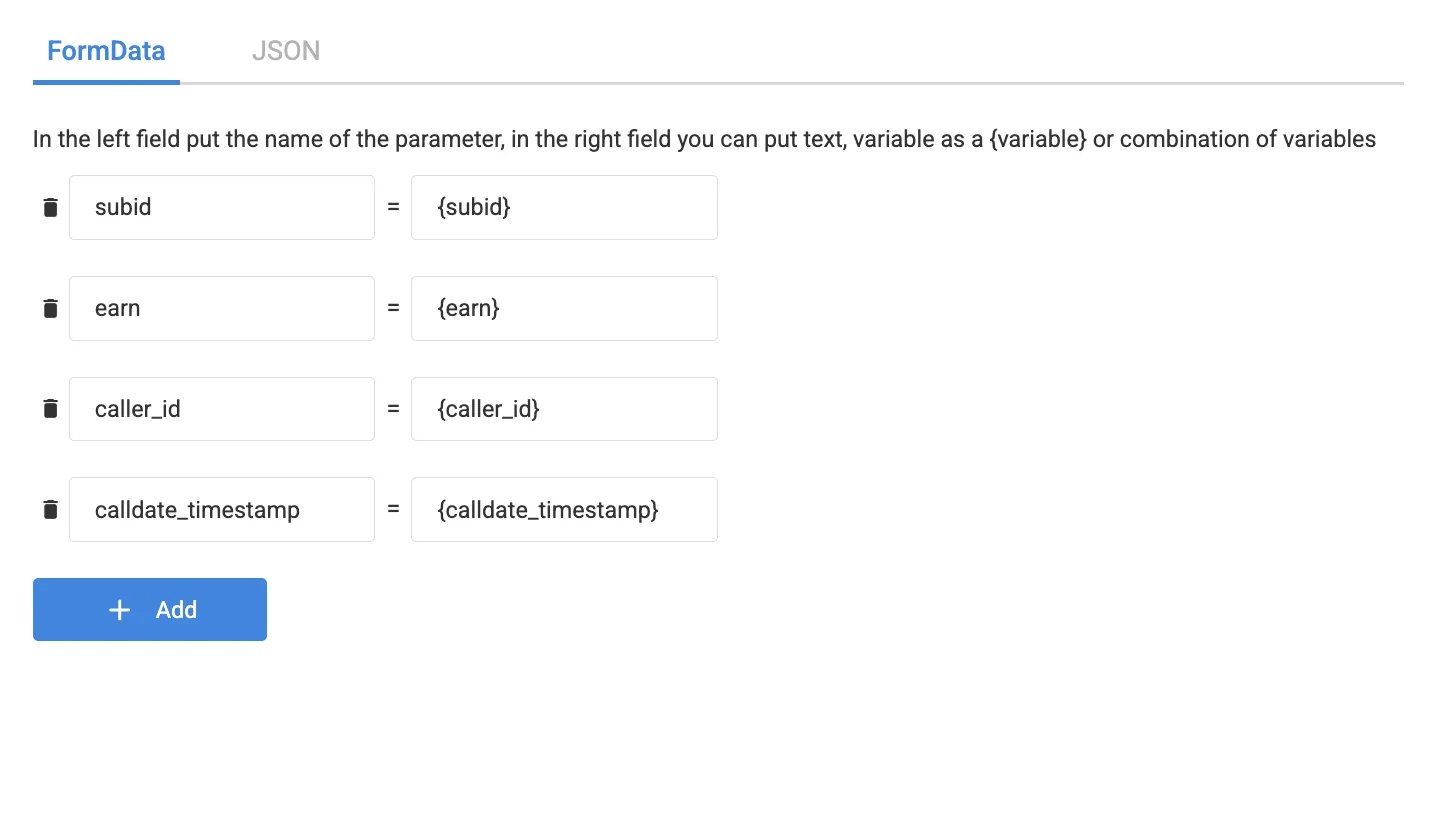
- Scroll to the bottom and click Create.
Step 5: Add URL parameters to your ads
Use the standard Cometly URL parameters on your ads. To copy them, click Setup in the Cometly sidebar, open the step Add URL parameters to your ads, choose your ad platform under Select integration and click Copy Parameters. For Meta Ads, these are the URL parameters to use: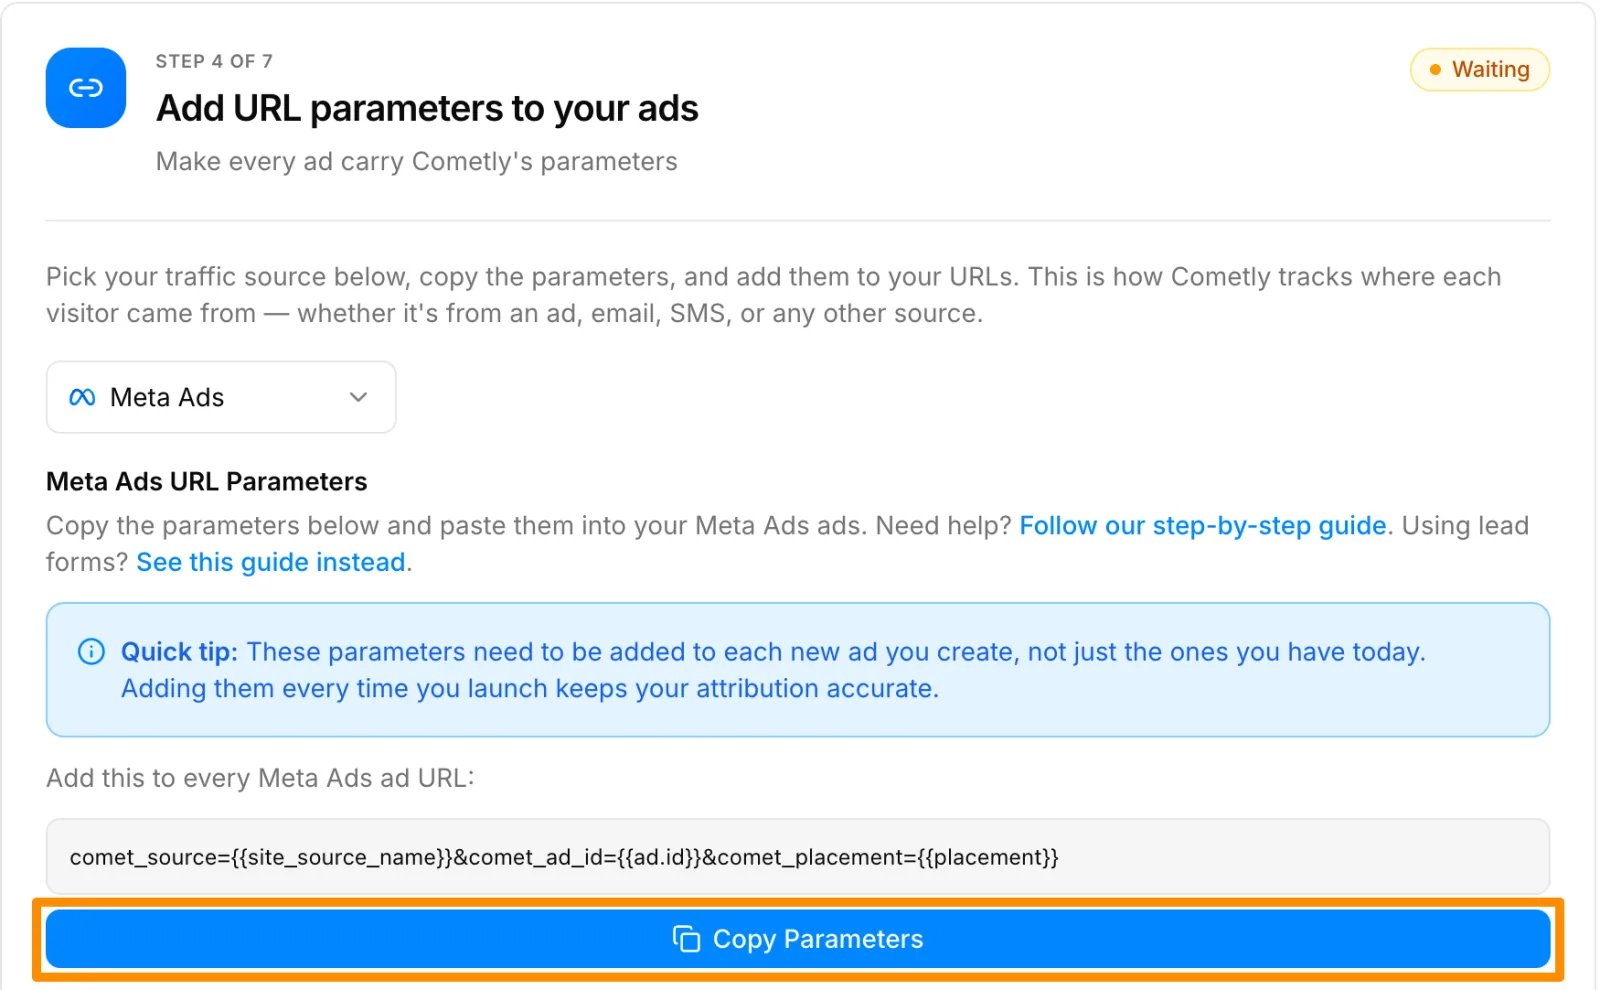
Check it worked
Visit your landing page and confirm the button shows a phone number, then call it. After MarketCall sends the postback, open Events Manager in Cometly and click the Events Log tab, with Source set to Server. The call appears in the log under the Cometly event you mapped it to.Frequently asked questions
Why are my MarketCall calls not showing up in Cometly?
Cometly only accepts postbacks while the MarketCall integration is activated, and only on the exact webhook URL shown on the MarketCall page in Cometly. Check that the postback Link in MarketCall is that URL, copied in full, and that the postback includes thesubid, earn, caller_id and calldate_timestamp parameters. Then open the Events Log tab in Events Manager to see whether the call arrived and what its Status is.
Why does the Cometly pixel have to sit above the MarketCall script?
The MarketCall script callscometToken(), a function the Cometly pixel provides. If the pixel has not loaded first, there is no token to pass to MarketCall as the subid, so Cometly cannot link the call to the visitor and the ad they clicked.
Does each Cometly space need its own MarketCall webhook URL?
Yes. The integration is activated per space (a space is one workspace in Cometly, usually one business or website), and each space gets its own webhook URL. Calls sent to a URL are recorded in the space that URL belongs to, so activate MarketCall and create a postback for every space that should receive calls.Next steps
- Understand how events work in Cometly
- Learn what the Comet Token is and how it links a call to a visit
- Send your call events back to the ad platforms
- Create a custom event for your calls
- Set up call tracking with the Cometly API instead